blog thumbnail for laser pricing tumblers

Laser Pricing 101: What to Charge for Engraving Tumblers

If you’ve ever charged $10 for a tumbler and thought, “That wasn’t worth my time,” you’re not alone.


Pricing is one of the hardest parts when you’re getting started with laser engraving. If you’re still dialing in your settings, it’s worth understanding how precision impacts your results—especially things like Scanning Offset.


Let’s make it simple.

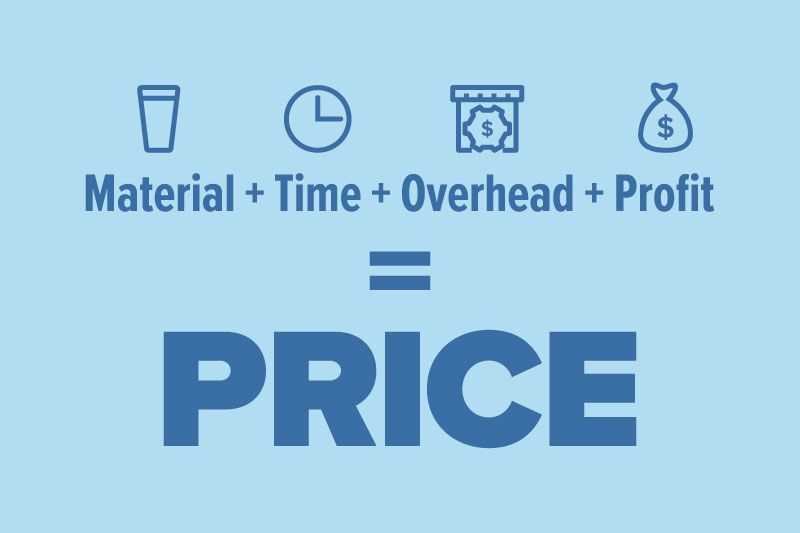
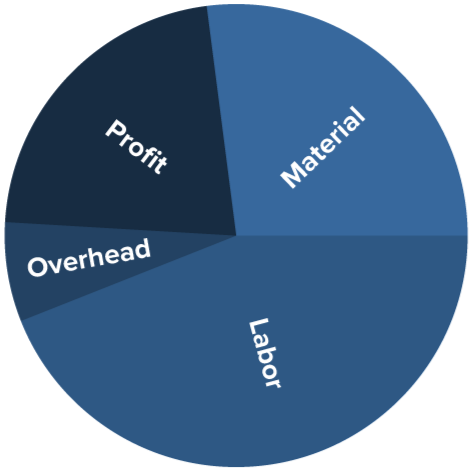
Start With a Simple Pricing Formula

Instead of guessing, use this:


Material + Time + Overhead + Profit = Your Price


Here’s what that actually means:


  • Material → What you paid for the tumbler
  • Time → How long it takes (setup + engraving + handling)
  • Overhead → Wear and tear, electricity, mistakes
  • Profit → What makes it worth doing


No spreadsheets needed—just a quick, honest breakdown.


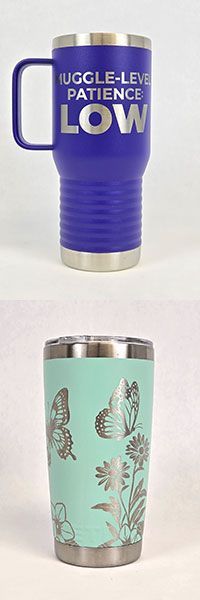
A Real Example (So You’re Not Guessing)

Let’s say:

  • Tumbler cost: $6
  • Total time: 10 minutes
  • Your goal: $60/hour

That means:

  • 10 minutes = $10 in labor

Now add:

  • Overhead: $2
  • Profit cushion: $2–$5

Final price: $18–$25 per tumbler


That’s a healthy range—and way better than guessing $10 and hoping it works.

What Most People Charge (Real-World Ranges)


Here’s what you’ll typically see:


  • Basic name or logo: $15–$25
  • Custom designs: $20–$35
  • Bulk orders: $10–$18 each


If you’re in that range, you’re in the game.


If you’re way below it… you’re probably undercharging.

Time Matters More Than You Think


A tumbler might only engrave for a few minutes—but that’s not the full story.


You still have:


  • Setup and alignment
  • File prep
  • Loading/unloading
  • Cleaning and finishing


That “quick job” adds up fast.


If you don’t account for that time, your pricing falls apart.


A lot of wasted time actually comes from poor setup or inconsistent results. Taking the time to properly test your materials upfront can save you hours later—something we break down in our material testing guide.

Not All Tumblers Take the Same Time

A simple name on a tumbler is quick.


A full wrap? That’s a different story.


Basic Engrave (Name or Small Logo)

  • Setup: 2–3 minutes
  • Engraving: 2–4 minutes
  • Total time: ~5–8 minutes

Full Wrap Engrave

  • Setup and alignment: 5–10 minutes
  • Engraving (rotation + full coverage): 15–30 minutes
  • Total time: ~20–40 minutes

That’s easily 3–5x more time.

What That Means for Pricing


Let’s use that same $60/hour goal:


  • Basic tumbler (10 minutes): ~$10 labor
  • Full wrap (30 minutes): ~$30 labor


Now add material and overhead:


  • Basic tumbler: $18–$25
  • Full wrap: $35–$60+


If you charge the same for both, you’re paying yourself less for harder work.

The Trap: Competing on Price


You’ll see people selling engraved tumblers for cheap online.


Here’s the truth:


They’re either:


  • Undervaluing their time
  • Running high volume
  • Or not staying profitable


Trying to be the cheapest is a race you don’t want to win.


Instead, focus on:


  • Clean, consistent engraving
  • Good design
  • Clear photos
  • Reliable turnaround


People will pay more when it looks worth it.

If Your Tumblers Aren’t Selling


Before lowering your price, check this:


  • Does the design actually stand out?
  • Are your photos clean and well-lit?
  • Are you selling to the right audience?
  • Does it look like a $25 product?


You can charge $30 all day… if it feels like a $30 product.

Why Consistency Changes Everything


Pricing gets easier when your process is consistent.


When your machine is dialed in:


  • You’re not redoing work
  • You’re not wasting blanks
  • You’re not second-guessing settings


That means your time is predictable—and your pricing can be too.

A Simple Way to Dial in Your Pricing Today


Don’t overthink it. Try this:


  1. Engrave one tumbler from start to finish
  2. Time the entire process
  3. Calculate your price using the formula
  4. Test it at that price
  5. Adjust based on demand


That’s it.


No guessing. No stress.

Final Thoughts


You don’t need the perfect price—you need a profitable one.


Start with a solid baseline, stay consistent, and improve as you go.


Because at the end of the day, this isn’t just about engraving tumblers…


It’s about building something that actually pays you back.

Quick Tip Before You Go


If you feel like you’re working too hard for too little, you probably are.


Raise your price, improve your process, and give it a real test.


You might be surprised what people are willing to pay.

Light blue title graphic with Rabbit Laser USA watermark background.
By Rod Boehm April 13, 2026
New to laser engraving or cutting? Avoid common mistakes that cause poor results, wasted material, and frustration. Learn what to fix fast.
CO2 laser engraver gantry system engraving at high speed illustrating motion control and engraving p
By Rod Boehm March 4, 2026
High-speed laser engraving demands motion control. Learn how overscan, acceleration, and momentum impact precision and usable workspace.
CO2 laser air assist settings comparison showing laser head cutting acrylic and low vs high air assist results on plywood
By Rod Boehm February 17, 2026
Dial In Your Air Assist: Settings That Make a Difference Air Assist Isn’t Just an Add-On If you’ve ever smelled smoke during a job or noticed charred edges on your laser-cut pieces, chances are your air assist wasn’t doing its job—or it wasn’t set right for your application. While it might seem like a minor detail, air assist plays a critical role in the performance and lifespan of your CO2 laser machine. In this post, we’ll break down the difference between low flow and high flow air assist, when to use each, and how to get the best results from your setup.
By Rod Boehm February 6, 2026
Laser beam alignment guide for flying optics laser machines. Step-by-step maintenance tutorial to restore accuracy, cutting power, and engraving performance.
CO2 laser lens held with gloves showing correct orientation, blog cover upside down lenses
By Rod Boehm January 15, 2026
Blurry engraving or weak cuts? Learn the correct CO2 laser lens orientation and how to fix one of the most common laser setup mistakes.
Graphic with “STOP RE-TESTING” text, yellow arrow pointing to the LightBurn Material Library window,
By Rod Boehm December 30, 2025
Stop re-testing. Save proven engraving and cutting settings in LightBurn’s Material Library and apply them fast on future projects.
CO2 laser machine engraving a wooden project card on a honeycomb bed with “Beginner’s Guide to CO2 L
By Rod Boehm December 17, 2025
New to CO2 laser engraving? Learn how to choose bed size, wattage, safety features, and support so your first industrial laser is ready to make money.
Blog cover
By Rod Boehm November 25, 2025
Learn which fabrics are safe to laser cut, which should never be used, and how to get clean results without fraying or burning.
Red and beige Rabbit Laser USA SD-90-1390 with text highlighting Class 1 laser safety
By Rod Boehm November 3, 2025
Learn what Class 1 means for enclosed CO2 lasers, how interlocks keep users safe, and the safety checklist we train during install—plus lifetime support.
Finished HazardHive Analytics name tag engraved with variable text for Col. Maxwell Sporeman.
By Rod Boehm September 25, 2025
A beginner’s guide to LightBurn Variable Text—personalize projects, import CSV files, and batch produce custom tags in minutes.
Rabbit Laser USA graphic: icons for delivery, setup, calibration, training, and first cut.
By Rod Boehm August 29, 2025
Rabbit Laser USA delivers, installs, calibrates, and trains on-site—so you’re production-ready from day one. No curbside drops, ever.
Graphic titled
By Rod Boehm August 18, 2025
Discover engaging classroom laser projects that teach STEM, arts, and real-world skills. See how one tool sparks creativity, fundraising, and career readiness.
More Posts