First-Time Laser Owner? Avoid These Costly Mistakes
You finally get your laser set up.
Load your first project… hit start…
…and something’s off.
It didn’t cut through.
Edges look burned.
The engraving looks weak—or just plain wrong.
Here’s the truth:
It’s usually not the machine.
It’s small setup details—things we see all the time when helping new users get started.
Let’s fix those now so you don’t waste time, material, or patience.
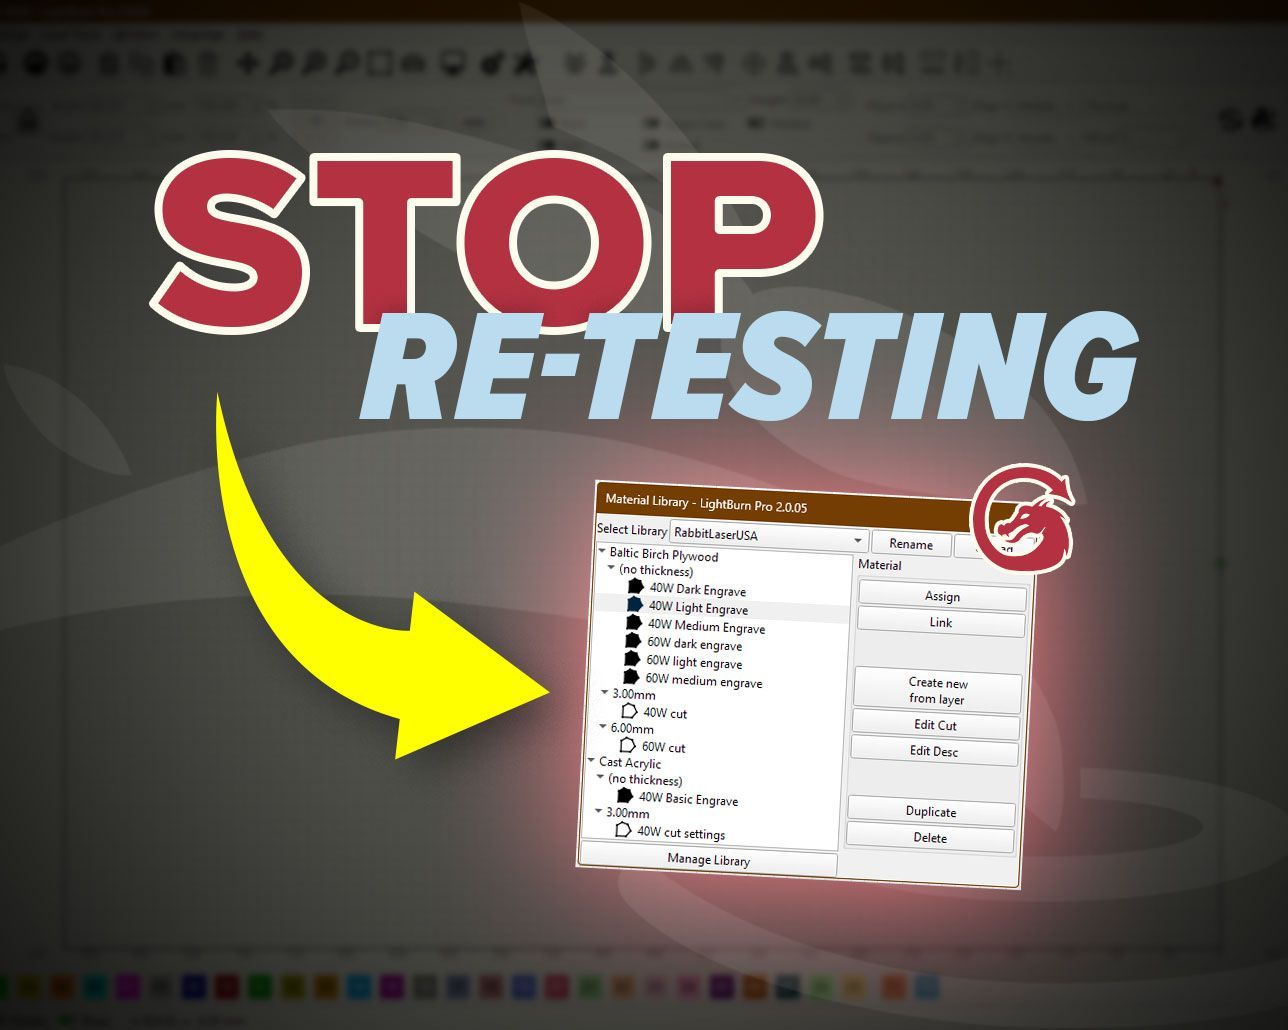
⚠️ Mistake #1: Skipping Test Cuts
You load a full sheet and go straight into your project…
Then it fails.
What’s really happening:
Even materials that look identical can react completely differently.
What to do instead:
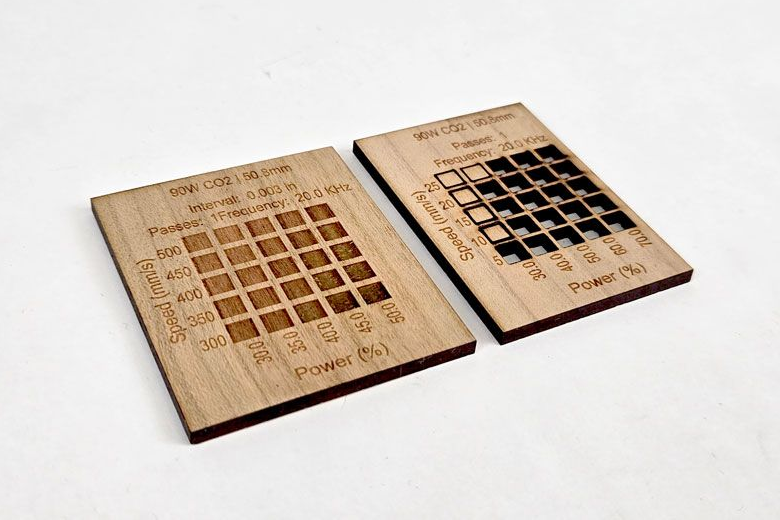
- Run a small test grid first
- Dial in your settings before committing
- Save those settings for later
That quick test saves you from ruining an entire sheet.
👉 Want a faster way to dial this in? Check out our material testing guide.
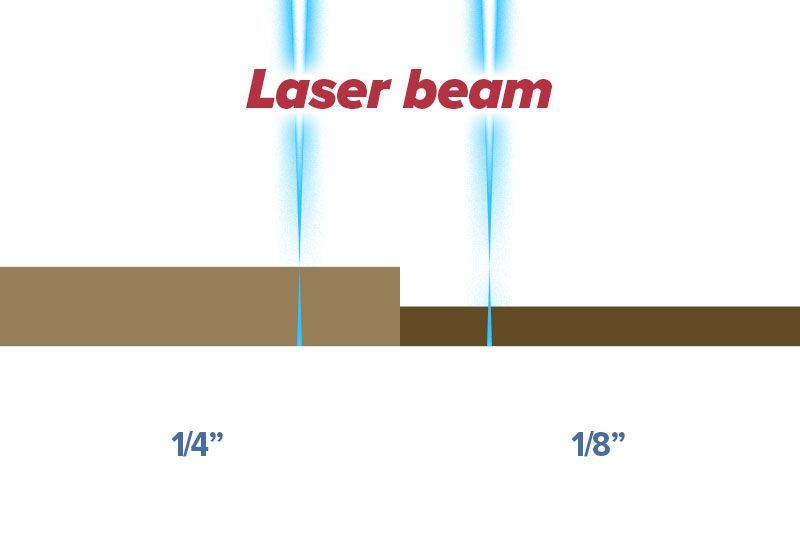
⚠️ Mistake #2: Ignoring Focus
If your engraving looks soft or your cuts won’t go through—this is usually why.
What’s really happening:
Your beam isn’t concentrated where it should be.
A common one we see?
Switching from 1/4" material to 1/8"… and forgetting to refocus.
That small height difference is enough to throw everything off.
What to do instead:
- Check focus before every job
- Re-check when switching materials
- Don’t assume it’s still set correctly
One small adjustment can completely change your results.
⚠️ Mistake #3: Chasing Speed Instead of Results
Everyone wants faster production. That makes sense.
But speed alone will wreck your results.
What’s really happening:
- Too fast → weak engraving, missed cuts
- Too slow → burn marks and charring
What to do instead:
- Balance speed and power together
- Aim for clean, not fast
- Adjust based on the material
If your engraving still looks off, it might not just be speed—motion behavior plays a role too.
👉 We break that down further in our scanning offset guide.

⚠️ Mistake #4: Treating Air Assist Like It’s Optional
This one causes more problems than people expect.
What happens:
- Burn marks and soot buildup
- Rough, inconsistent edges
- Increased risk of flare-ups
Reality:
Air assist is not optional. It should be running every time—no exceptions.
What to do instead:
- Always run air assist when cutting or engraving
- Make sure airflow is consistent and hitting the material
- Adjust pressure slightly depending on the material
👉 Want to fine-tune it? Check out our air assist settings guide.
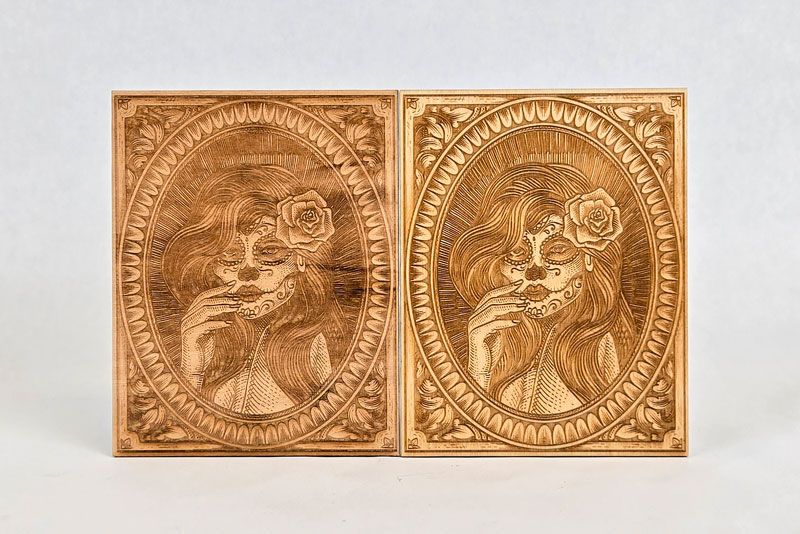
⚠️ Mistake #5: Expecting Perfect Results Every Time
Same file. Same settings. Different result.
Frustrating.
What’s really happening:
Materials—especially wood—aren’t perfectly consistent.
What to do instead:
- Expect some variation
- Adjust settings slightly when needed
- Don’t assume something is wrong
Sometimes it’s not the machine—it’s just the material.
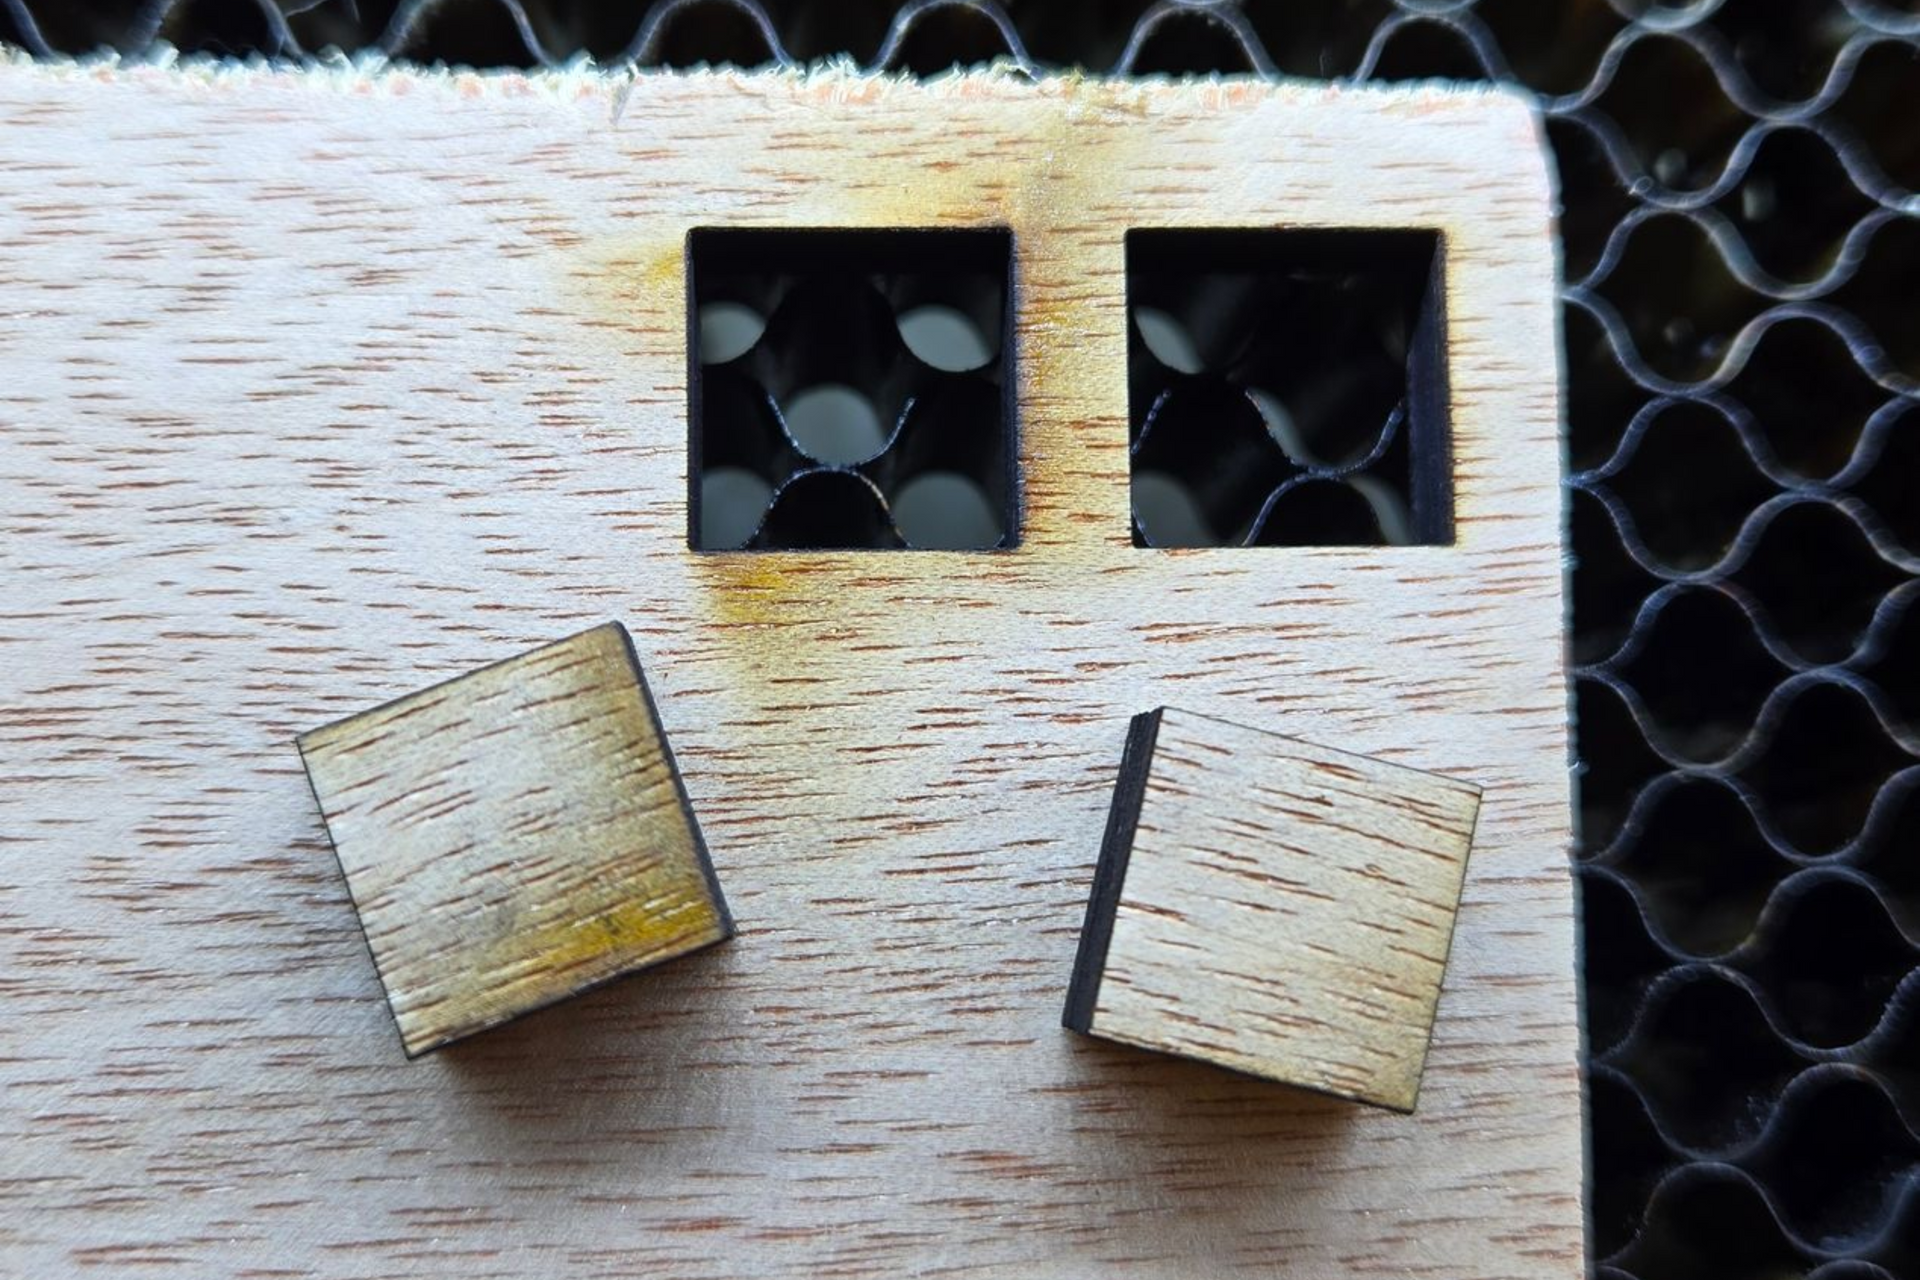
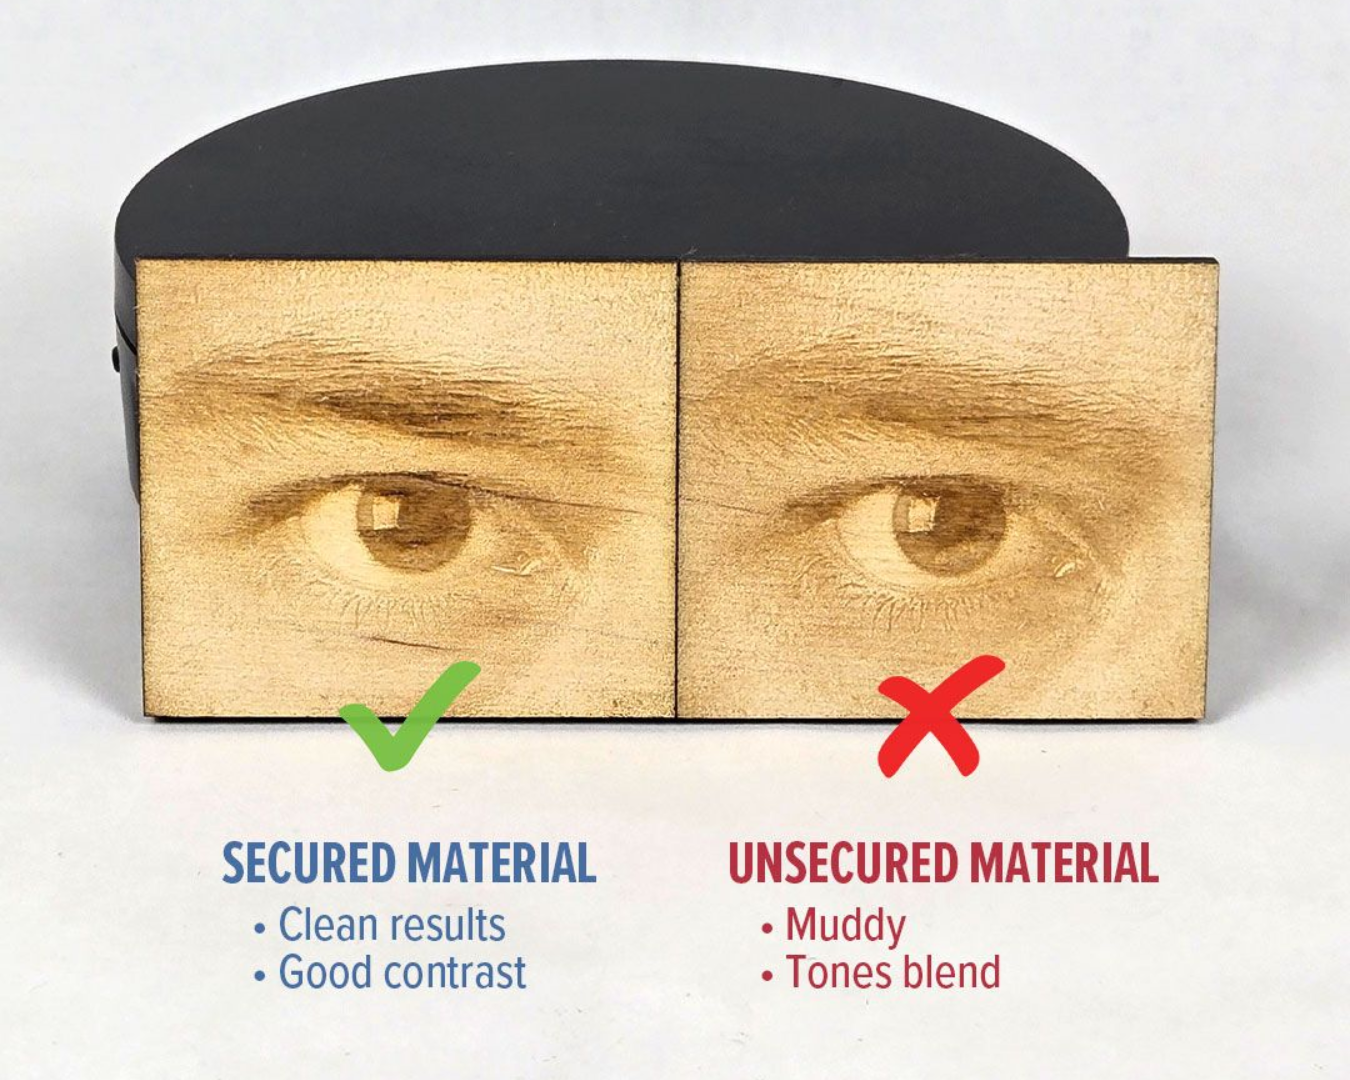
⚠️ Mistake #6: Not Securing Your Material Properly
This one sneaks up on people.
What happens:
- Cuts don’t go all the way through in certain spots
- Engraving looks inconsistent
- Results vary across the same piece
What’s really happening:
Your material isn’t flat.
Even slight warping changes your focus across the surface.
What to do instead:
- Use magnets, hold-downs, or weights
- Make sure the material is flat before starting
- Don’t assume the sheet is level
Flat material = consistent results.
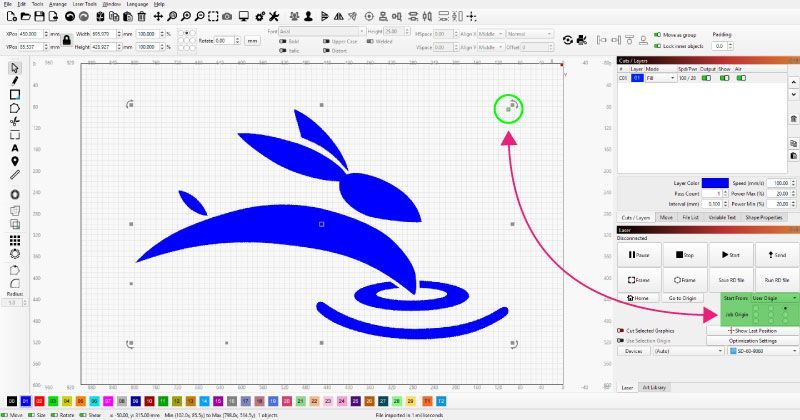
⚠️ Mistake #7: Not Understanding Your Origin
You line everything up… hit start…
…and the laser goes somewhere you didn’t expect.
What’s really happening:
Your machine’s origin controls where your job starts.
If you don’t understand it, your design won’t land where you planned.
What to do instead:
- Know your machine homes to (Rabbit's rear-right)
- Understand your “Start From” settings
- Frame your job before running
This alone can save a perfectly good project.
⚠️ Mistake #8: Assuming Something’s Broken
This happens more than you’d think.
What happens:
- Laser won’t fire
- Machine won’t run
- Immediate panic
What’s really happening (most of the time):
- A safety switch isn’t engaged
- The chiller isn’t on
- The machine just needs a reset
What to do instead:
Before assuming the worst, check:
- Is the chiller running?
- Are all doors/lids closed?
- Try hitting reset
A 30-second check can save you a lot of frustration.

⚠️ Mistake #9: Replacing Parts Too Soon
Performance drops… so you assume something needs replaced.
Not so fast.
What’s really happening:
Most of the time, it’s:
- Dirty optics
- Slight misalignment
—not failed parts.
What to do instead:
- Clean your lens and mirrors
- Check alignment
- Replace parts only when necessary
We’ve seen “major issues” fixed with a simple cleaning.

⚠️ Mistake #10: Trying to Figure Everything Out Alone
You hit a problem… start guessing… change a few things…
Now you’re not sure what caused what.
What’s really happening:
Most issues are simple—but only if you’ve seen them before.
What to do instead:
- Don’t guess your way through problems
- Reach out when something feels off
- Get answers before changing multiple variables
That’s why support matters.
A quick answer can save hours.

Wrap-Up
Nobody gets perfect results on day one.
But here’s the difference:
Some people burn through time and material trying to figure it out…
Others learn a few key things early and move forward fast.
Now you’re in that second group.
Before Your Next Project
Run through this quick checklist:
- Run a test grid
- Check your focus
- Balance speed and power
- Make sure air assist is on
- Keep your material flat and secure
Do that—and your results will immediately improve.
Real Talk
We’ve seen people:
- Think their machine was broken
- Replace parts they didn’t need
- Waste material chasing the wrong problem
And it usually came down to something simple.
Dial in the fundamentals early, and everything else gets easier. 🐰