
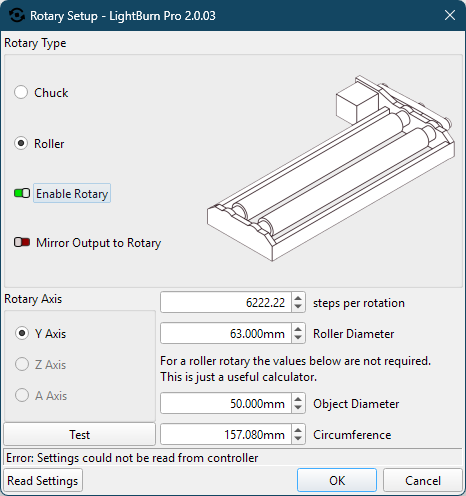
- Steps per rotation: 6222.22 (this is the standard setting for our rotary attachments).
- Roller rotary users: Enter the roller wheel diameter of 63 mm in LightBurn. You do not need to measure the object itself.
- Chuck rotary users: Enter the object diameter at the engraving surface for accurate scaling.
Optimize Laser Rotary Setup with LightBurn
A rotary attachment lets you engrave on round objects—like tumblers, mugs, or rolling pins—with the same precision you expect from flat materials. LightBurn makes setup straightforward once you know where to look. This guide walks through how to install, configure, and calibrate your rotary in LightBurn, plus a few tips to avoid common mistakes.
Rotary Types: Roller vs. Chuck
Not all rotaries work the same way. Knowing the difference helps you pick the right one for your project.
- Roller Rotary: The object rests on wheels and spins as the rollers turn. Great for tumblers, cups, and bottles. Simple to use but sometimes objects slip if they aren’t perfectly round.
- Chuck Rotary: Holds the object firmly in place like a lathe. Best for items that need precise alignment or have handles (like mugs). Less chance of slipping, but setup takes longer.
Step 1: Check Compatibility
Before you get started, make sure your laser and rotary are compatible. Most modern CO2 machines support rotary attachments, but it’s worth double-checking your controller type and connector ports. If you’re unsure, reach out to your supplier.
Step 2: Install the Rotary Hardware
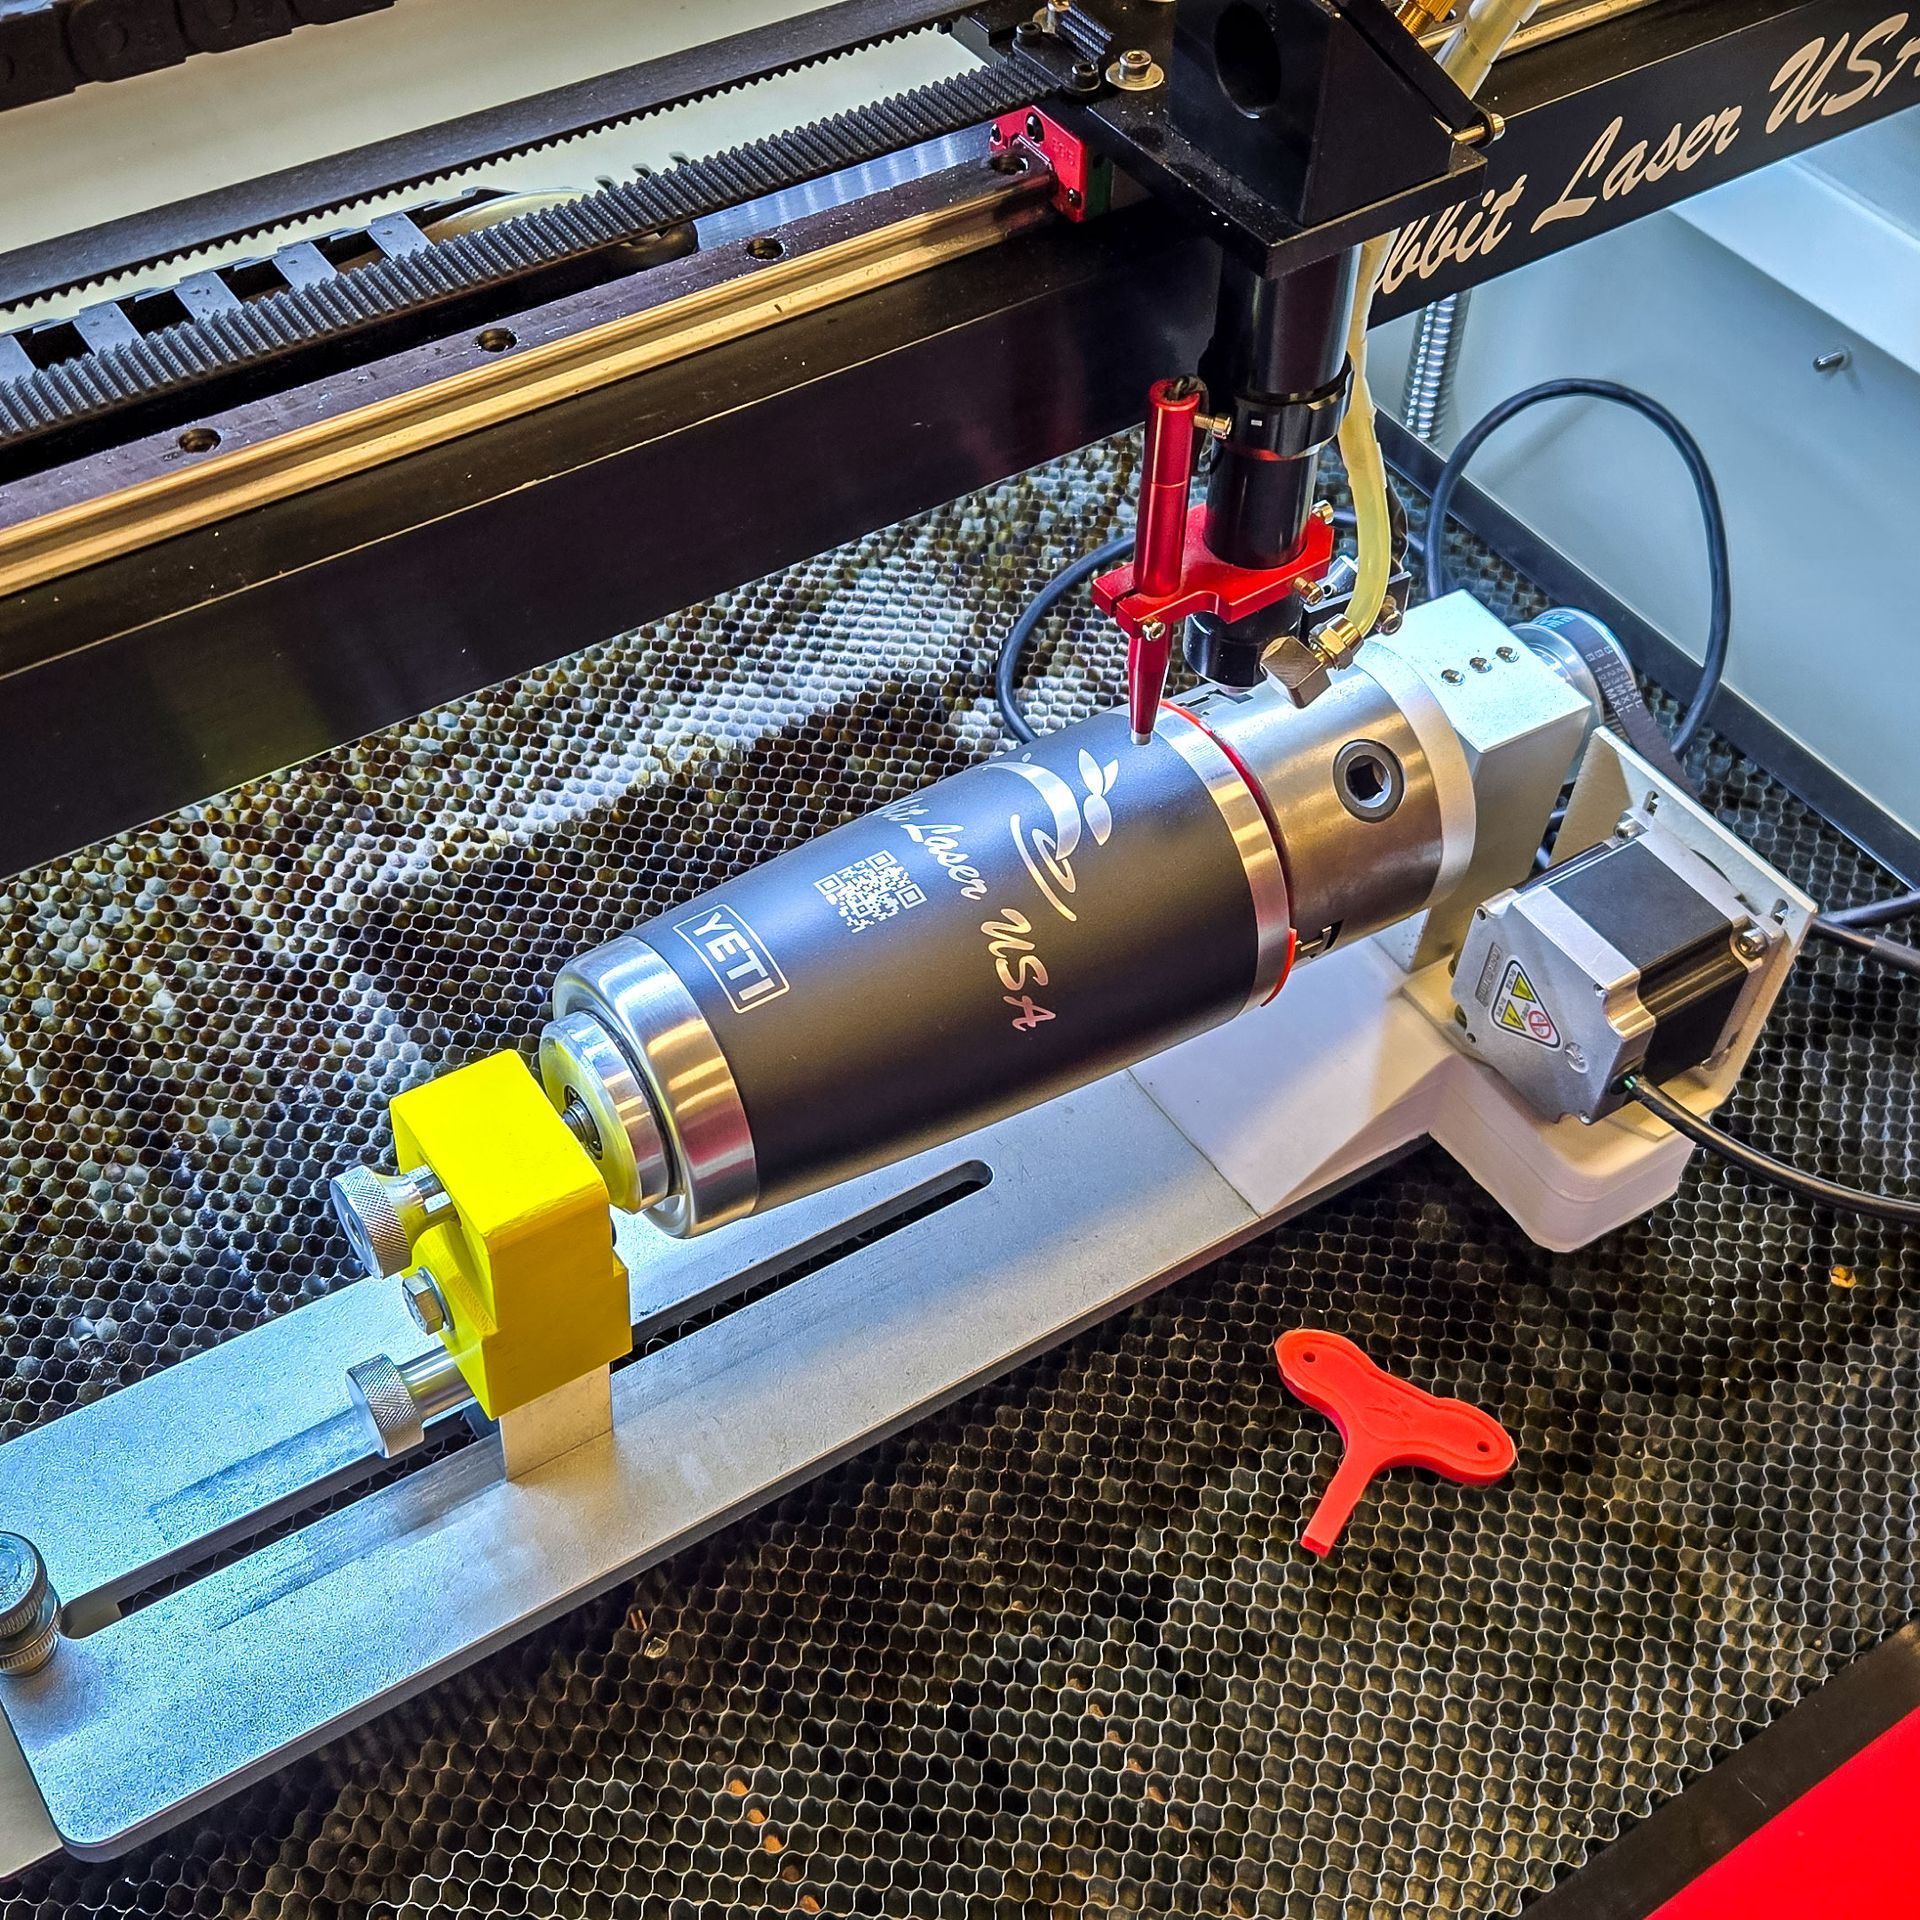
- Place the rotary inside your CO2 laser bed.
- Connect the rotary cable to the dedicated 4-pin rotary port on your machine.
- Press the Rotary button on the control panel to activate rotary mode.
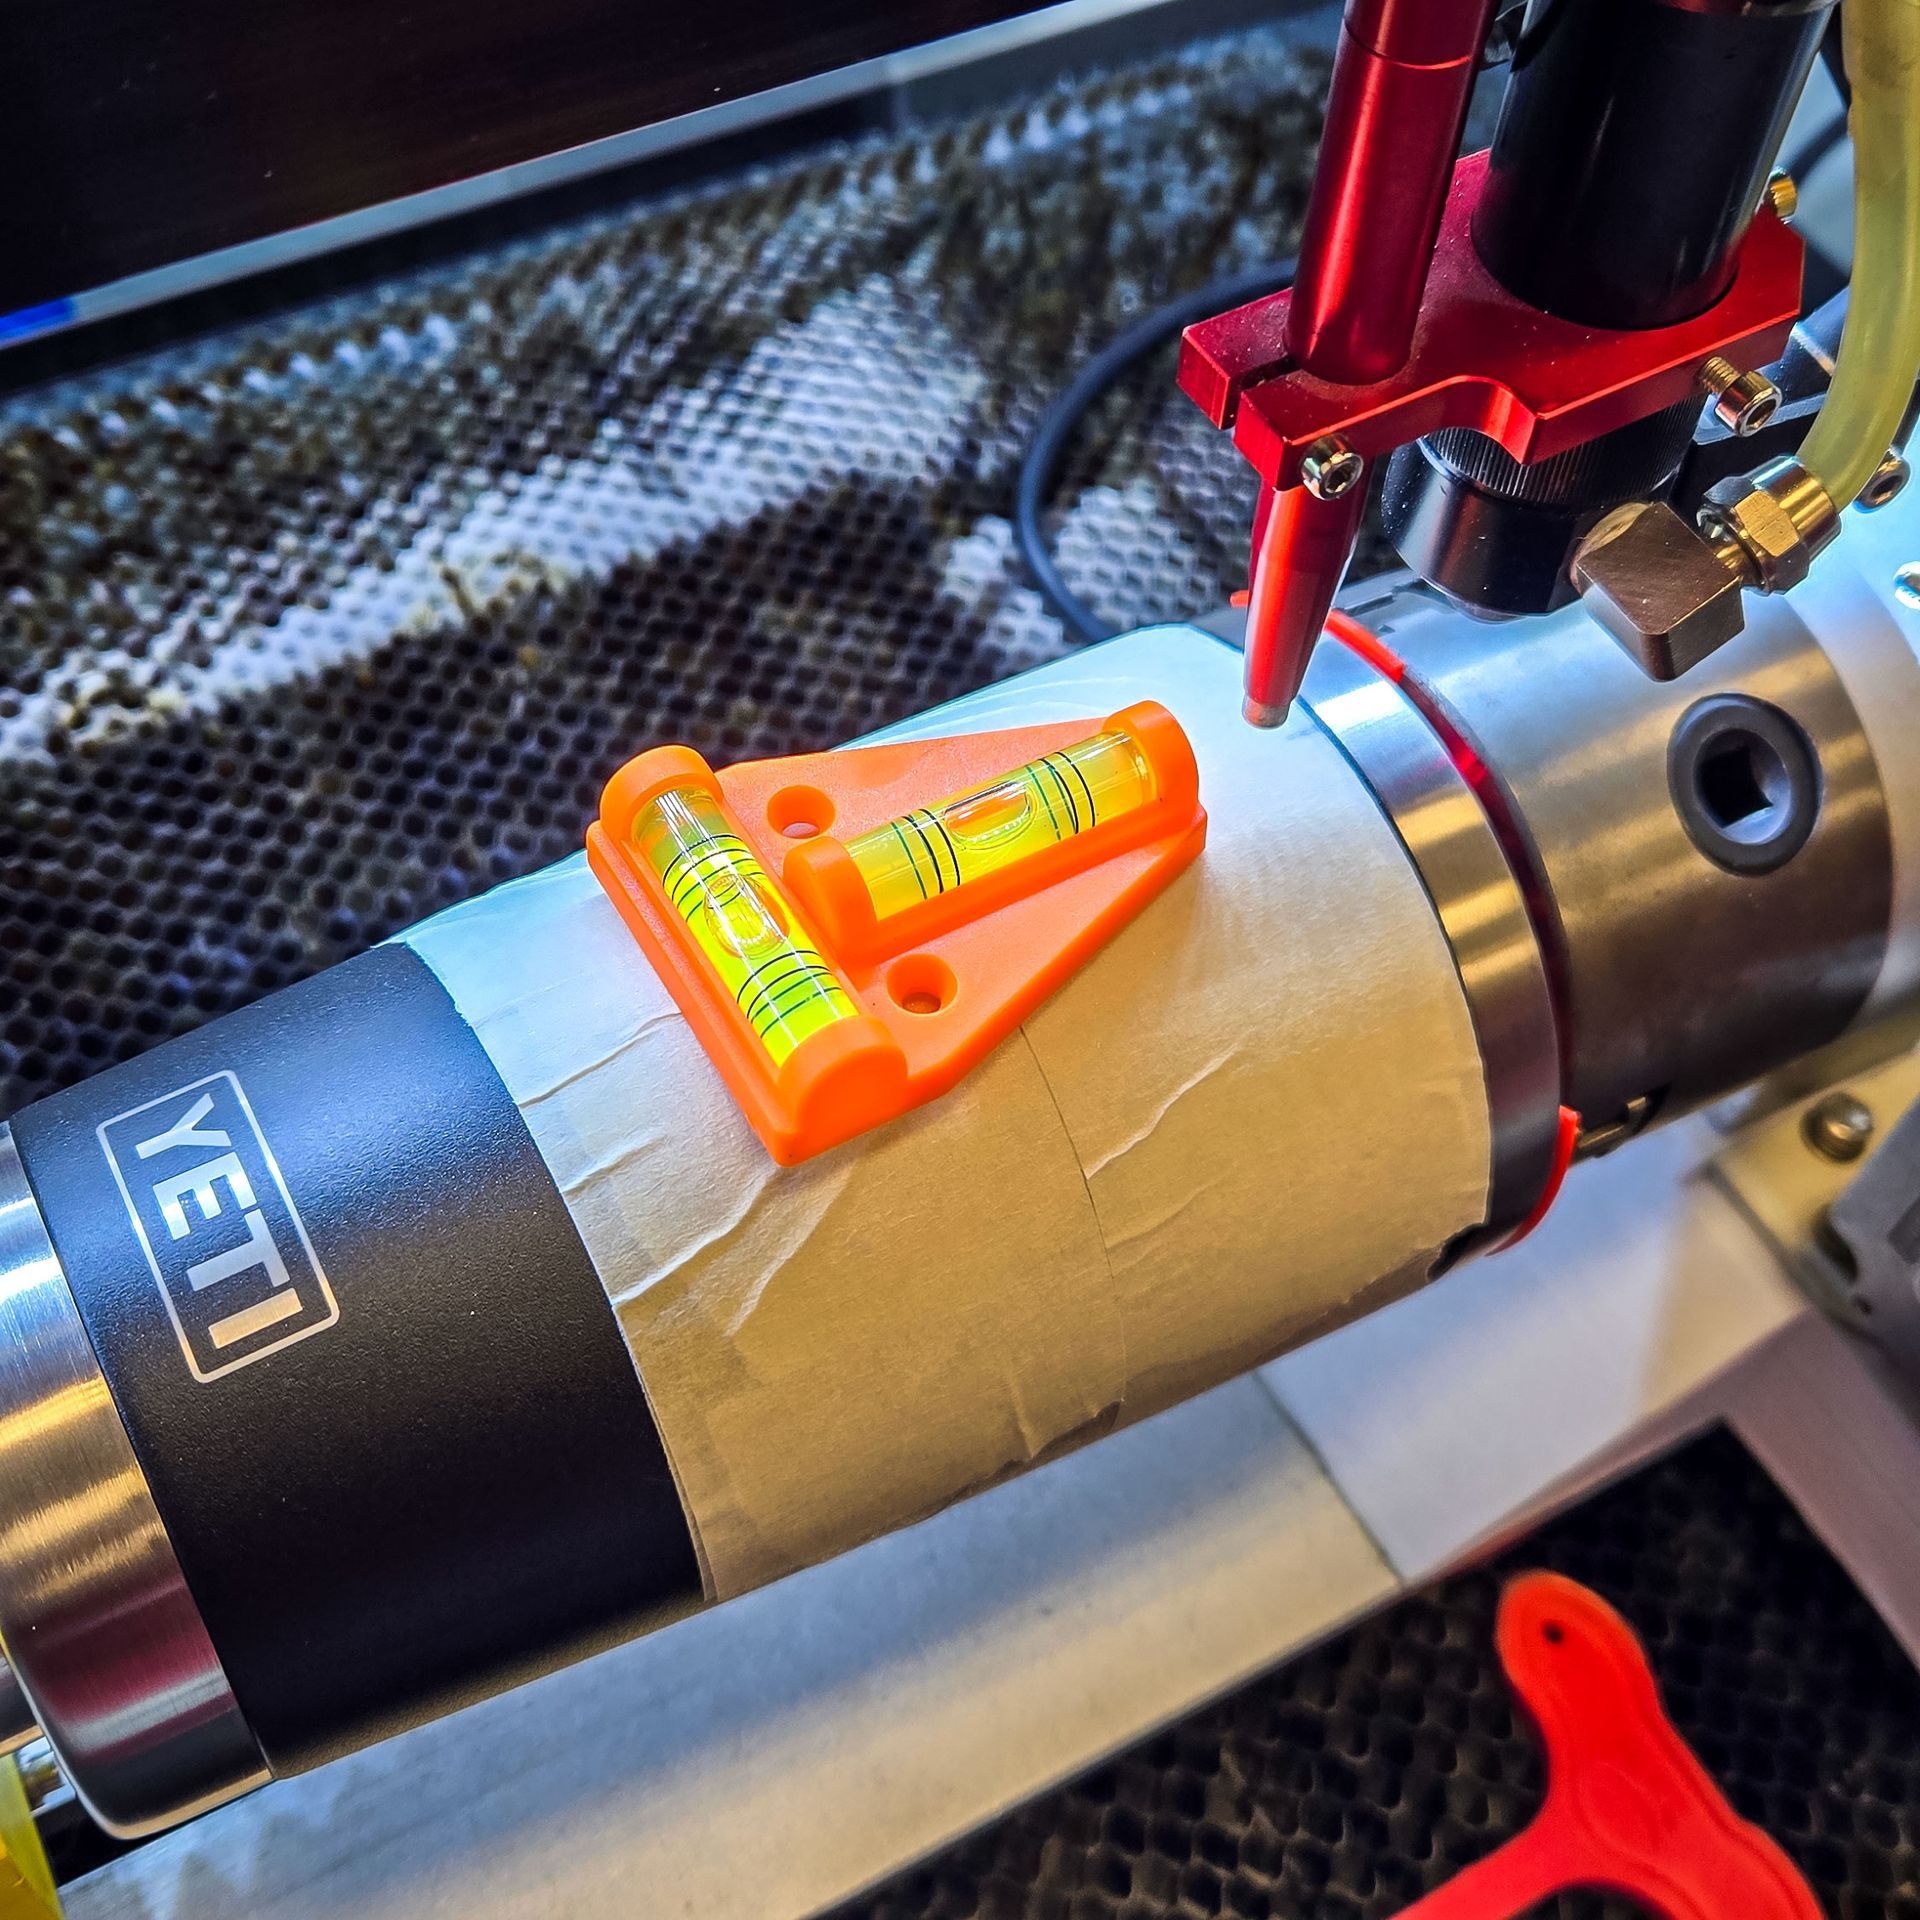
- Make sure the rotary is set parallel to the gantry so the engraving lines run evenly across the surface of your object.
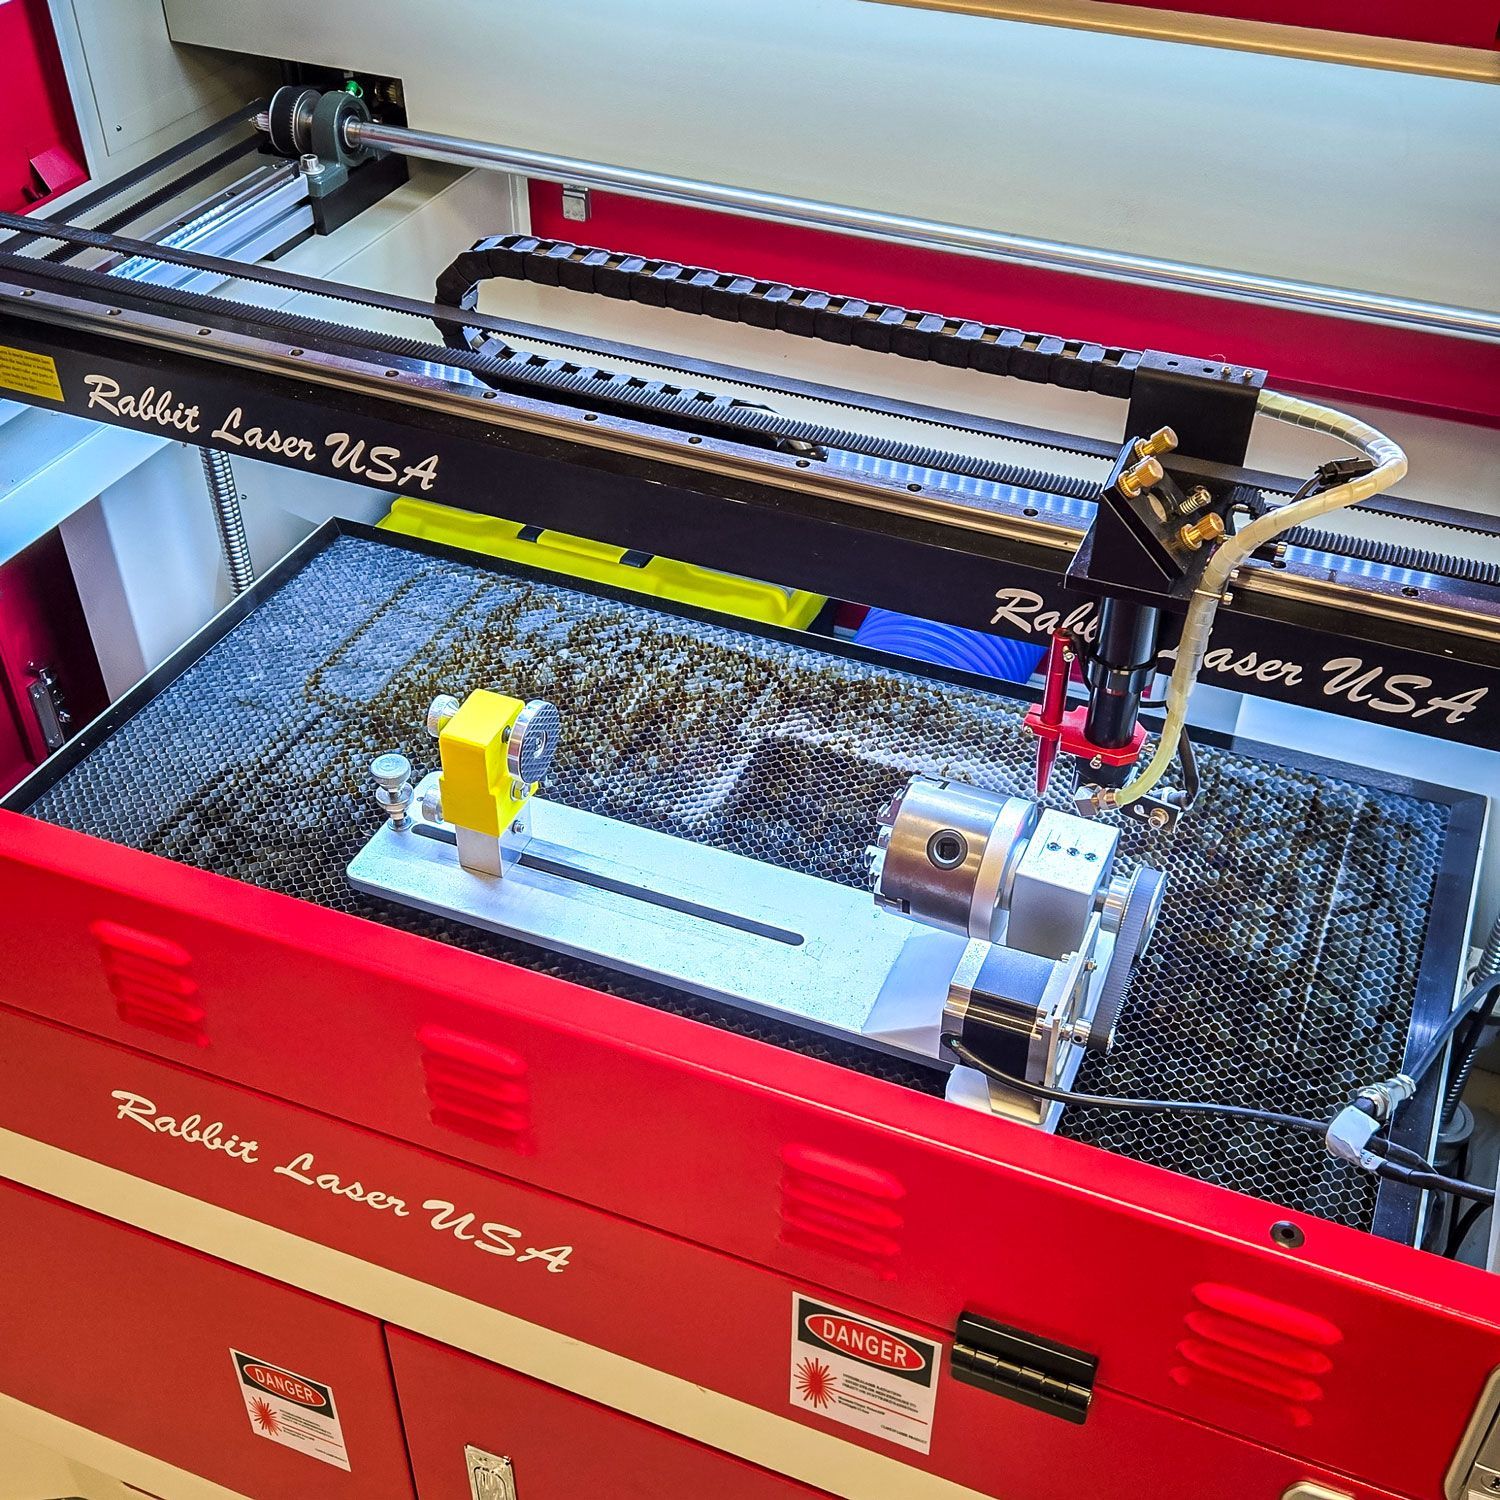
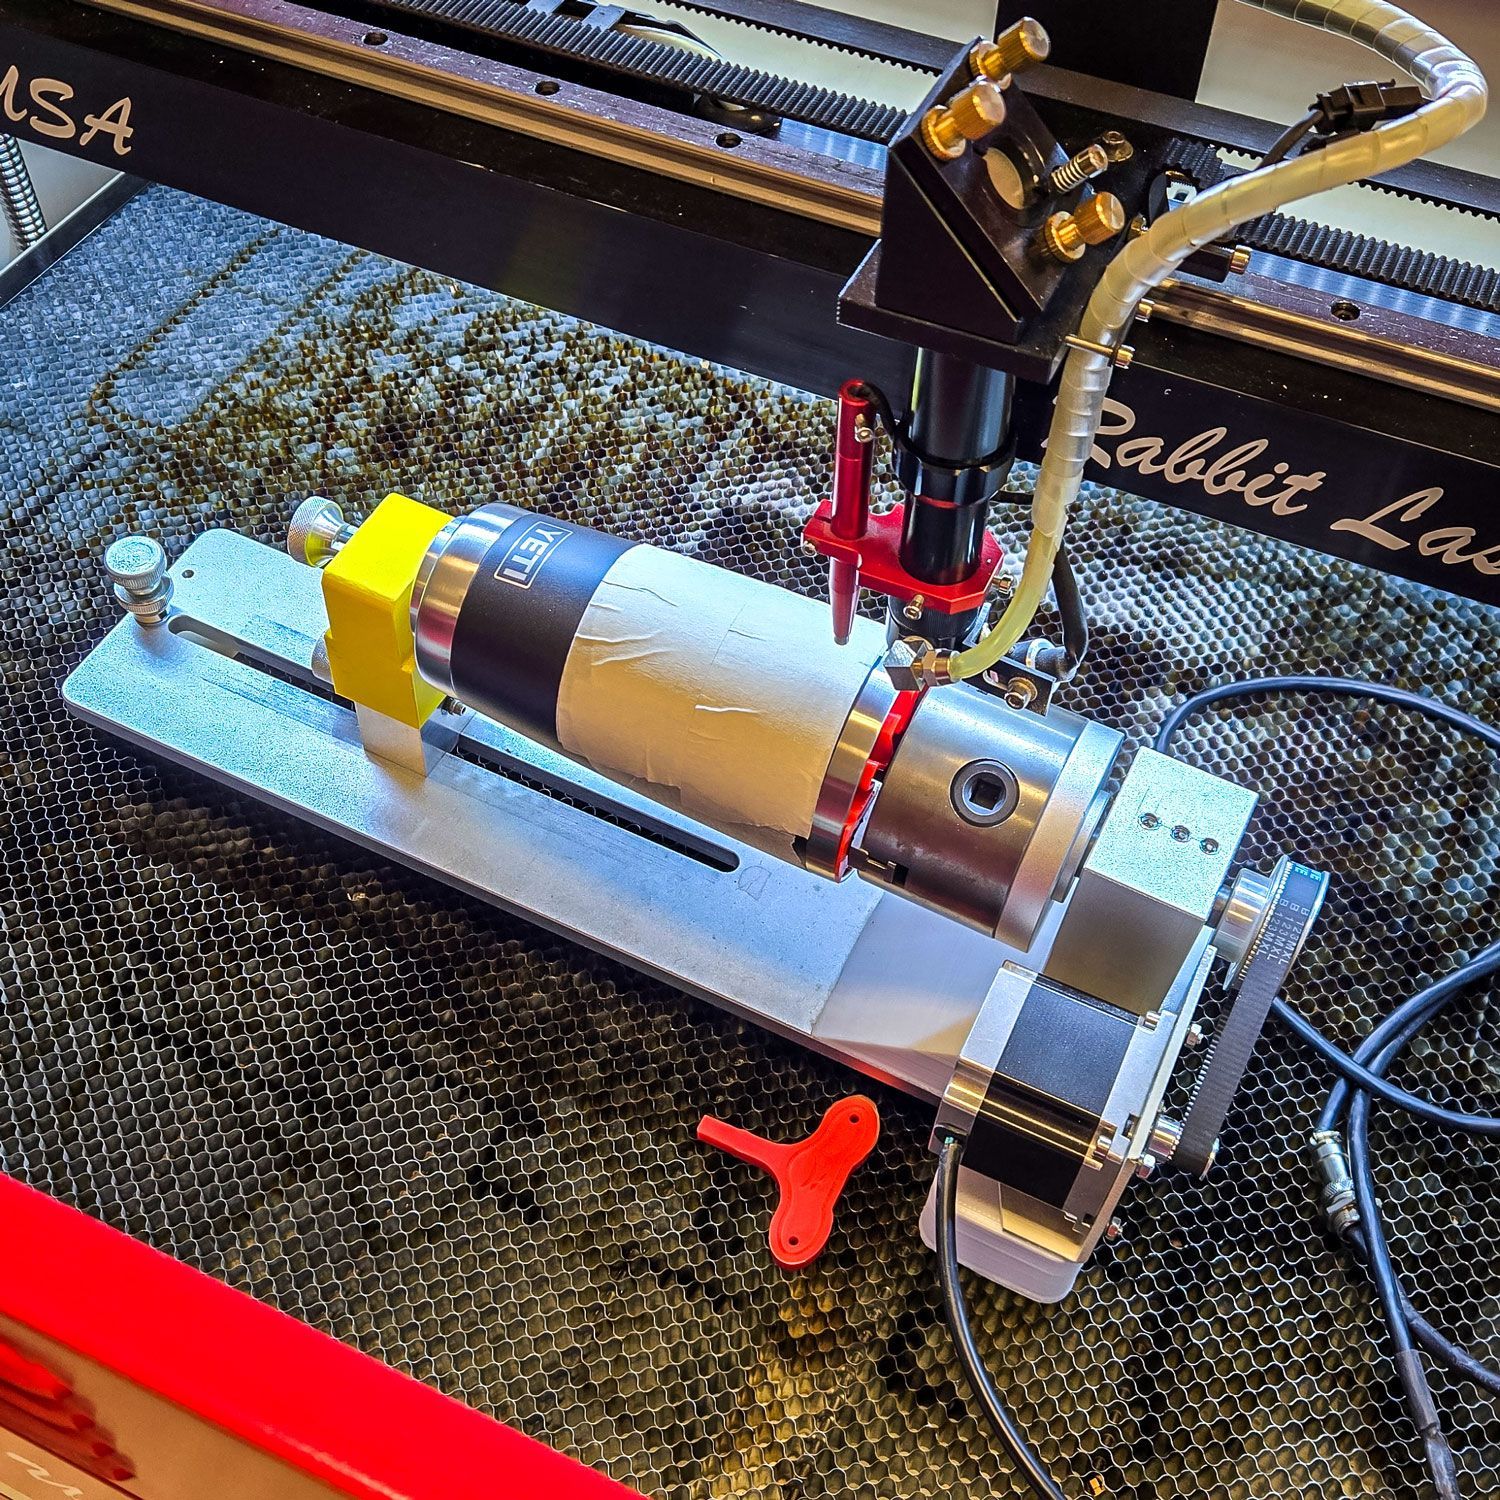
Chuck Rotary Installed in Rabbit Laser USA SD-60-9060 CO2 Laser
Chuck rotary attachment installed in an SD-60-9060 CO2 laser, aligned for cylindrical engraving projects.
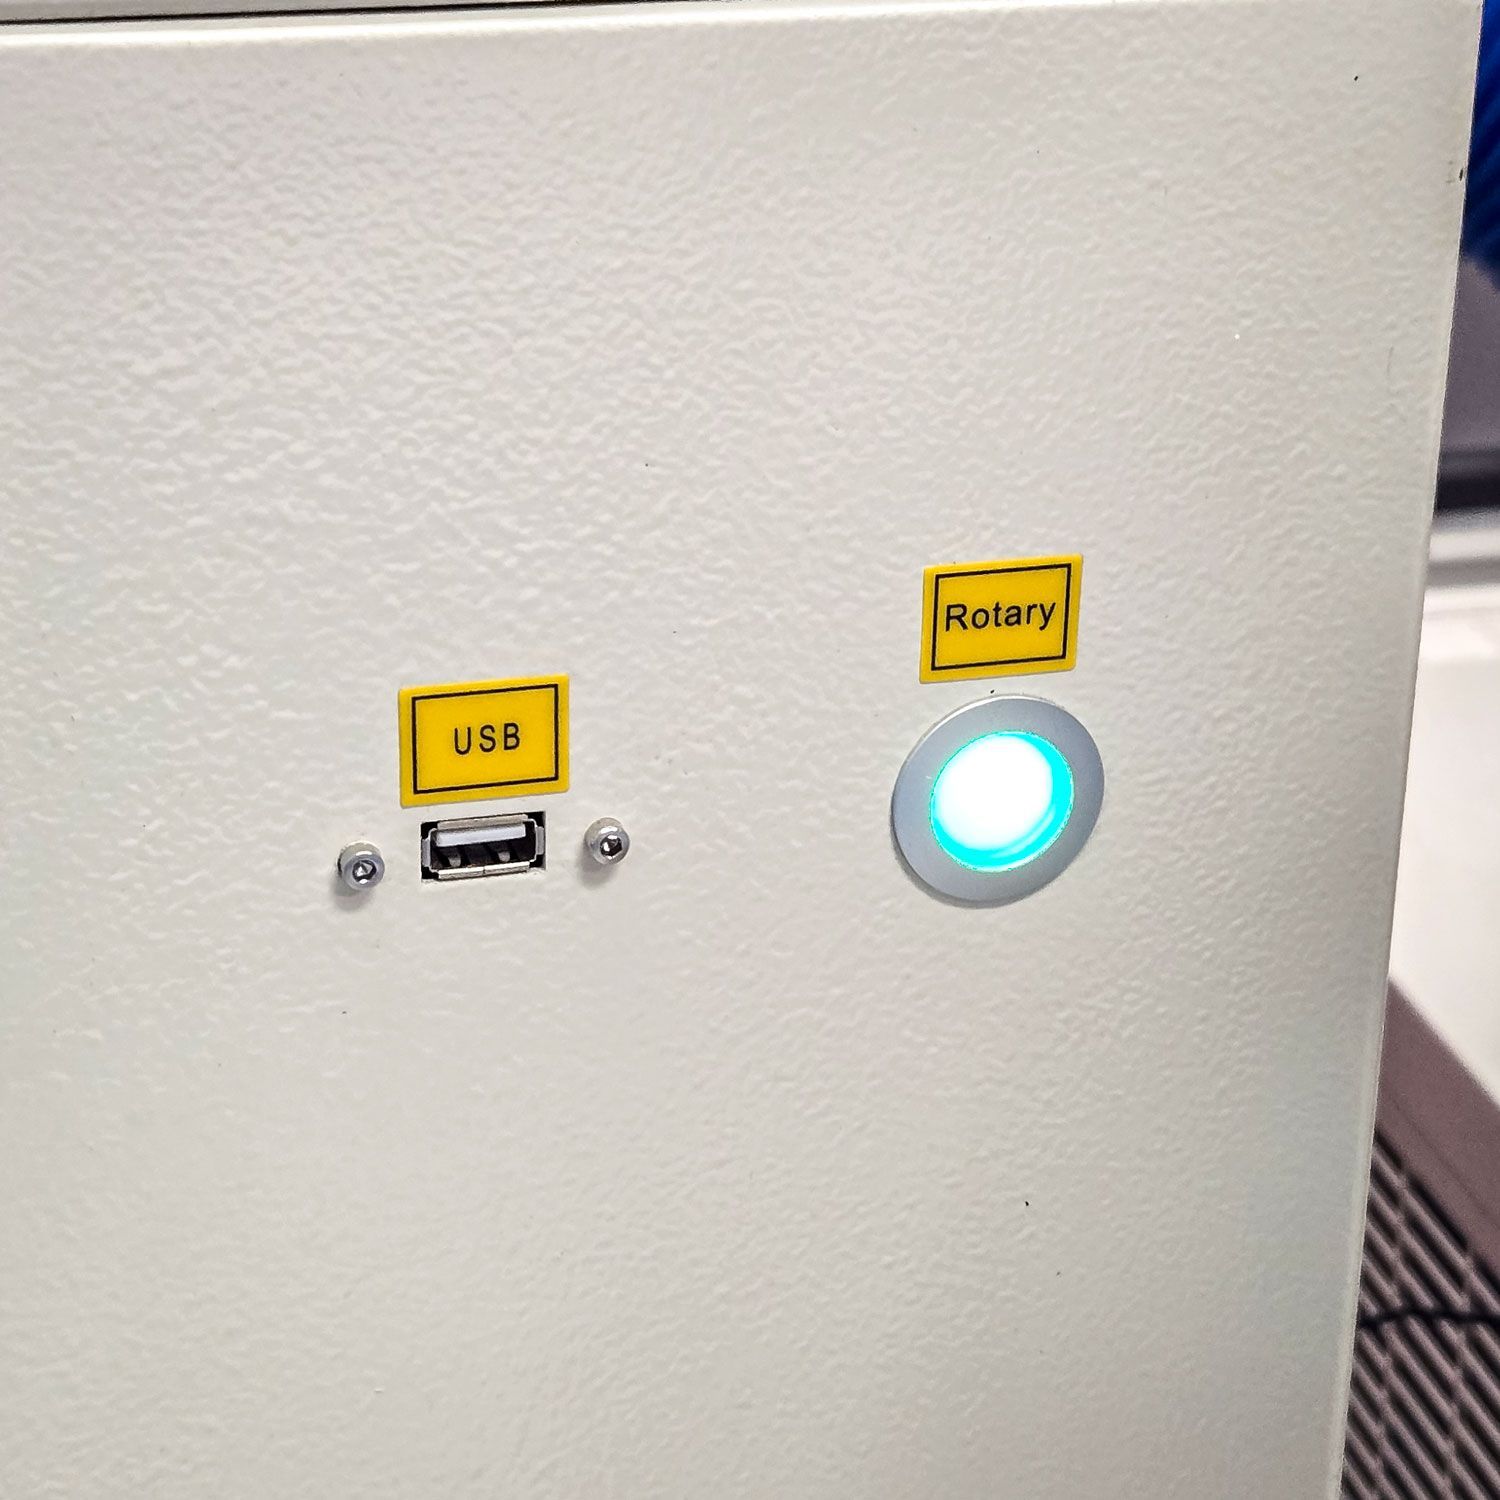
Easy Rotary Button on Rabbit Laser USA CO2 Laser Machines
Dedicated Rotary button on Rabbit Laser USA CO2 lasers for quick rotary attachment setup and activation.
Because Rabbit Laser USA machines include a separate driver for rotary attachments, there’s no need to disconnect the Y-axis motor like many other brands require. This makes switching between flat projects and cylindrical engraving fast and straightforward.
Pro Tip: On roller rotaries, use a rubber band or painter’s tape on slick tumblers to prevent slipping during engraving.
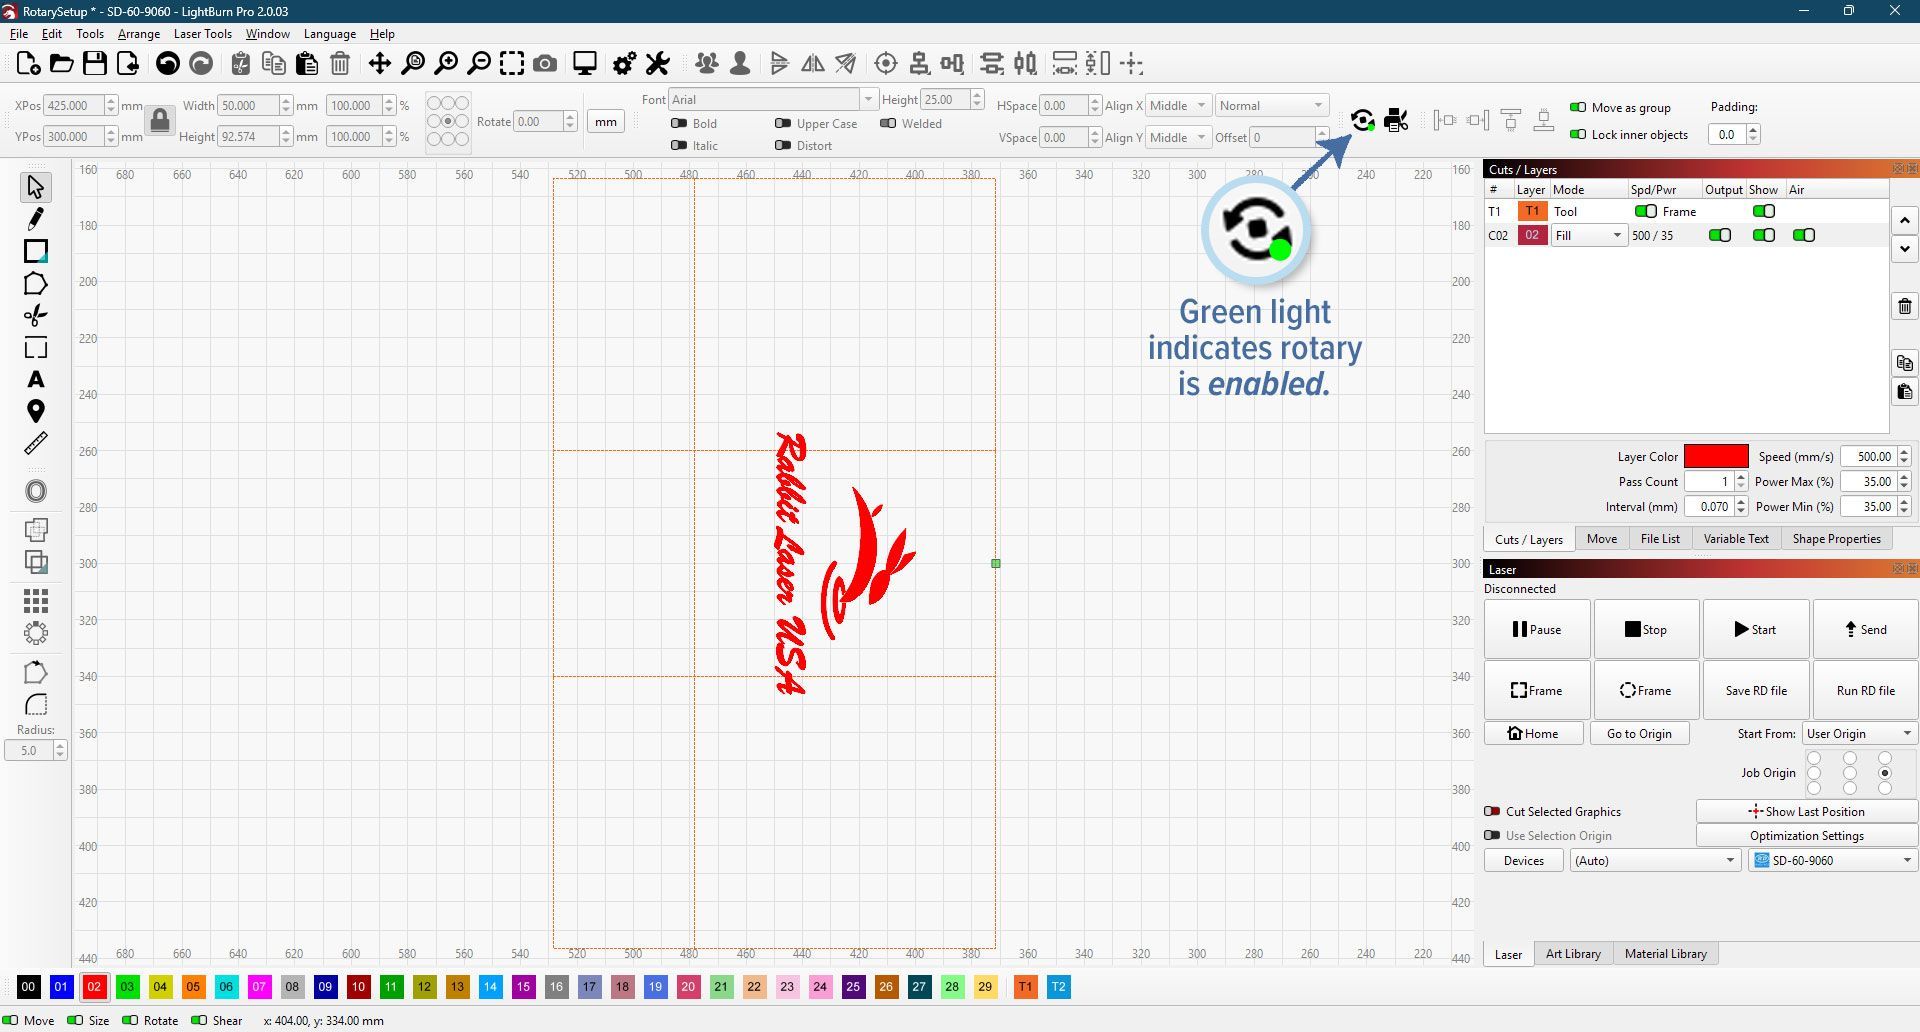
Step 3: Enable Rotary in LightBurn
- Open LightBurn.
- Access the Rotary Setup in either of two ways:
- From the top menu, go to Tools > Rotary Setup.
- Or click the Rotary button in the main toolbar (screenshot shows its location with the green light indicator.
- In the Rotary Setup window, check "Enable Rotary" to tell LightBurn you're using the attachment.
For Rabbit Laser USA rotaries
Step 4: Test & Calibrate
Before engraving your first tumbler or glass, it’s important to run a calibration test.
- Apply Tape: Cover the engraving area with several layers of masking tape.
- Low Power Test: Run a simple design at just enough power to mark the tape without touching the material underneath. This gives you a clear visual guide without wasting blanks.
- Check for Distortion:
- If the design looks stretched → adjust the steps per rotation lower.
- If the design looks squished → adjust the steps per rotation higher.
- Account for Optical Illusions: On curved objects like tumblers, circles may appear slightly squashed because of the viewing angle. To compensate, increase the width of your design by about 10% while leaving the height unchanged. This correction makes the finished engraving look right to the eye.
Common Rotary Mistakes to Avoid
- Not leveling the object → results in skewed engravings.
- Forgetting to measure diameter at the engraving surface (not the lip or base).
- Starting with a complex design → always test with something simple first.
- Leaving handles or off-balance weight unsupported → can cause slipping mid-job.
Project Ideas to Try
Once you’re confident with setup, here are a few beginner-friendly rotary projects:
- Personalized tumblers for gifts or events.
- Wooden rolling pins engraved with decorative patterns.
- Pint glasses etched with logos or family crests.
- Flashlights or metal tubes marked for identification.
Final Thoughts
A rotary attachment dramatically expands what you can create with your laser. By taking the time to set it up properly in LightBurn—and running a few test engraves—you’ll save material, reduce frustration, and get consistent results. Start small, dial in your settings, and soon you’ll be engraving cylindrical projects like a pro. 🐰
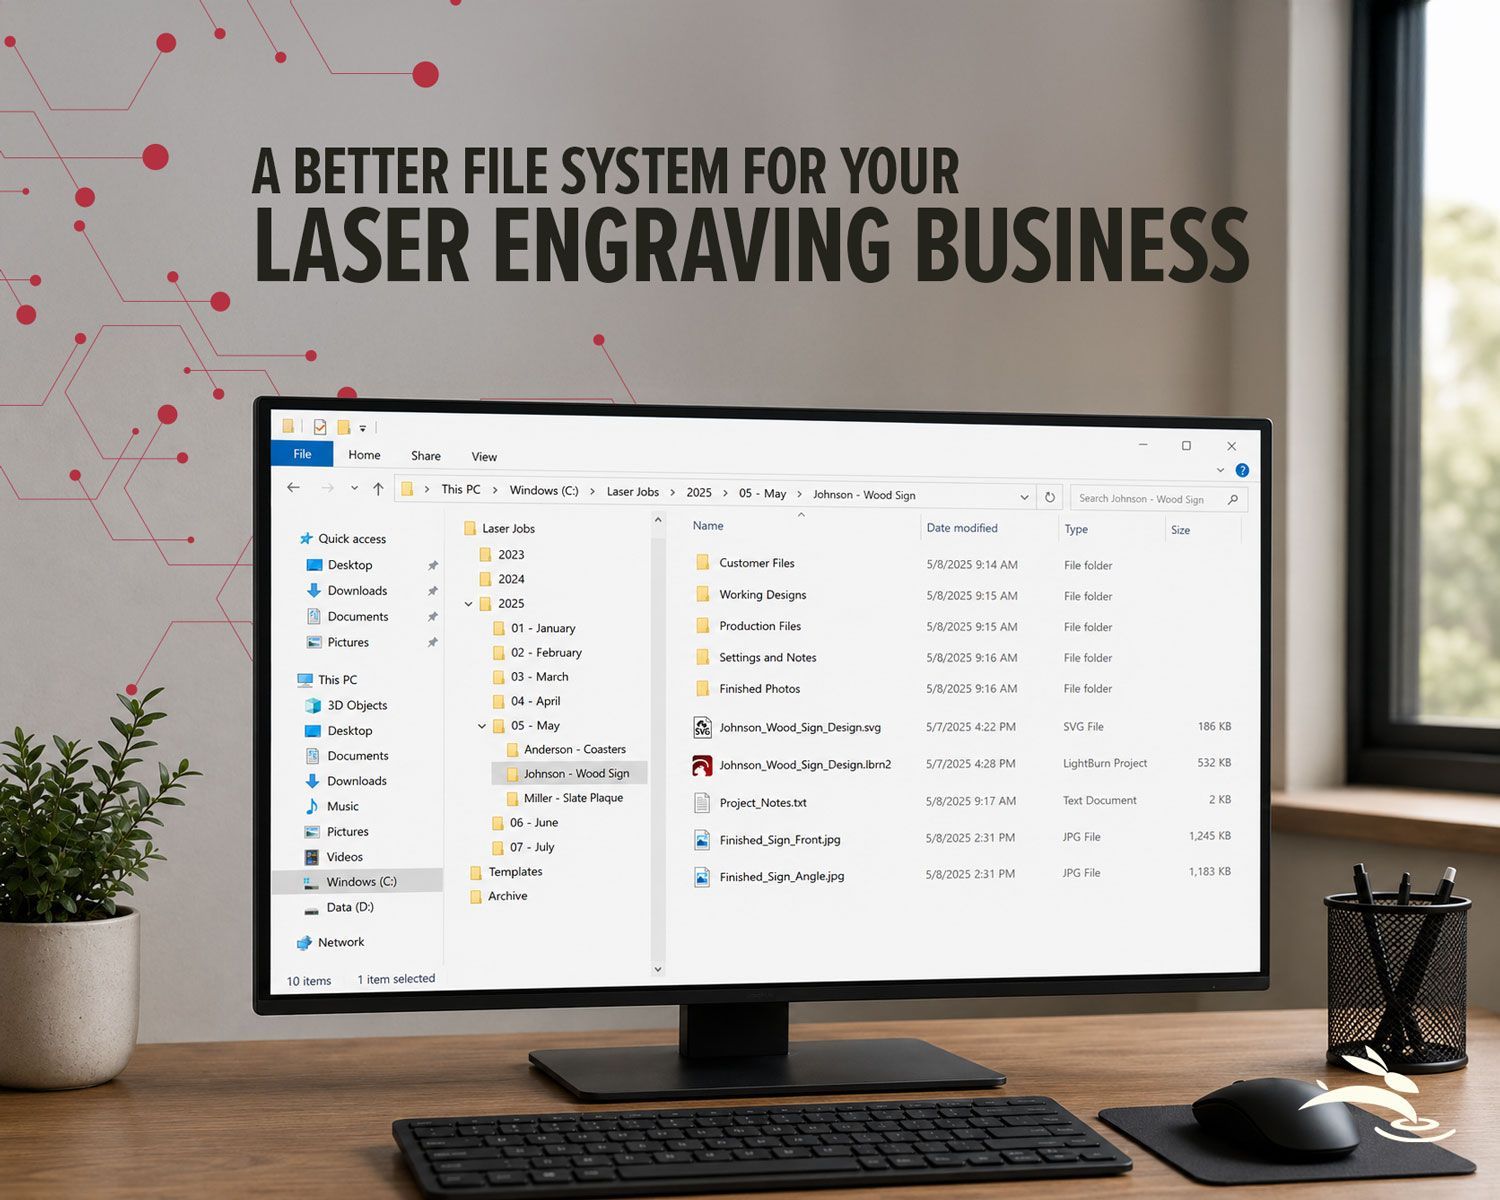
Organize your laser engraving files with a simple folder system that makes repeat orders faster, reduces mistakes, and protects customer artwork.
Rabbit Laser USA CO2 laser with support workstation for troubleshooting.
Remote laser support can help with software, settings, troubleshooting, alignment, parts questions, and service needs.
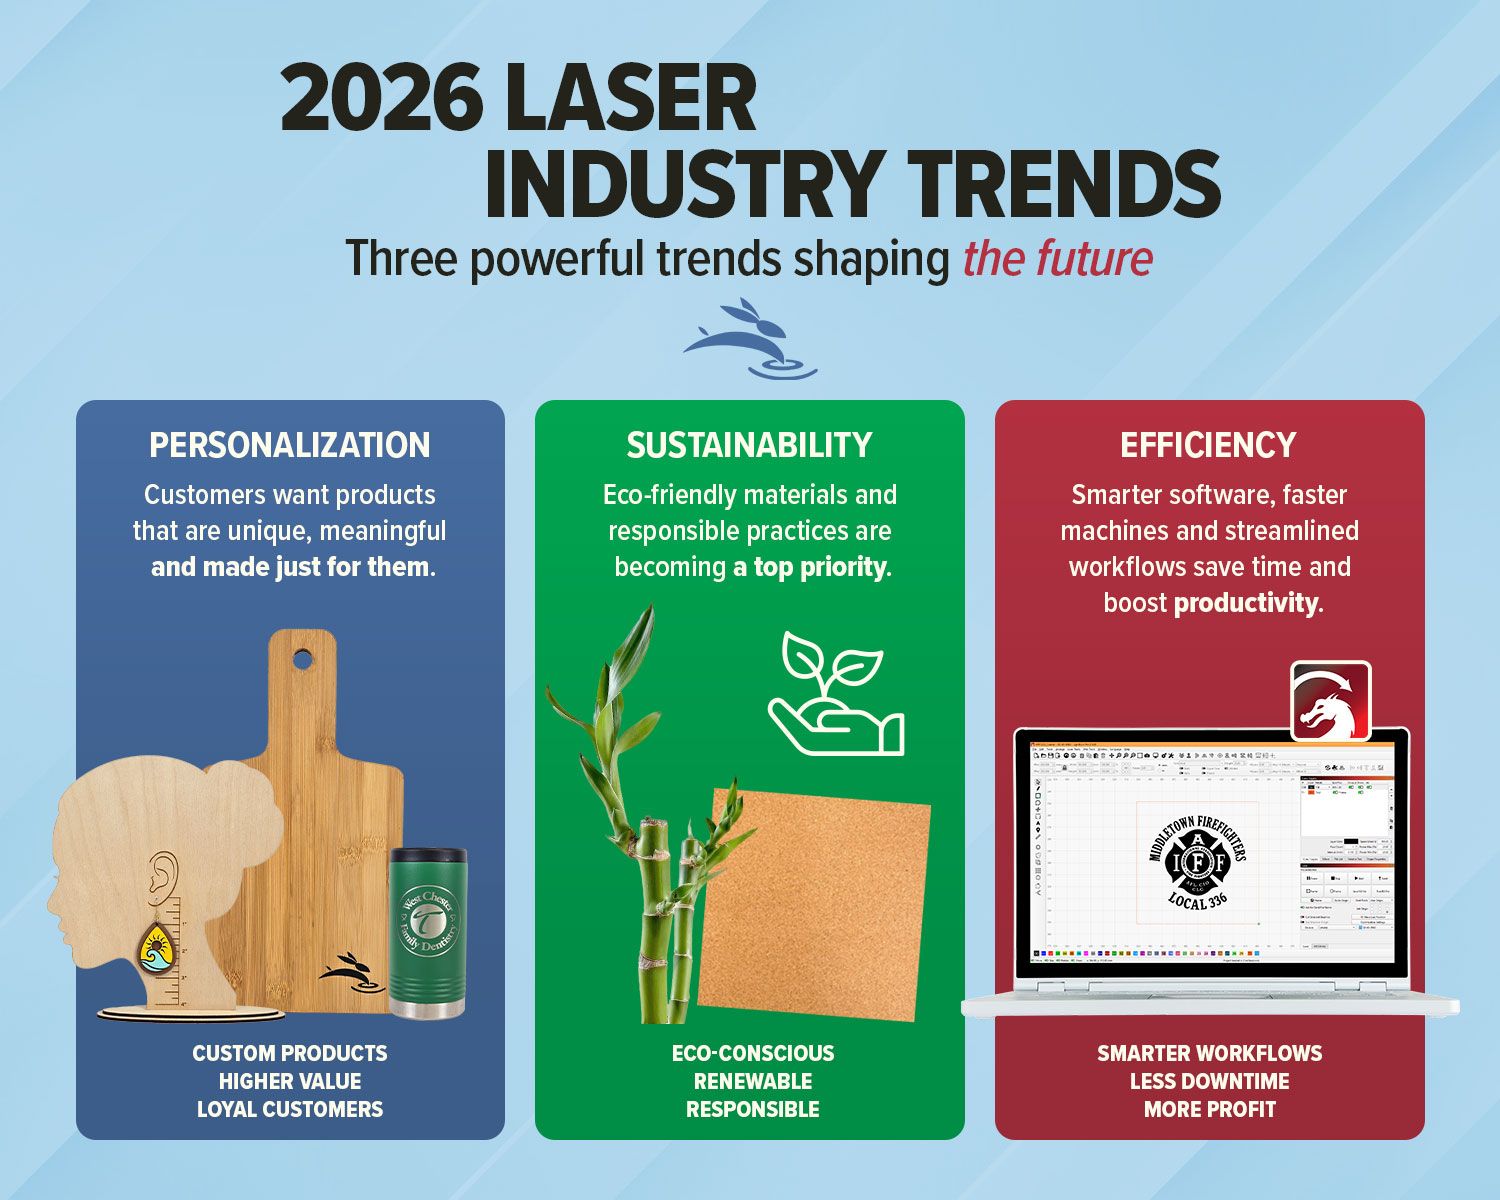
Explore 2026 laser engraving trends, including custom products, eco-friendly materials, efficient workflows, and business growth ideas.
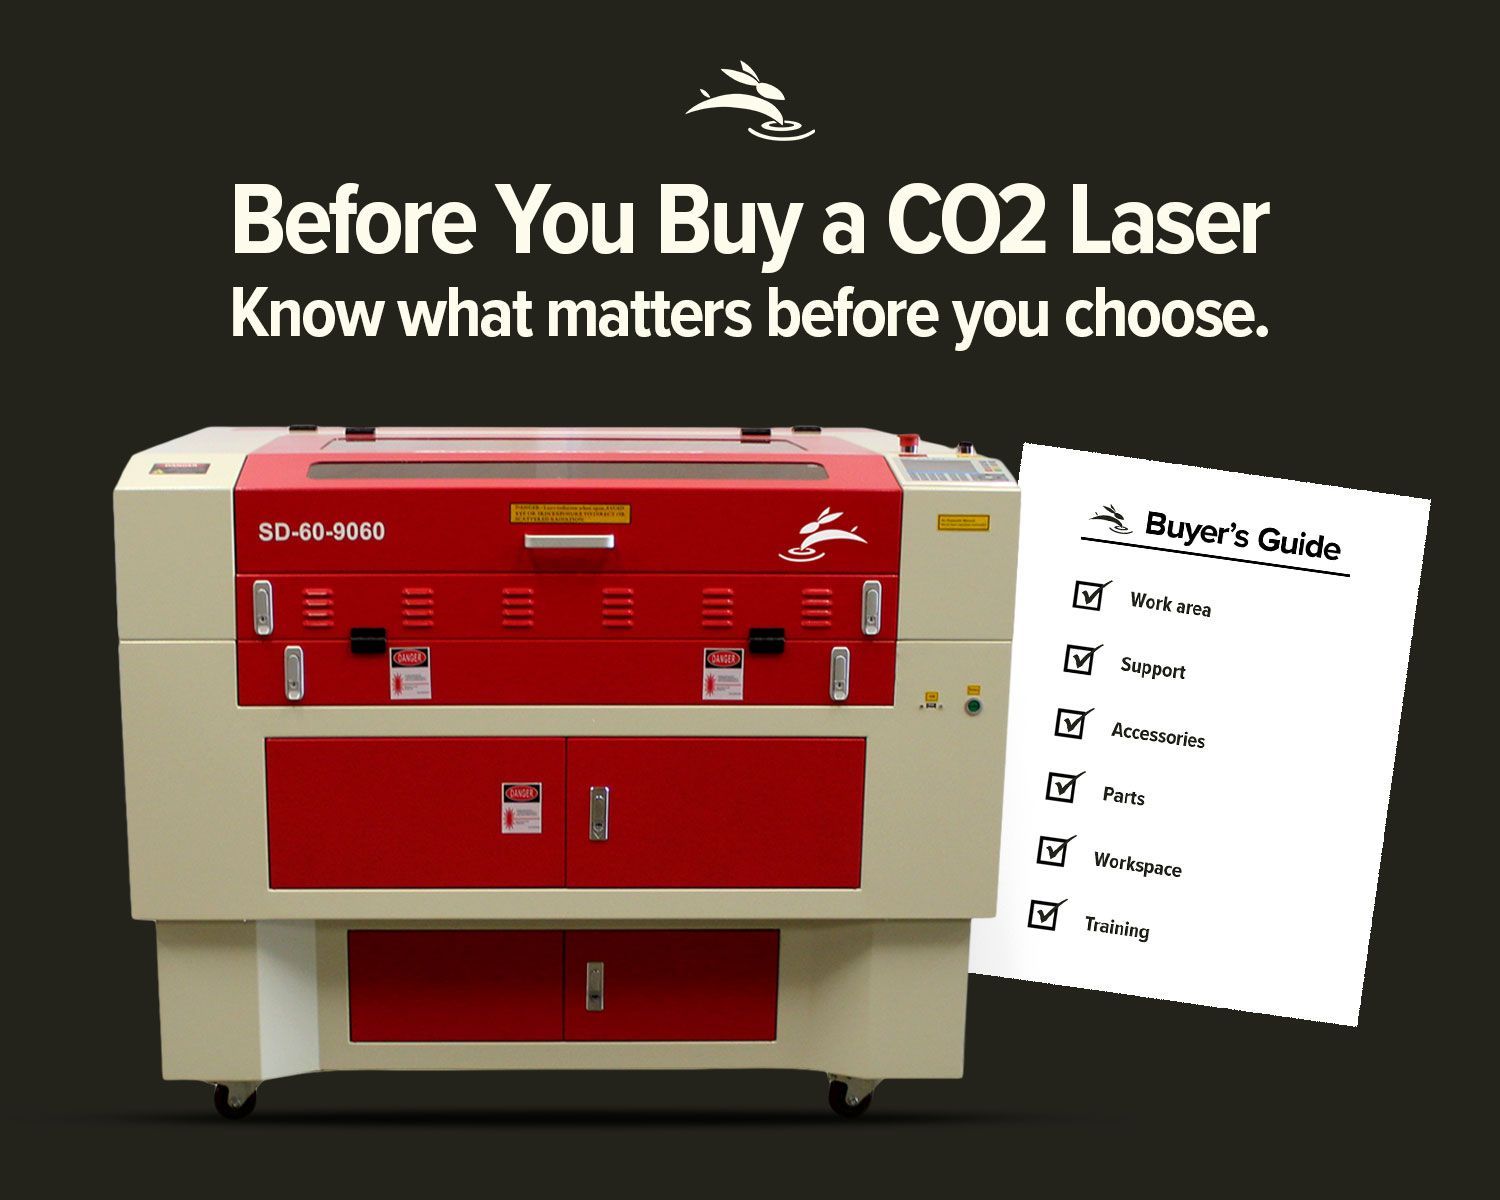
Avoid common CO2 laser buying regrets. Learn what to know about size, support, parts, accessories, setup, and long-term value before you buy.
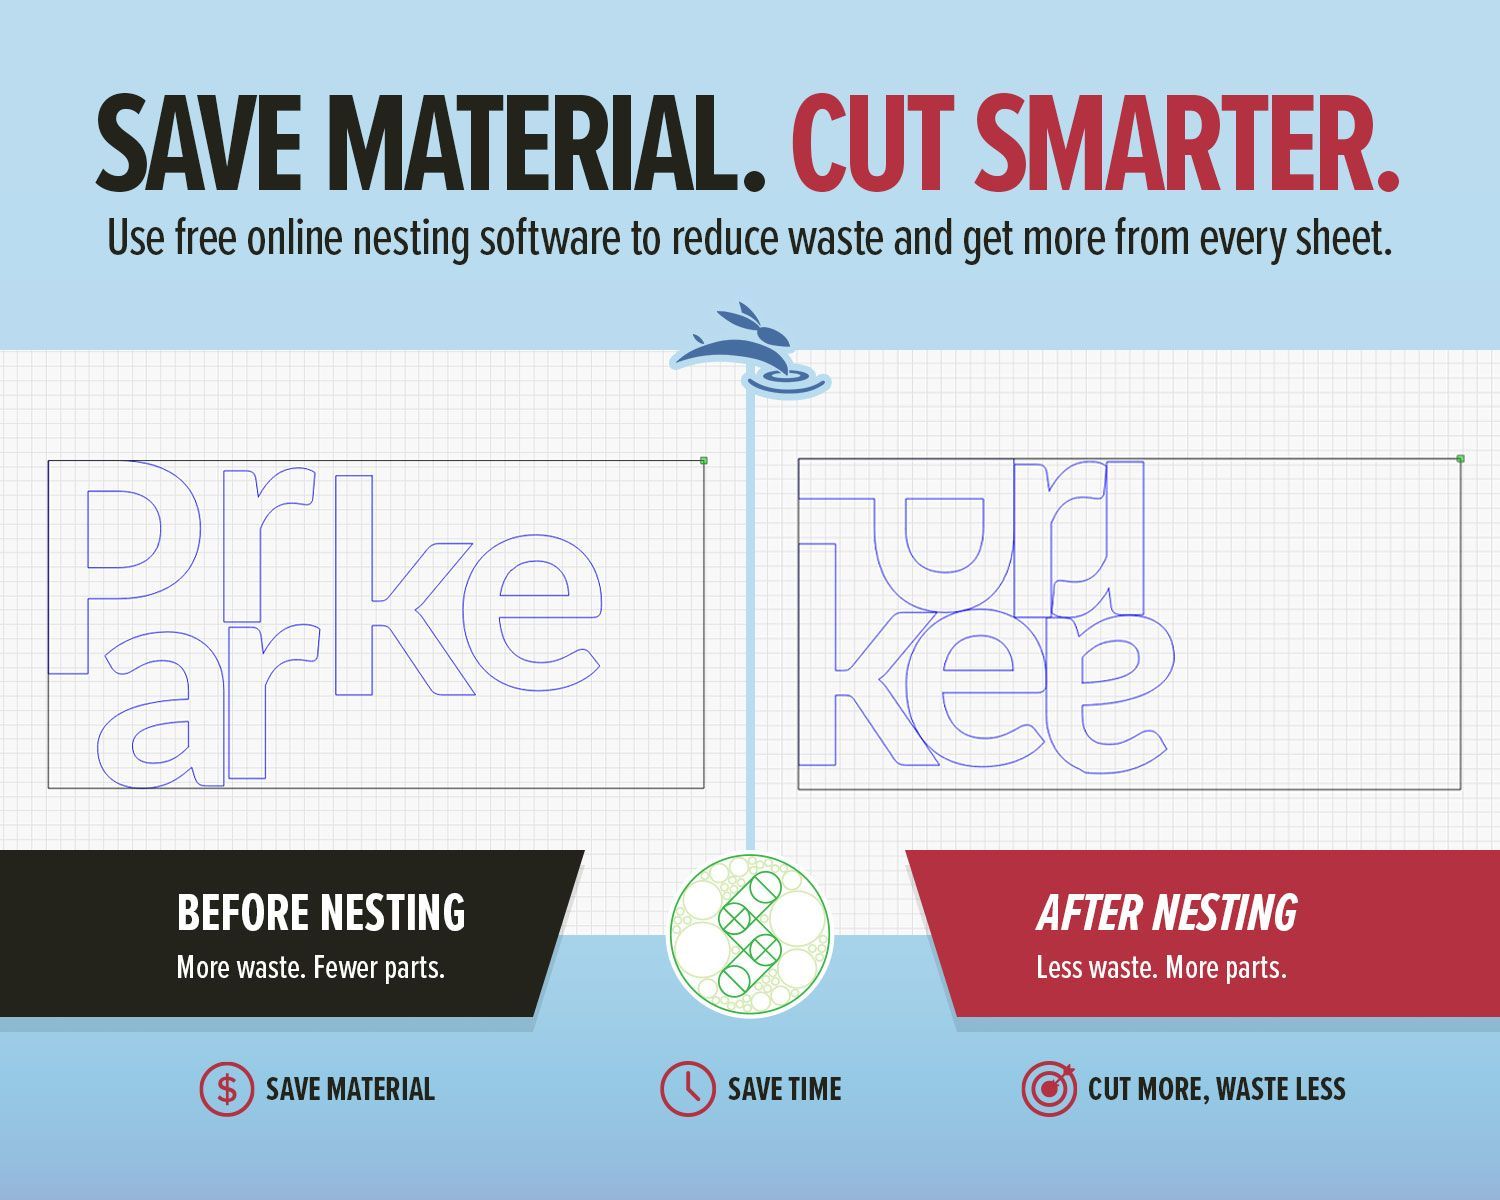
Use free online nesting software like SVGnest to arrange laser cutting files, reduce material waste, and improve your LightBurn workflow.

New to laser engraving or cutting? Avoid common mistakes that cause poor results, wasted material, and frustration. Learn what to fix fast.
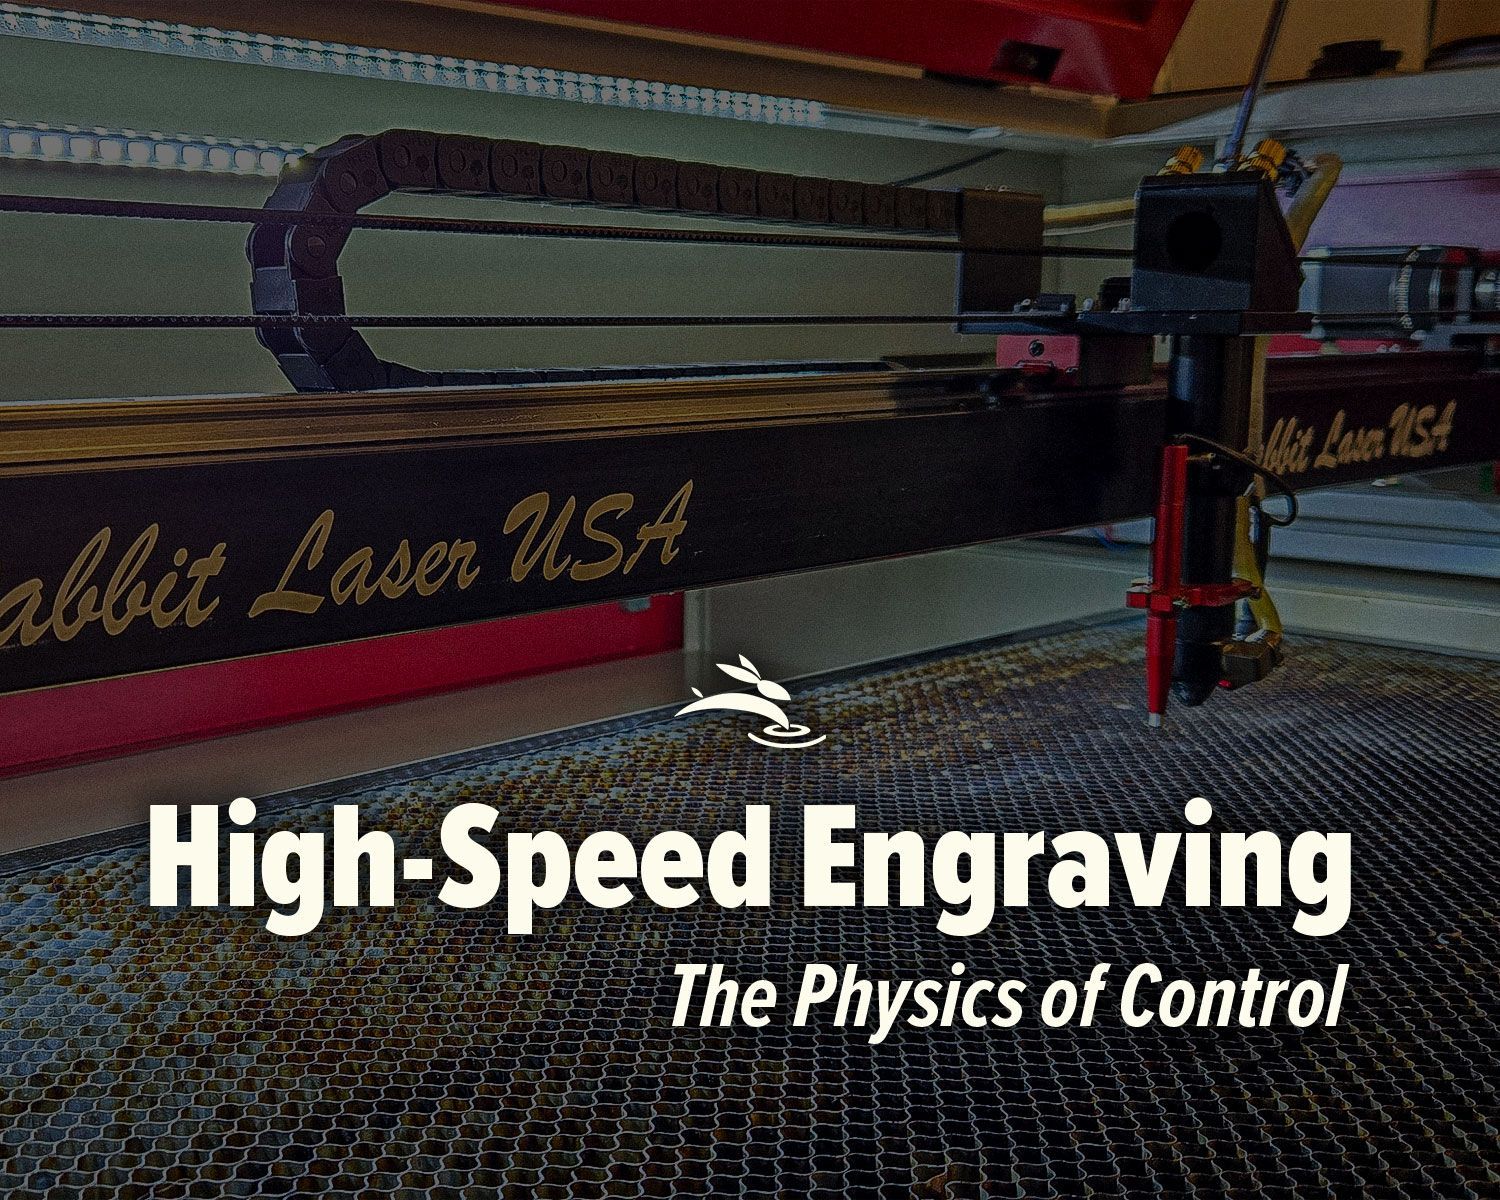
High-speed laser engraving demands motion control. Learn how overscan, acceleration, and momentum impact precision and usable workspace.
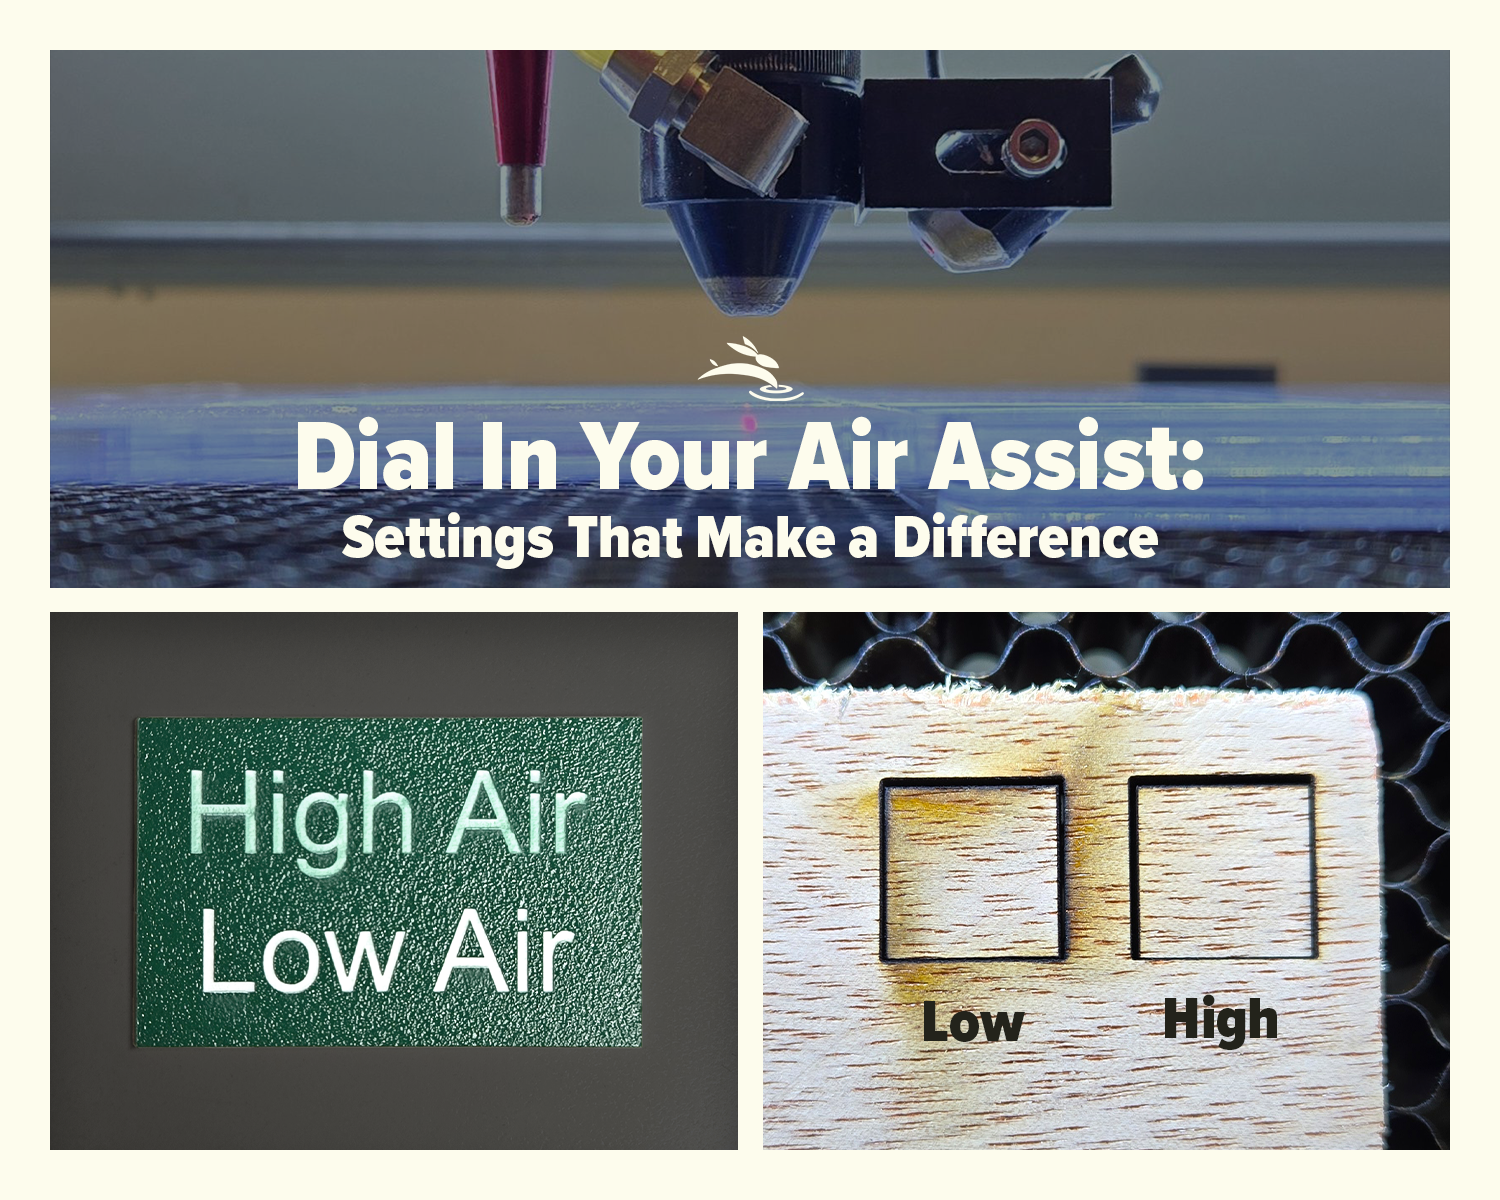
Dial In Your Air Assist: Settings That Make a Difference Air Assist Isn’t Just an Add-On If you’ve ever smelled smoke during a job or noticed charred edges on your laser-cut pieces, chances are your air assist wasn’t doing its job—or it wasn’t set right for your application. While it might seem like a minor detail, air assist plays a critical role in the performance and lifespan of your CO2 laser machine. In this post, we’ll break down the difference between low flow and high flow air assist, when to use each, and how to get the best results from your setup.
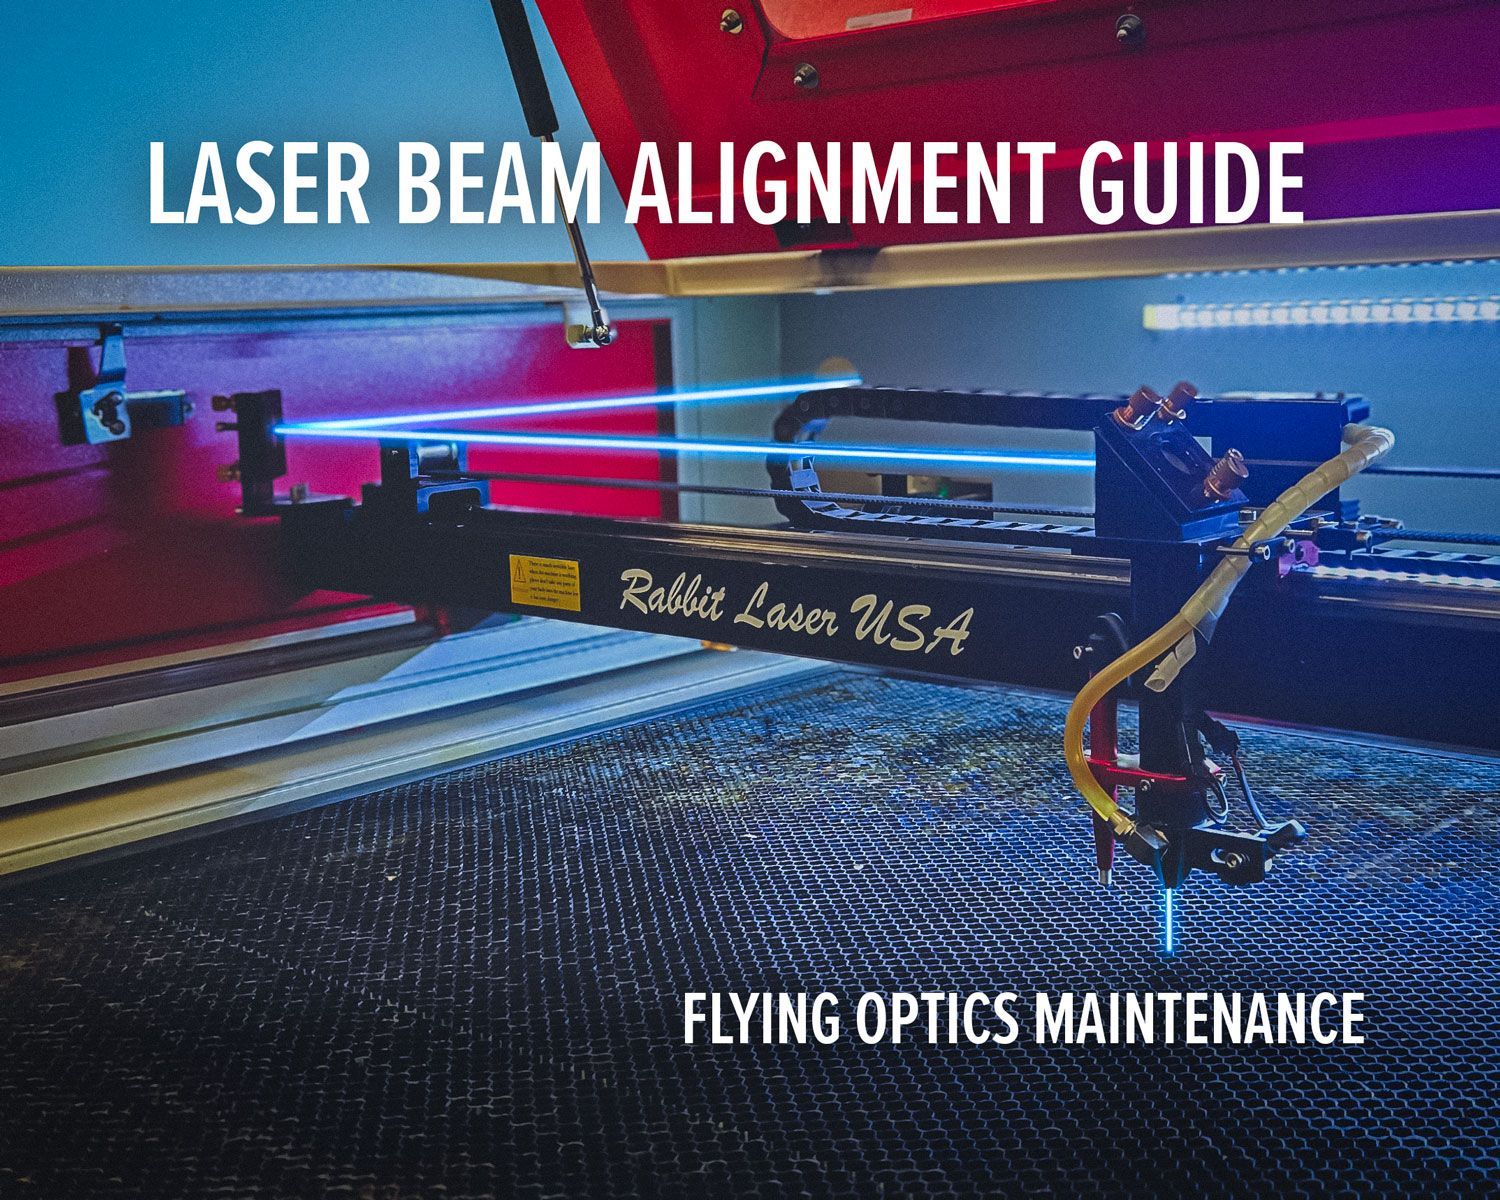
Laser beam alignment guide for flying optics laser machines. Step-by-step maintenance tutorial to restore accuracy, cutting power, and engraving performance.
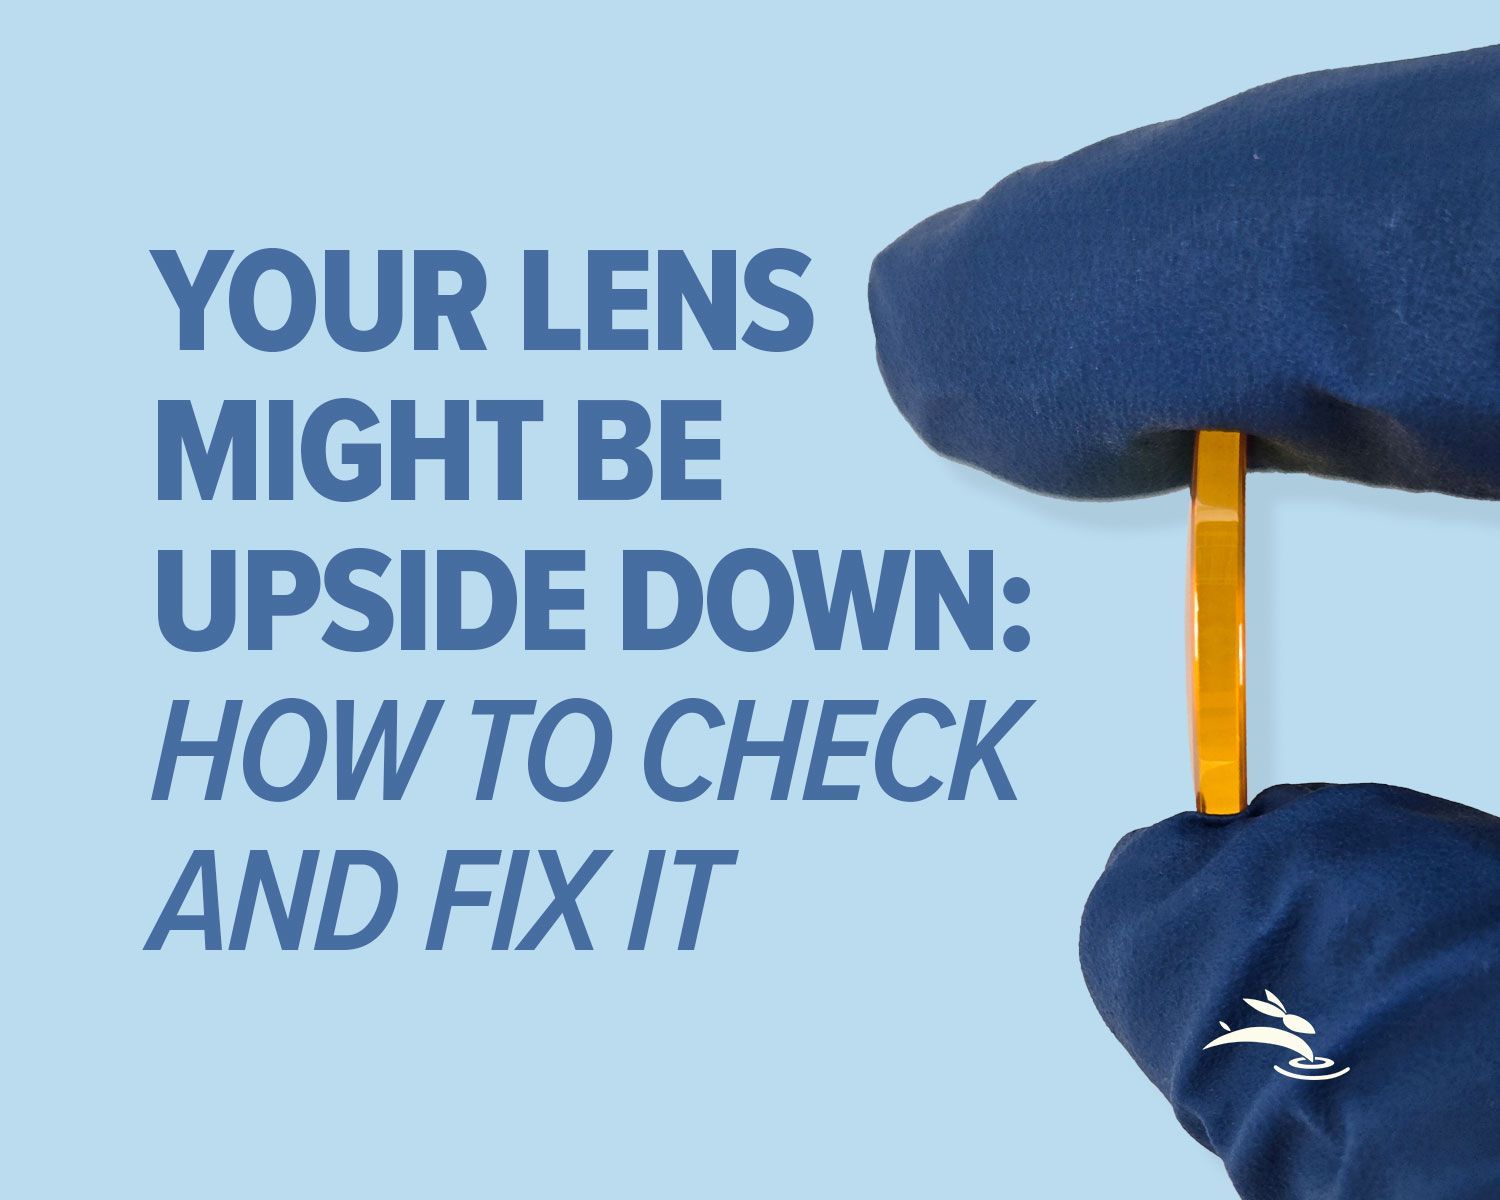
Blurry engraving or weak cuts? Learn the correct CO2 laser lens orientation and how to fix one of the most common laser setup mistakes.
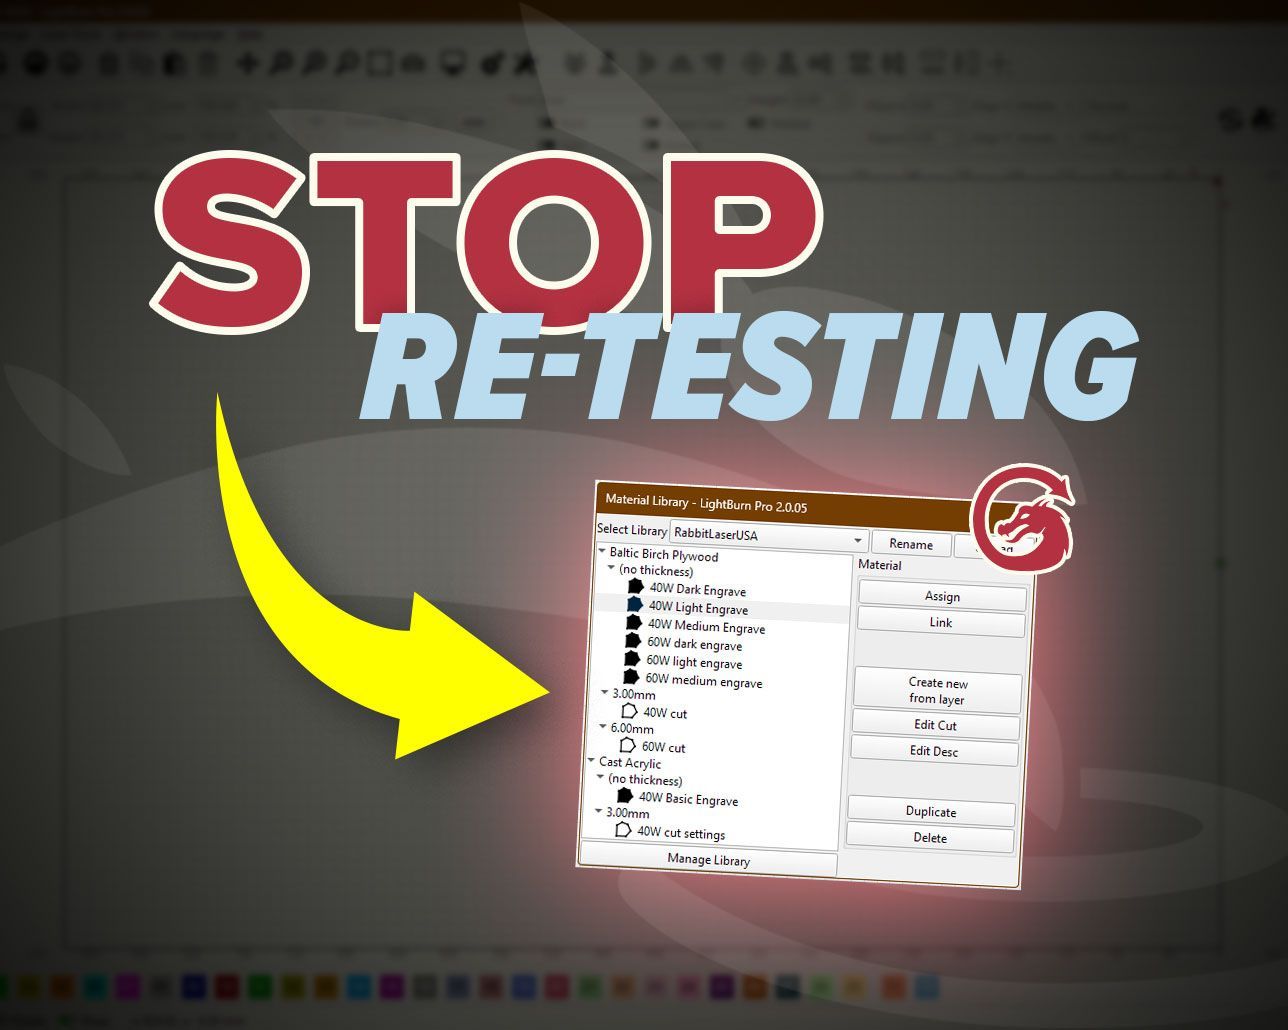
Stop re-testing. Save proven engraving and cutting settings in LightBurn’s Material Library and apply them fast on future projects.