How We Engraved a 62-Inch Wooden Bench Back With LightBurn Print and Cut
Some projects are longer than the laser bed. That does not necessarily mean they are too large for the machine.
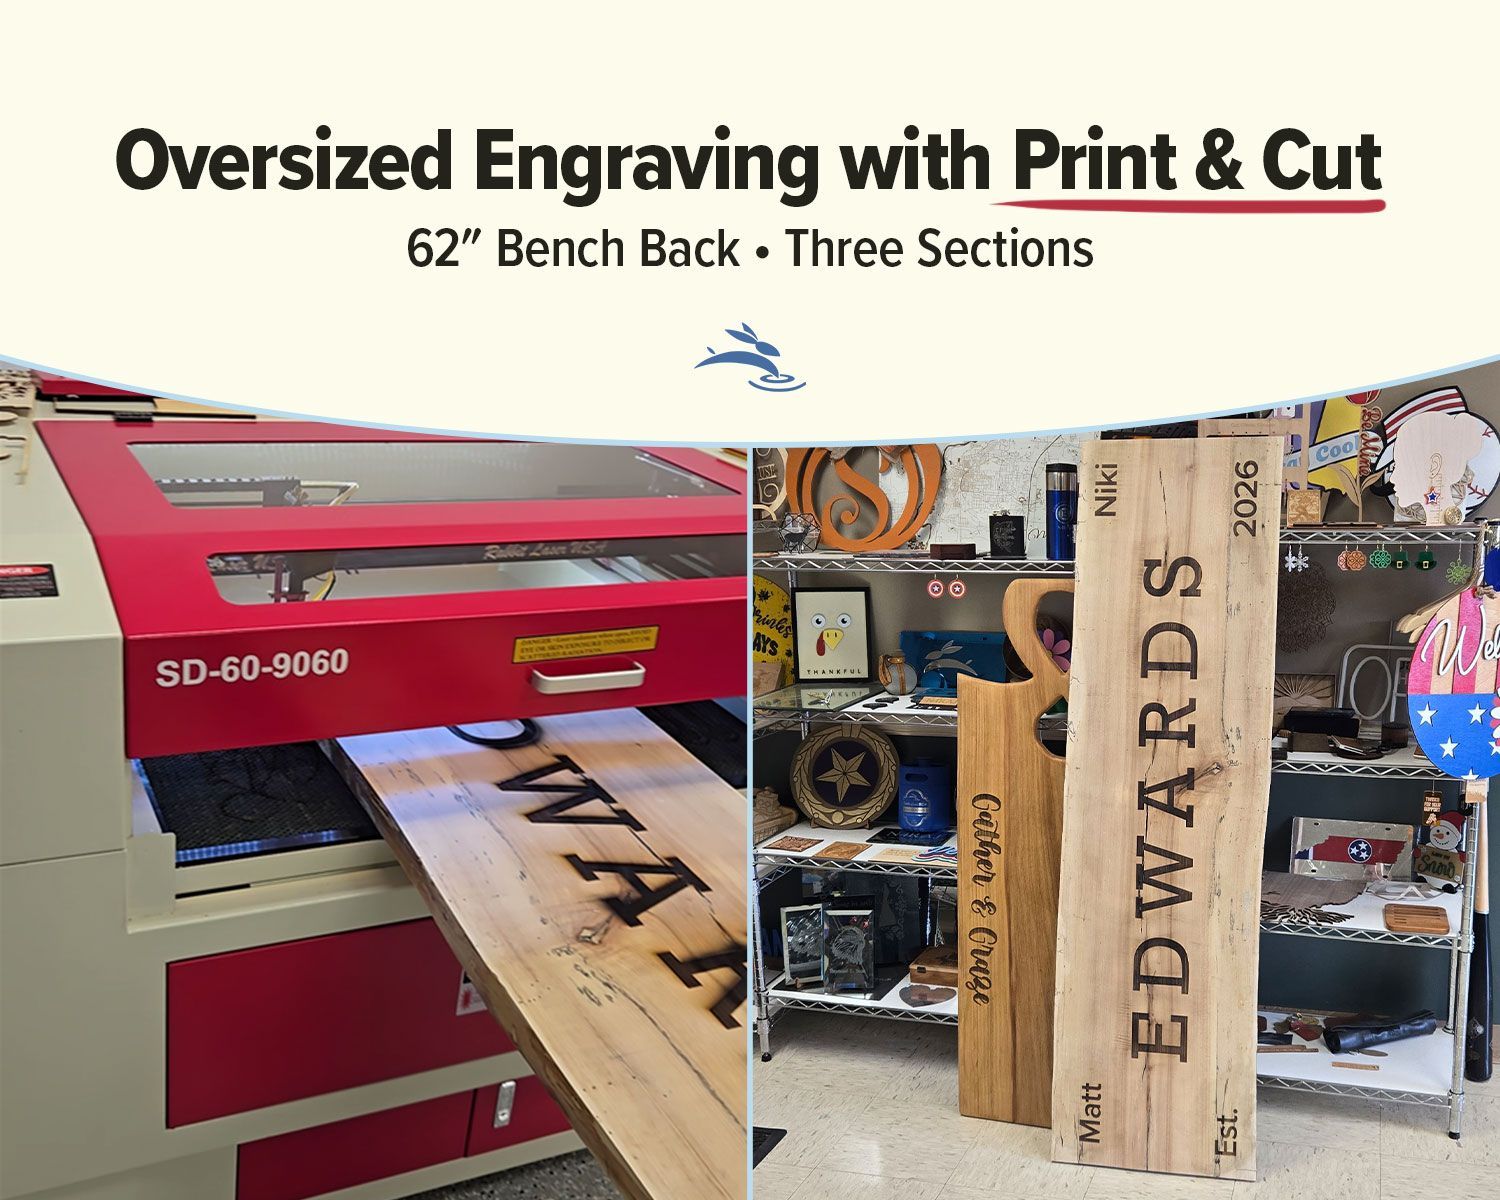
For this project, we engraved a personalized wooden bench back measuring 62 inches long and roughly 18 inches wide at its widest points. Because of the wood’s natural edges, the width was not completely uniform.
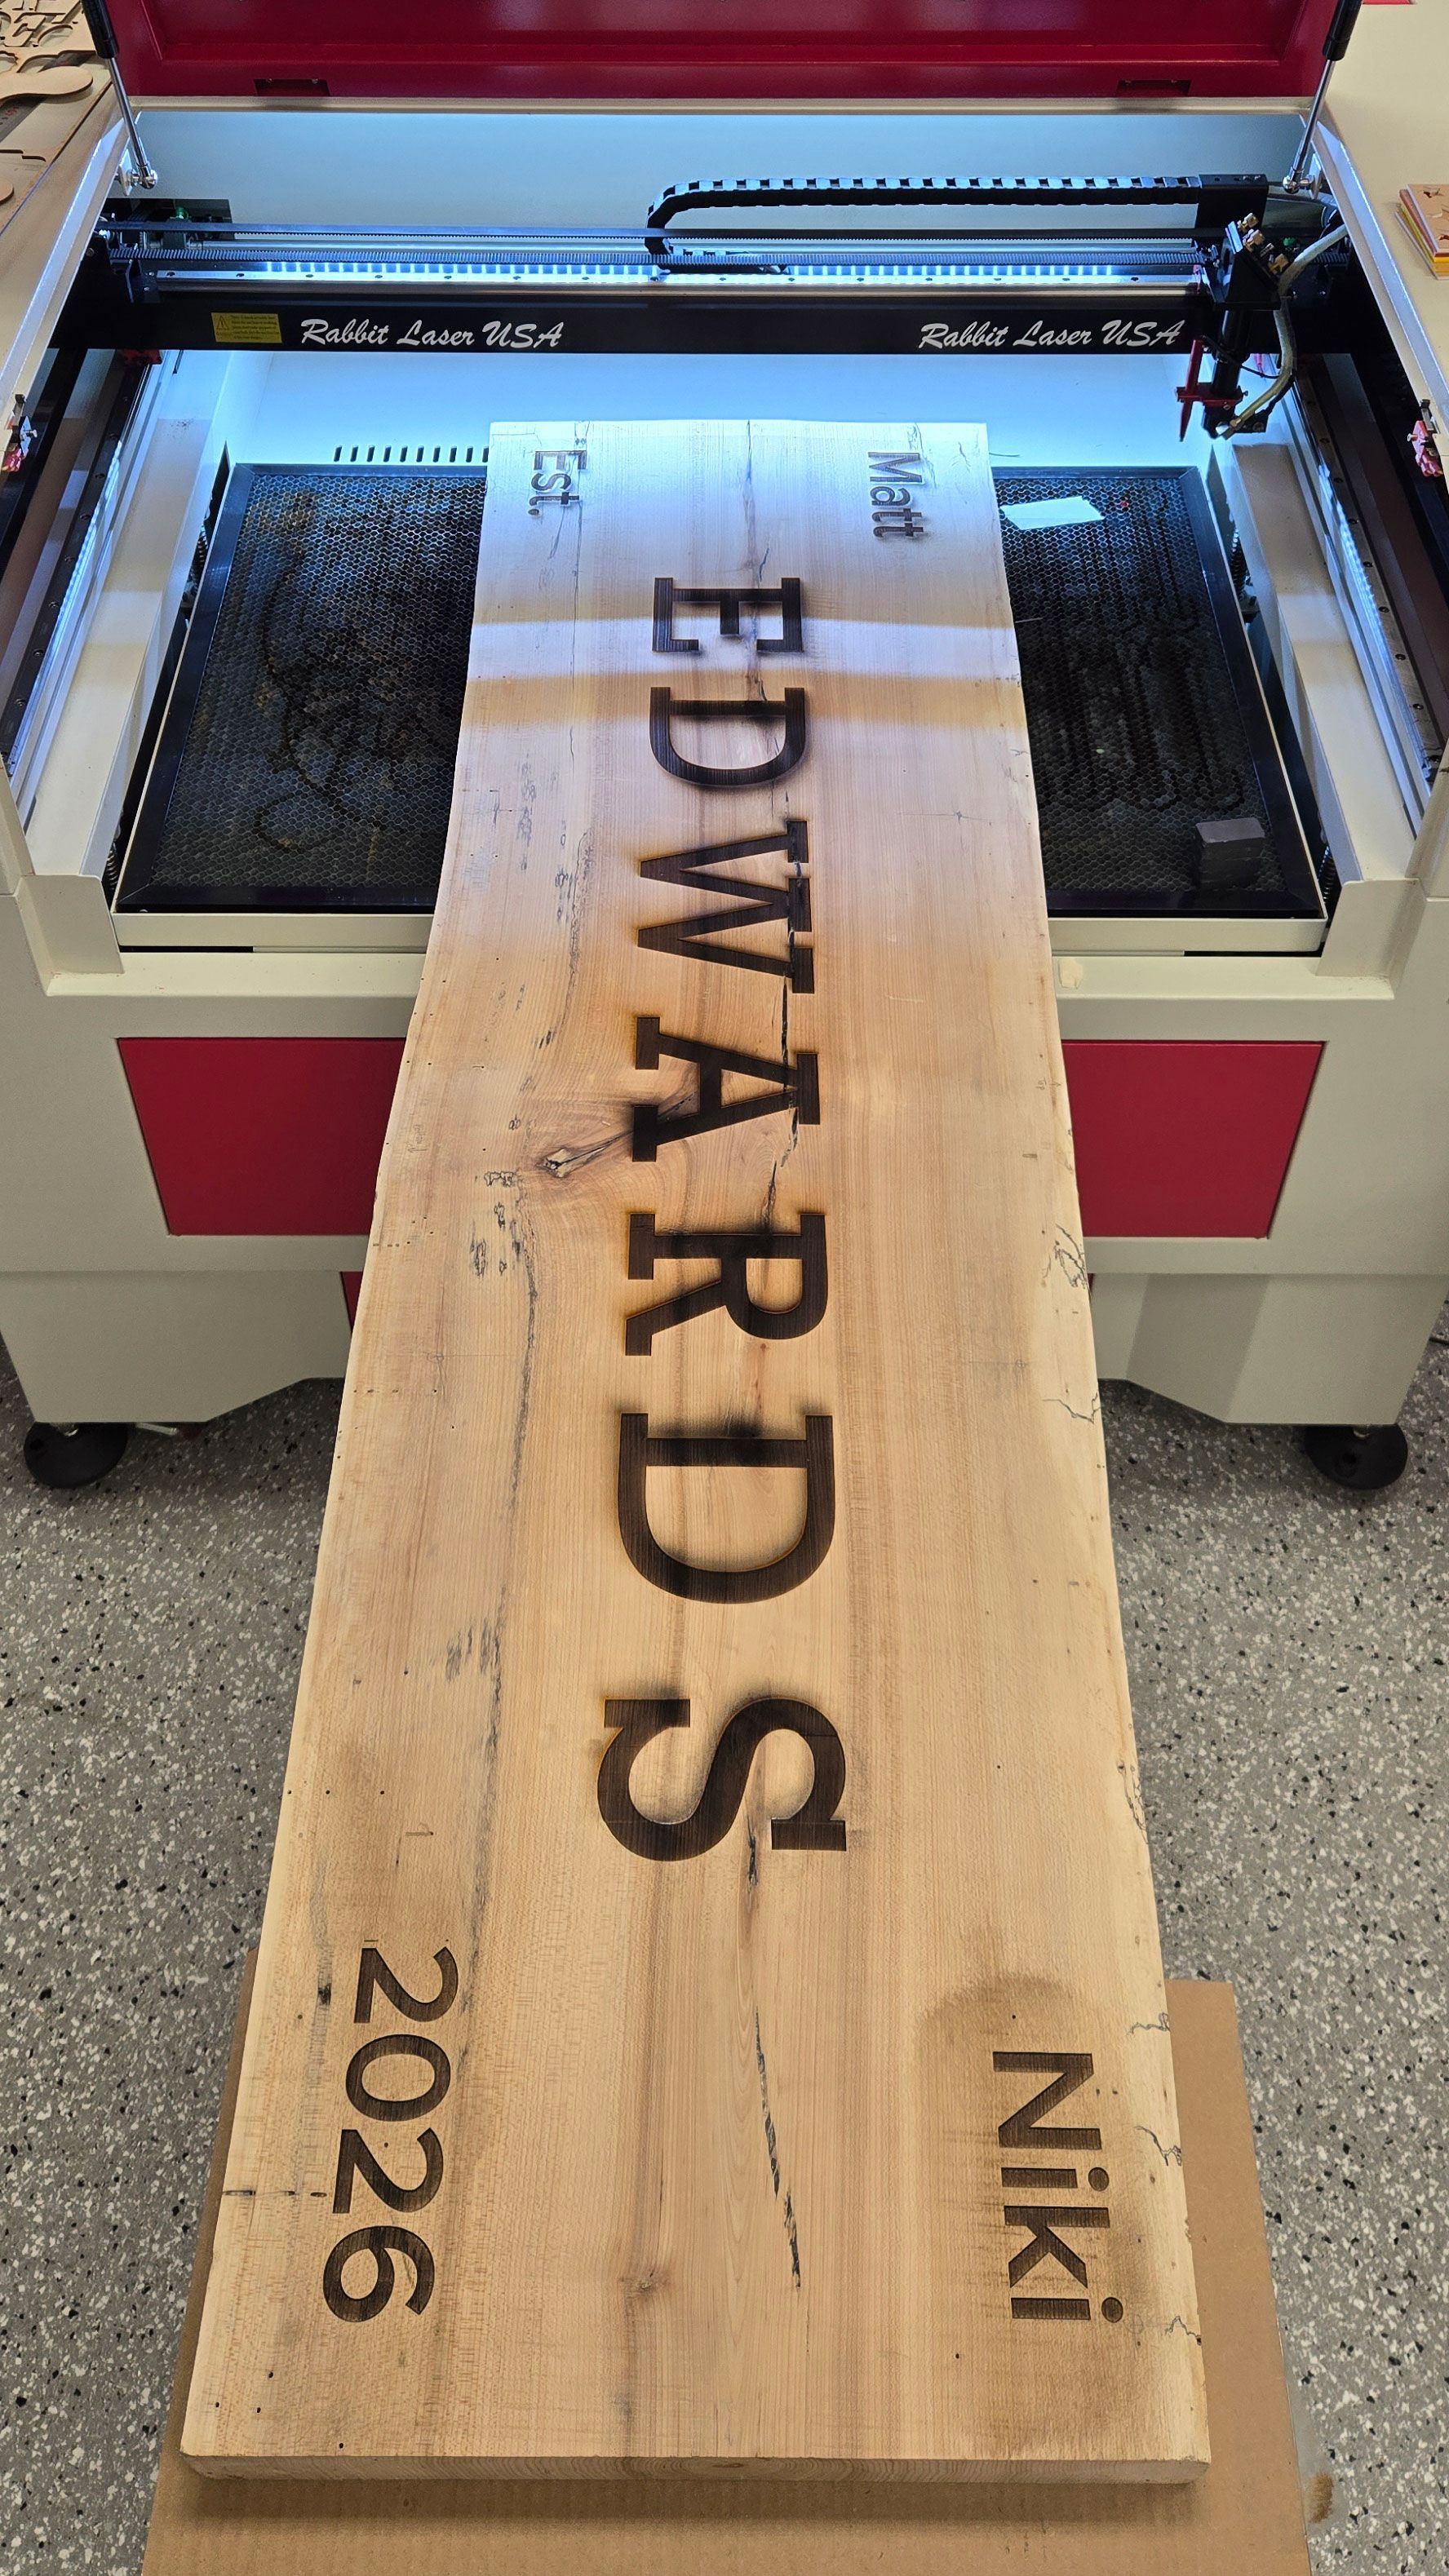
The design featured the family name across the center, with the first names placed at opposite ends and the established year near the bottom corners.
The board could not fit completely inside the laser, so we divided the design into three sections. We then used the machine’s pass-through doors and LightBurn’s Print and Cut feature to reposition the board while keeping the artwork aligned.
The software handled the digital alignment, but the physical setup was just as important. A cardboard template, pencil marks, proper material support, framing, and repeated focus checks all played a part in the final result.
What Is LightBurn Print and Cut?
LightBurn Print and Cut helps realign a job after the material has been moved.
The feature uses two known target positions on the material. Once those positions are matched with the same points in the LightBurn file, the software adjusts the remaining artwork to the material’s new location.
Print and Cut is commonly associated with cutting around printed graphics, but it can also be helpful for oversized engraving projects that must be completed in multiple sections.
Examples include:
- Long wooden signs
- Bench backs
- Door panels
- Nameplates
- Wall décor
- Long boards and planks
- Projects removed and returned to the machine
For this project, Print and Cut allowed us to move the bench back through the laser and continue the engraving without relying on measurements alone.
Project Overview
Project: Personalized wooden bench back
Length: 62 inches
Width: Roughly 18 inches at the widest points
Design: Large centered family name with first names and established year
Machine used: Rabbit Laser USA SD-60-9060
Software: LightBurn
Number of sections: Three
Alignment method: Cardboard template and penciled registration marks
Material support: Stool and scrap material
Main challenge: Maintaining focus across an uneven wood surface
Why We Divided the Design Into Three Sections
The SD-60-9060 provides approximately 24 inches of work area in the direction the board was fed through the machine.
Because the bench back measured 62 inches long, dividing the design into only two sections would not have provided enough room. Three sections were needed to keep each portion of the artwork within the usable engraving area.
The sections were designed to meet edge to edge without intentional overlap. That made accurate positioning especially important.
A small shift between sections could have caused:
- Incorrect spacing between letters
- Visible gaps in the design
- Overlapping artwork
- One section sitting higher or lower than another
- Smaller text landing in the wrong position
The full layout was completed before the artwork was divided. This helped preserve the original spacing and ensured the three sections would still form one continuous design.
Setting Up the Design in LightBurn
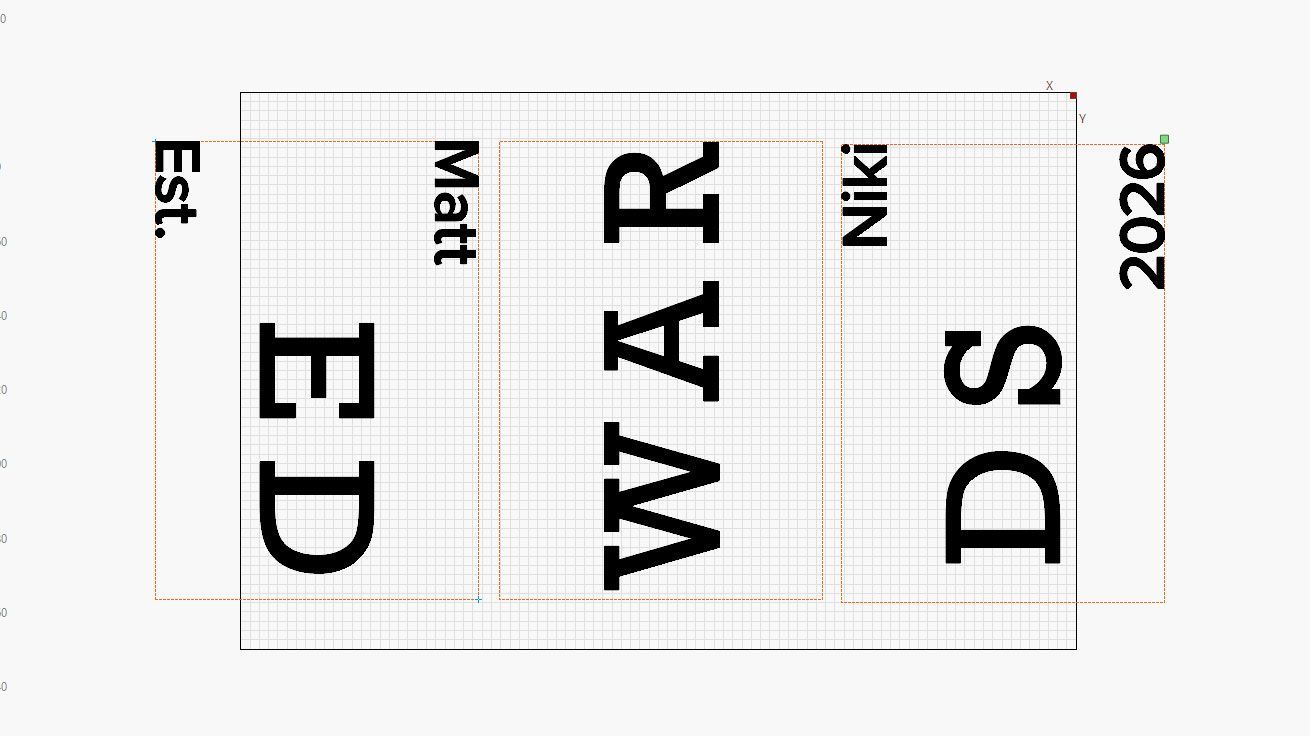
The complete family design was created at its final size in LightBurn.
The family name was centered across the board. The first names were placed on opposite sides, while “Est.” and the year were positioned near the bottom corners.
Once the full layout was approved, it was divided into three workable sections based on the available engraving area.
Keeping everything inside one master layout made it easier to confirm that the position of each element remained correct. The sections were not treated as three separate designs. They were three parts of one larger project.
Creating a Cardboard Positioning Template
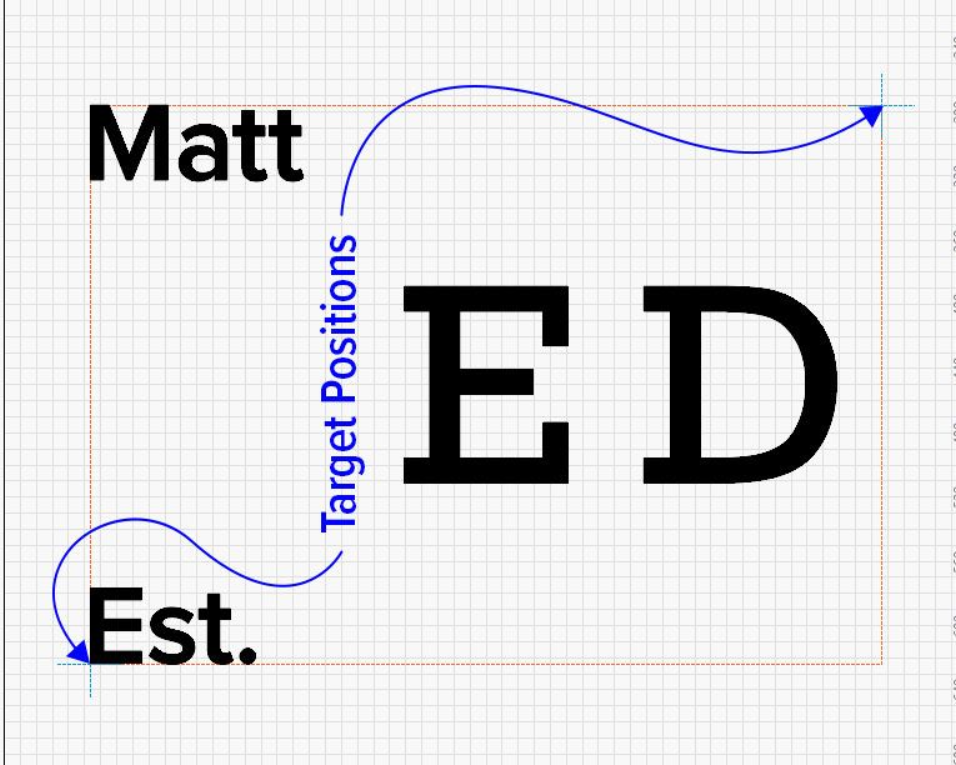
Before placing the board inside the laser, we created a bounding box around the complete design area.
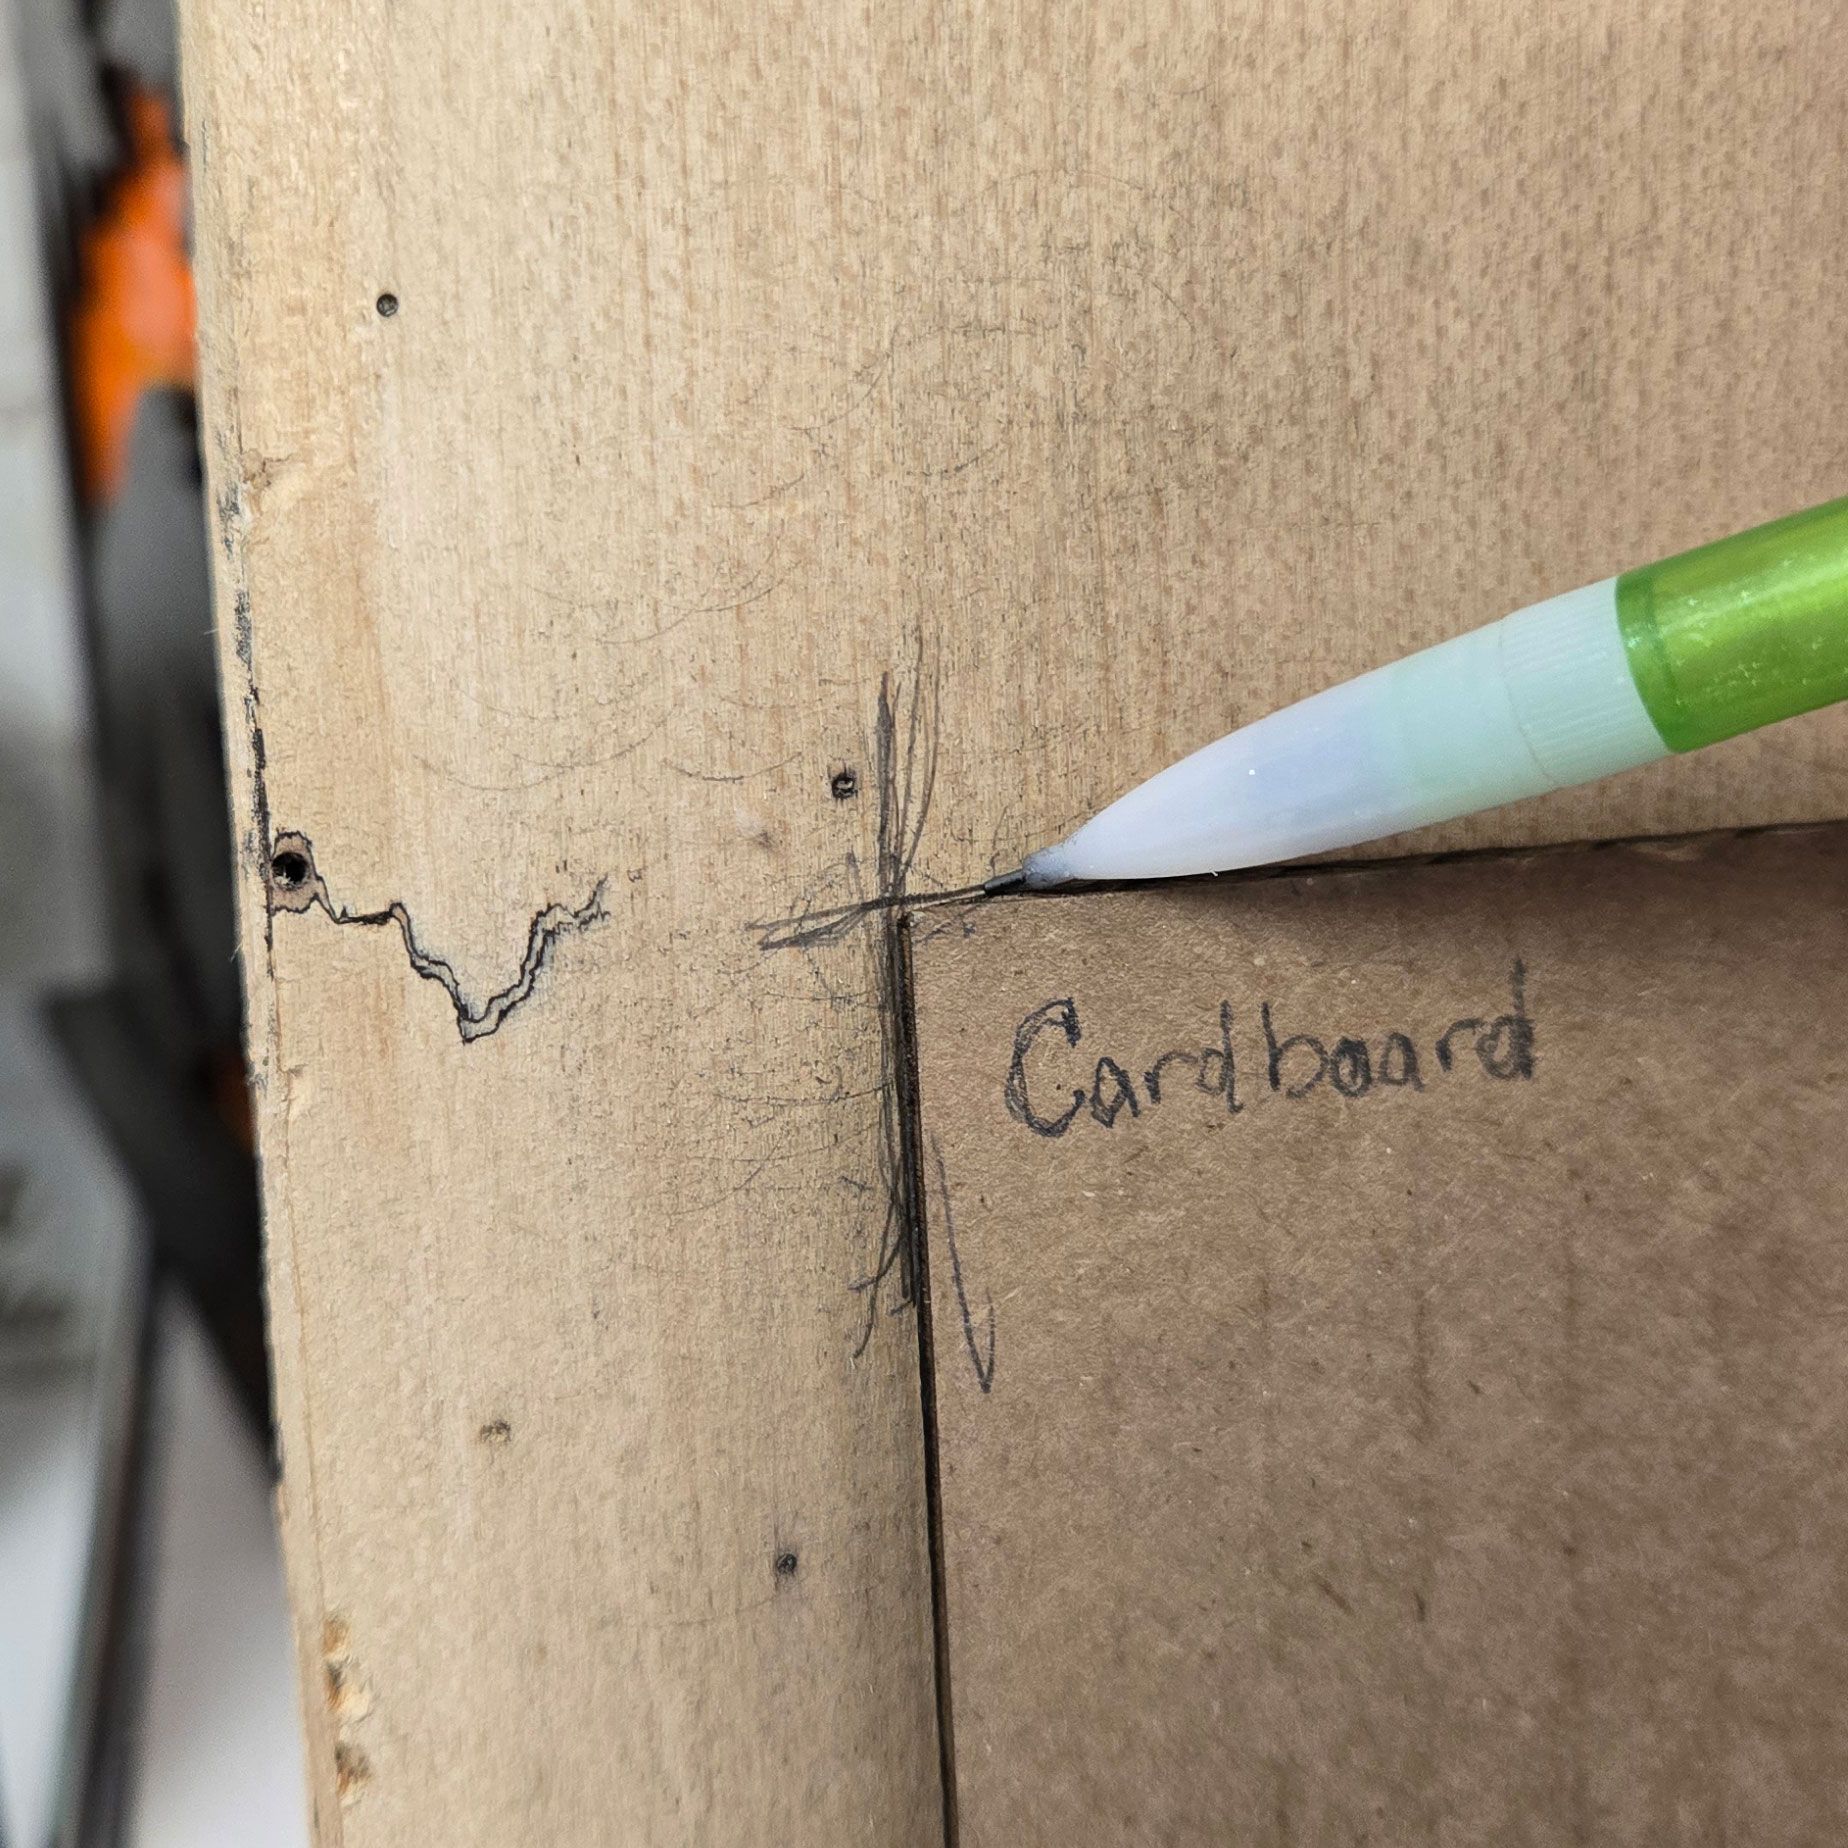
That bounding box was cut from cardboard to create a full-size positioning template. The cardboard was placed on the bench back and adjusted until the design area appeared centered on the wood.
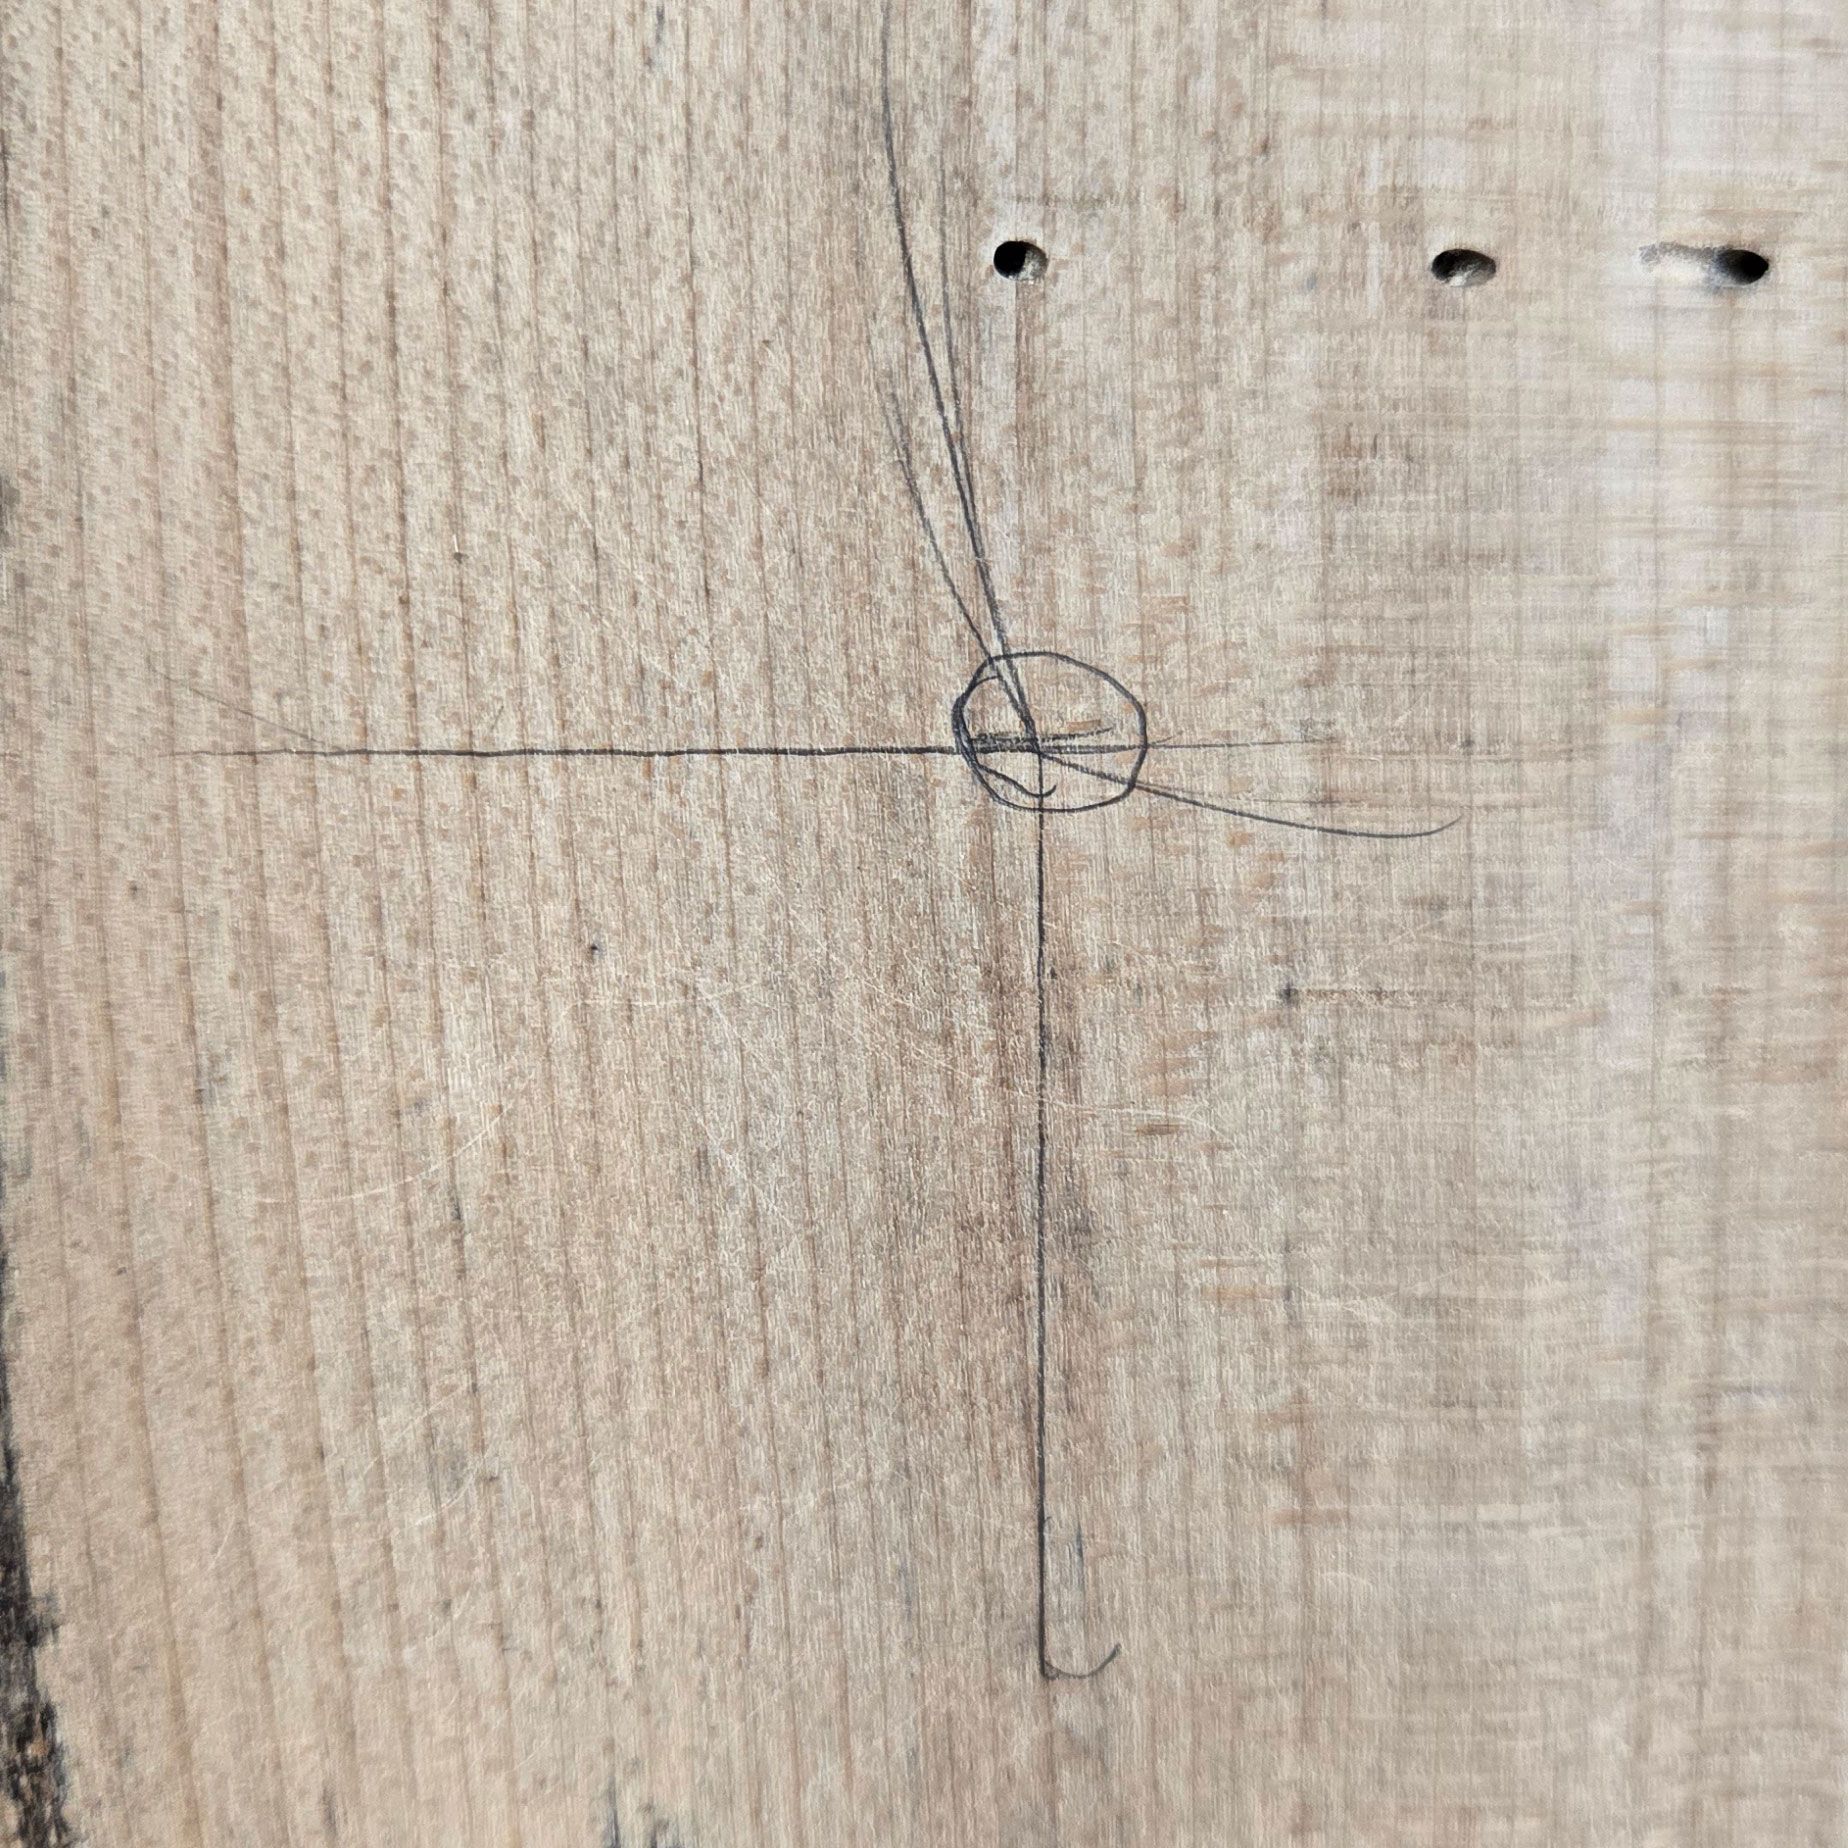
Once the placement was confirmed, the corners of the cardboard were marked lightly with a pencil.
Those marks provided known reference points for the project. They helped us:
- Confirm the overall position of the design
- Keep the artwork centered on the irregular board
- Locate the design area after the board was moved
- Create target positions for Print and Cut
This was a simple step, but it removed a great deal of guesswork later.
A digital file can tell you where artwork belongs on the screen. The cardboard template helped connect that digital layout to the real piece of wood.
Supporting the Bench Back
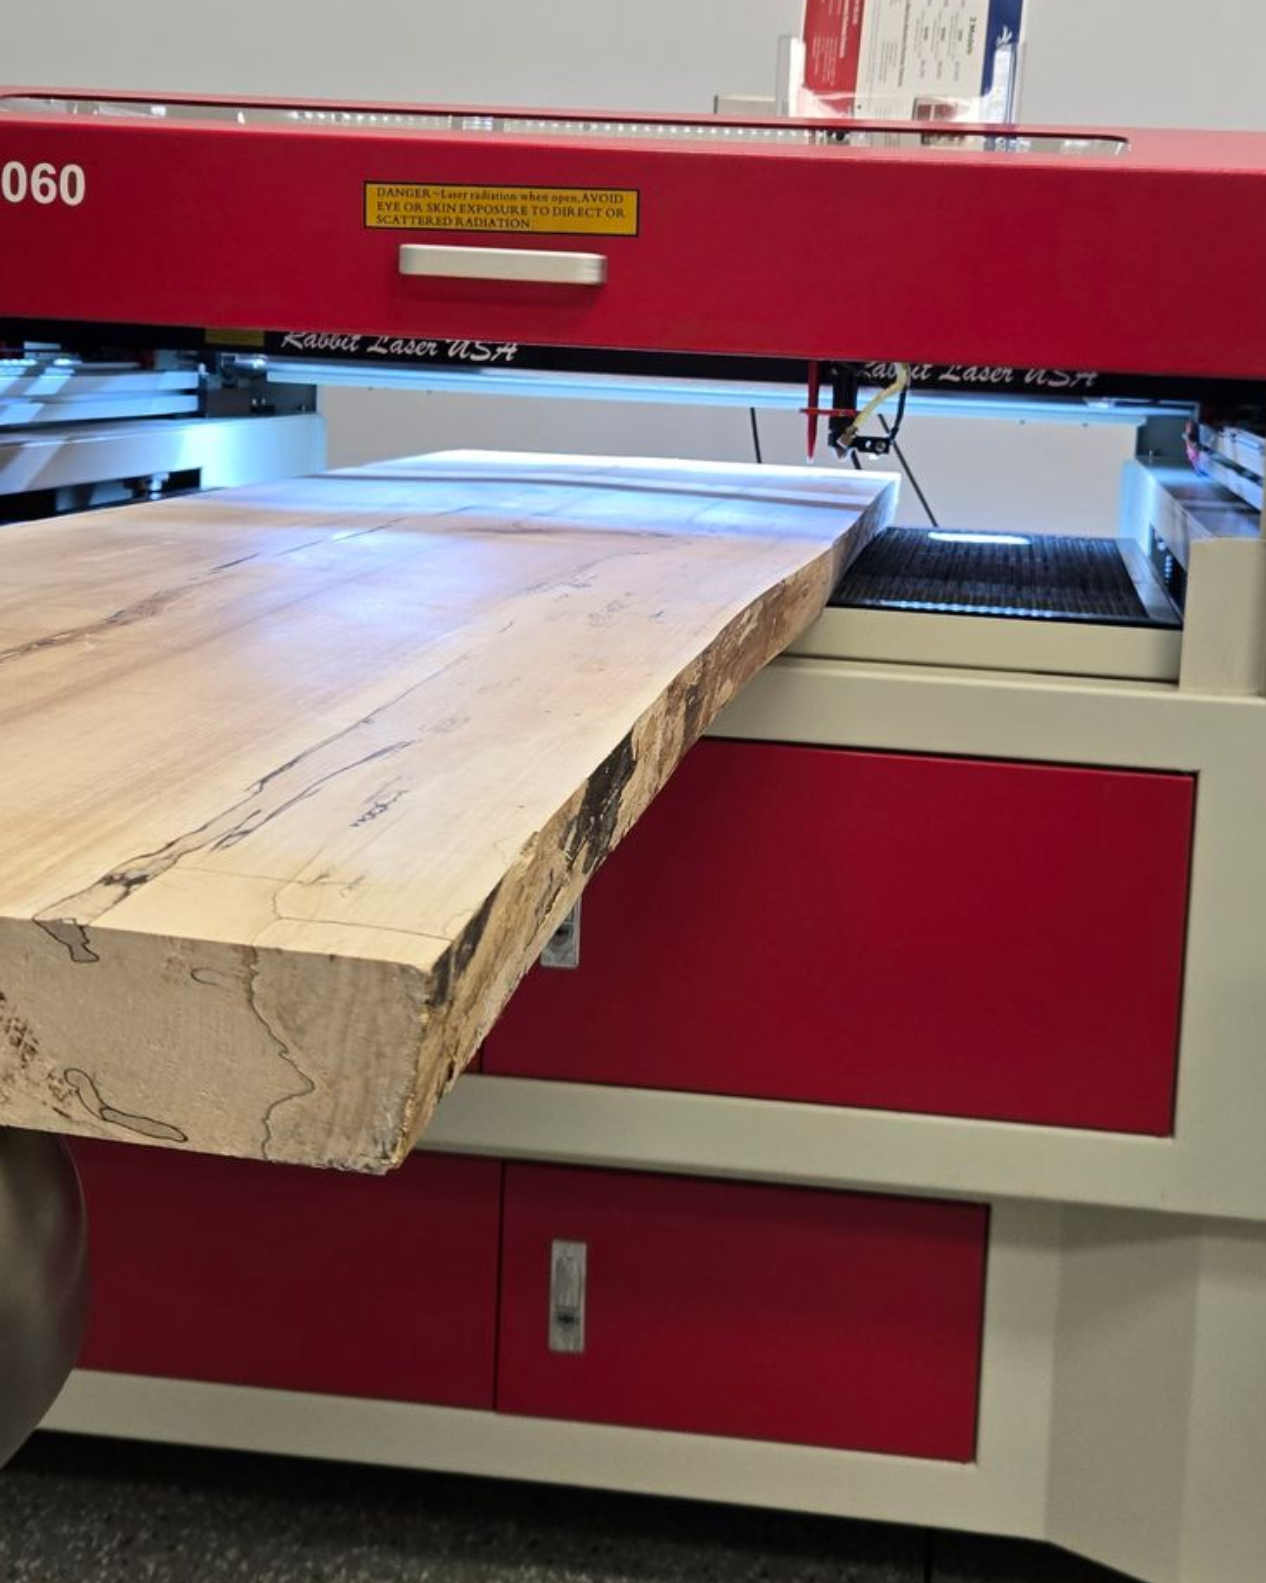
Pass-through doors give long material a path through the machine, but they do not support the material outside the cabinet.
The bench back needed to remain level and stable as it extended beyond the laser. If the unsupported end dropped, rotated, or shifted sideways, the engraving area inside the machine could move with it.
We used an extra stool and pieces of scrap material to support the board at the correct height. The support was adjusted until the section inside the machine remained level with the workbed.
The goal was to prevent the board from:
- Rocking
- Sliding sideways
- Rotating while being moved
- Changing height during alignment
- Pulling against the portion inside the machine
The board was stabilized again after every move.
The Three-Section Engraving Process
1. Position and frame the first section
The first portion of the board was loaded through the pass-through opening and positioned inside the work area.
Before engraving, we used LightBurn’s Frame function to trace the outside boundary of the first section. This helped confirm that the artwork would land within the planned area.
We also checked:
- Material clearance
- Focus
- Board stability
- Available machine travel
- Design placement
- Support outside the machine
Once the setup was confirmed, the first section was engraved.
2. Move and stabilize the board
After the first section was completed, the bench back was carefully moved through the pass-through doors until the next portion of the design was inside the work area.
The stool and scrap supports were adjusted as needed to keep the new engraving area level.
The board was stabilized before beginning the alignment process. This was important because even a small amount of rotation could change where the next section landed.
3. Set the Print and Cut targets
Two visible pencil marks that matched known positions in the LightBurn file were selected as target positions.
The laser was moved to the first mark, and that location was identified as the first Print and Cut target. The process was then repeated with a second mark.
LightBurn used those two locations to understand how the board had moved and to align the remaining artwork with its new position.
4. Frame before engraving
After the Print and Cut alignment was completed, the next section was framed.
Framing provided one final check before the laser began engraving. It helped confirm that the section:
- Lined up with the completed artwork
- Remained inside the usable work area
- Did not extend beyond the planned boundaries
- Matched the position of the physical board
Once the placement was confirmed, the next section was engraved.
The same process was repeated for the third and final section.
The Main Challenge: Focus on an Uneven Surface
Repositioning the board was only part of the challenge.
The bench back had a natural, uneven surface. Its height changed slightly across the length of the wood, which affected both focus and alignment.
On this setup, the red positioning dot does not travel directly through the same path as the CO₂ laser beam. When the surface height changes, the position of that visible dot can shift slightly in relation to the beam’s actual location.
Because of this, we needed to focus the machine at each selected registration point before confirming its position.
That meant every section required attention to:
- Surface height
- Focus at the first target
- Focus at the second target
- Board support
- Registration mark placement
- Framing before engraving
Print and Cut can correct for a change in the board’s position. It cannot physically flatten an uneven board or correct poor focus.
This was the most demanding part of the project and one of the most important lessons from it.
The Finished Bench Back
The positioning, focusing, framing, and engraving process was repeated across all three sections.
When complete, the large family name read as one continuous engraving across the full 62-inch board. The first names and established year remained positioned near the outer corners as planned.
Although the artwork had been engraved in three separate stages, the finished project appeared as one complete design.
Lessons From This Oversized Engraving Project
Build the complete design first
Create the artwork at its final size before dividing it. This protects the spacing and placement of the full layout.
Use clear registration points
Choose marks that are easy to identify after the material has been moved. A cardboard template can help connect the digital layout to the physical project.
Keep the board supported
Long materials need stable support outside the machine. The board should remain level and should not rotate, rock, or pull against the work area.
Frame every section
Do not assume the next section is correct because the previous one worked. Frame after every repositioning.
Check focus after moving the material
An uneven board may sit at a different height after it is moved. Confirm focus at both target positions before completing the alignment.
Keep a master LightBurn file
Save the complete design and the divided production layout together. This makes the project easier to adjust, repeat, or troubleshoot later.
Allow extra setup time
Oversized projects usually require more preparation than a job that fits completely inside the laser. Most of that time is spent on support, alignment, focus, and checking—not on the engraving itself.
A Note About Engraving Settings
We are not listing the exact power and speed settings used for this project because the wood species was unknown and the surface was irregular.
Results can change based on:
- Wood species
- Surface condition
- Moisture
- Laser power
- Lens choice
- Focus
- Desired engraving darkness
- Machine condition
Always test your material before engraving the final project. Settings that work well on one board may produce a completely different result on another.
Can This Process Work on Other CO₂ Laser Sizes?
Yes. This project was completed on the SD-60-9060, but the same general method can be used with other Rabbit Laser USA CO₂ machine sizes equipped with pass-through doors.
The important limits are:
- The material must fit within the machine’s usable width.
- Each design section must fit inside the work area.
- The material must be properly supported.
- The artwork must be divided and aligned carefully.
- The pass-through path must remain clear.
A smaller workbed may require more sections and more repositioning. A larger workbed may allow the same project to be completed with fewer moves.
The best machine size depends on the width of your typical material, the size of your normal projects, and how often you plan to work with oversized pieces.
Safety When Working With Long Materials
Keep the pass-through path clear and make sure the material cannot tip, bind, or pull against the machine.
Long projects may require additional support on both sides of the laser. Check that the material can move freely before starting, and never leave the machine unattended while it is operating.
Oversized Engraving Takes More Than Software
A project that is longer than the laser bed may still be possible when the material fits through the machine, the artwork can be divided properly, and every section can be safely supported and aligned.
For this bench back, the finished result came from combining:
- LightBurn Print and Cut
- Pass-through doors
- A three-section file layout
- A cardboard positioning template
- Pencil registration marks
- Proper material support
- Framing and focus checks
Print and Cut handled the digital alignment. The template, support system, and setup checks kept the physical project under control.
When all of those pieces work together, oversized engraving becomes far more manageable.
Explore Rabbit Laser USA’s CO₂ laser machines or contact our team to discuss your material sizes, workspace, and project needs.
Frequently Asked Questions
What is LightBurn Print and Cut?
LightBurn Print and Cut is an alignment feature that helps reposition a job after the material has been moved. It uses two known target positions to match the digital design with the material’s new location.
Can Print and Cut be used for engraving?
Yes. Print and Cut can help align engraving and cutting jobs when the material must be moved or returned to the machine.
Can I engrave something longer than my laser bed?
Yes, when the machine has pass-through access and the material fits within its usable width. The design must be divided into sections that fit inside the available work area.
Do I need pass-through doors for an oversized project?
Pass-through doors are needed when the material itself is longer than the machine cabinet and must extend outside the laser during the job.
How do you keep multiple engraving sections aligned?
Use stable material support, known registration marks, LightBurn Print and Cut, focus checks, and framing before engraving each section.
Can this process be used on different Rabbit Laser USA CO₂ machine sizes?
Yes. The same general process can be used on Rabbit Laser USA CO₂ machines with pass-through doors, provided the material fits within the usable width and each design section fits inside the work area.