Crafting Wood Inlays with Laser Precision

Wood inlays have long been admired for their intricate beauty, traditionally crafted by hand with meticulous care. But let's face it, anyone who's ever attempted a handcrafted inlay for the first time probably wished for a magic wand. Enter the modern laser cutter—your new best friend in the workshop, turning complex artistry into a project that's as fun as it is impressive.


What You’ll Need


Materials:


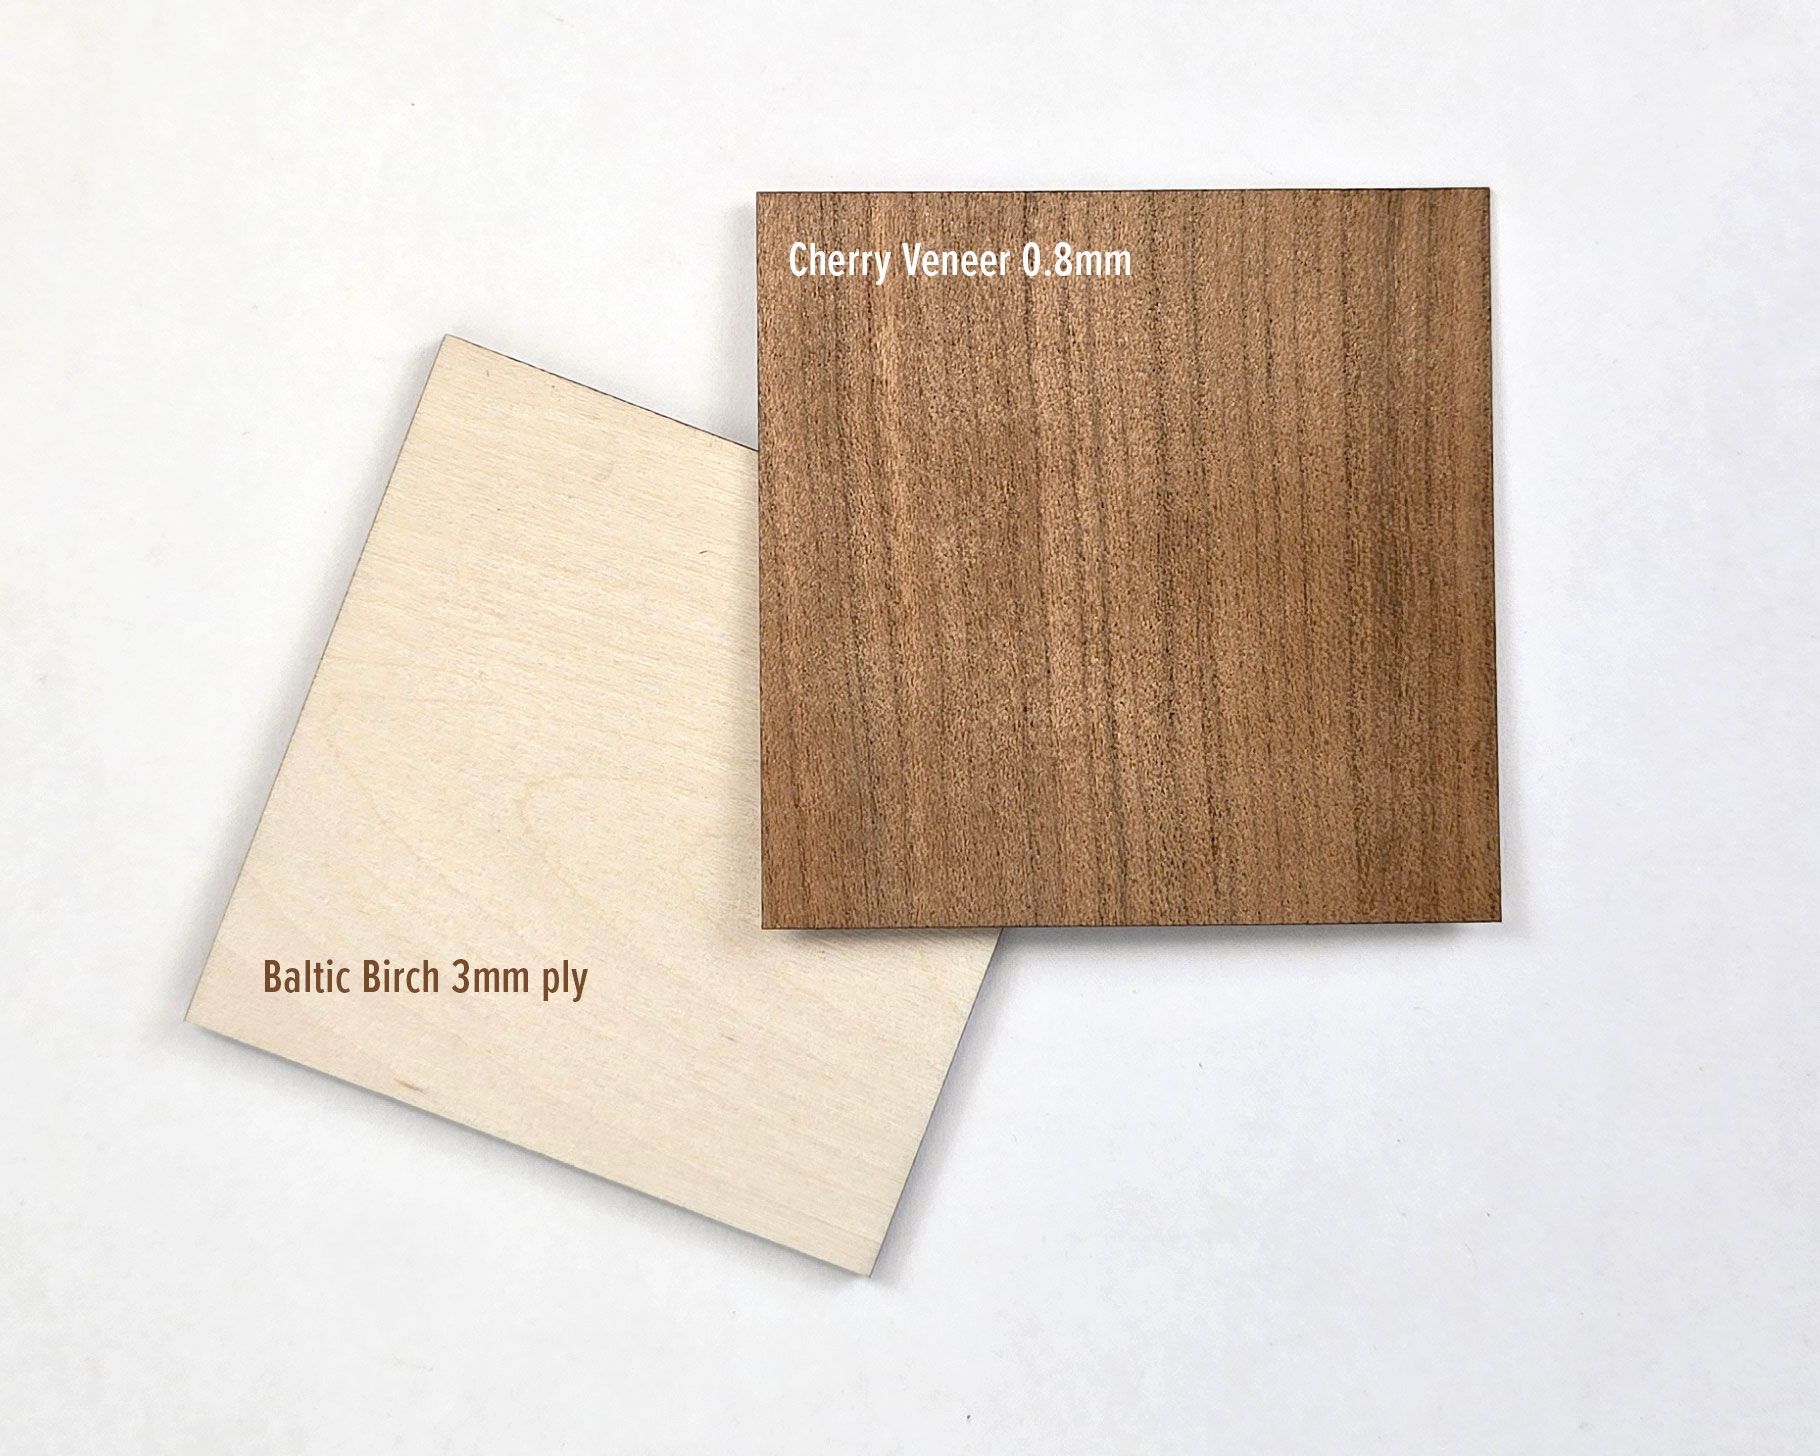
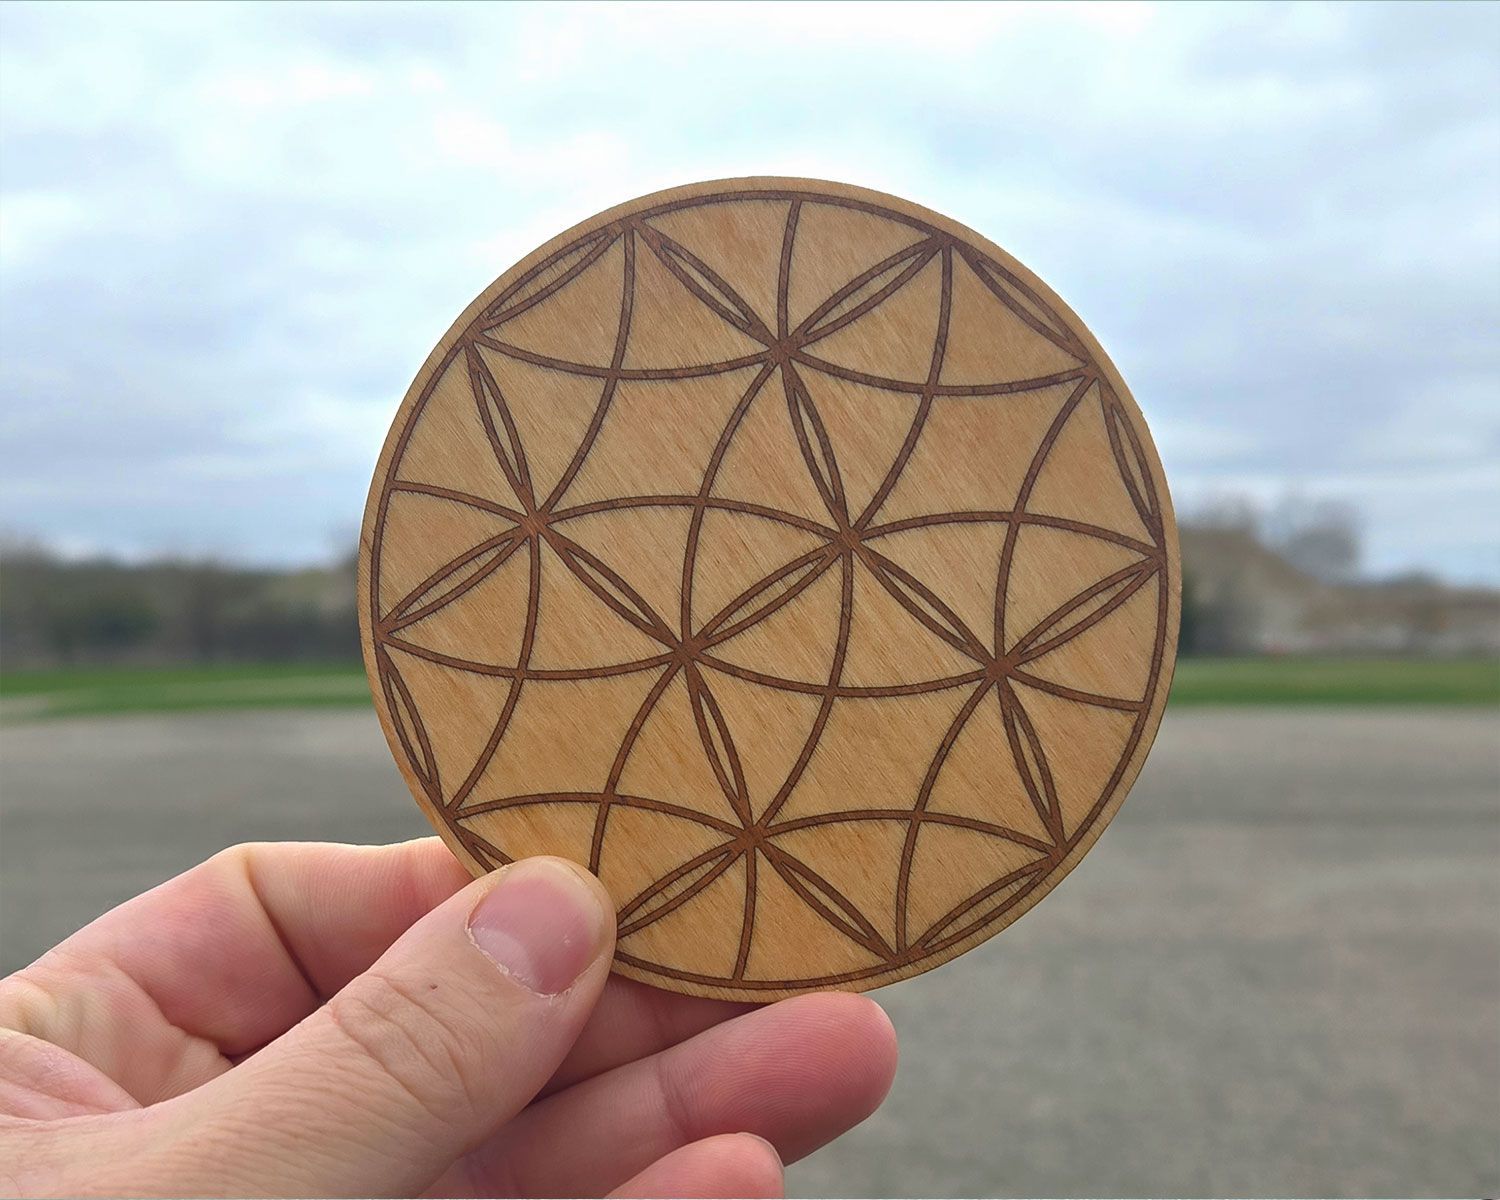
  • Wood: Use any suitable wood types based on what’s available to you and the desired visual contrast. For our project, we are using 3mm Baltic birch plywood as the base and cherry wood veneer for the inlay.
  • Adhesive: Any wood glue will work, though we recommend using a standard wood glue for its reliability and strength.
  • Finish: Select a finish that complements your wood type and enhances its natural beauty. We are applying Golden Pecan stain followed by clear spray polyurethane for a durable, glossy finish.


Tools:


  • Laser cutting and engraving machine
  • Safety gear for those using open bed machines
  • Sanding tools
  • Rubber mallet
  • Weights or hand clamps


Designing and Testing Your Inlay


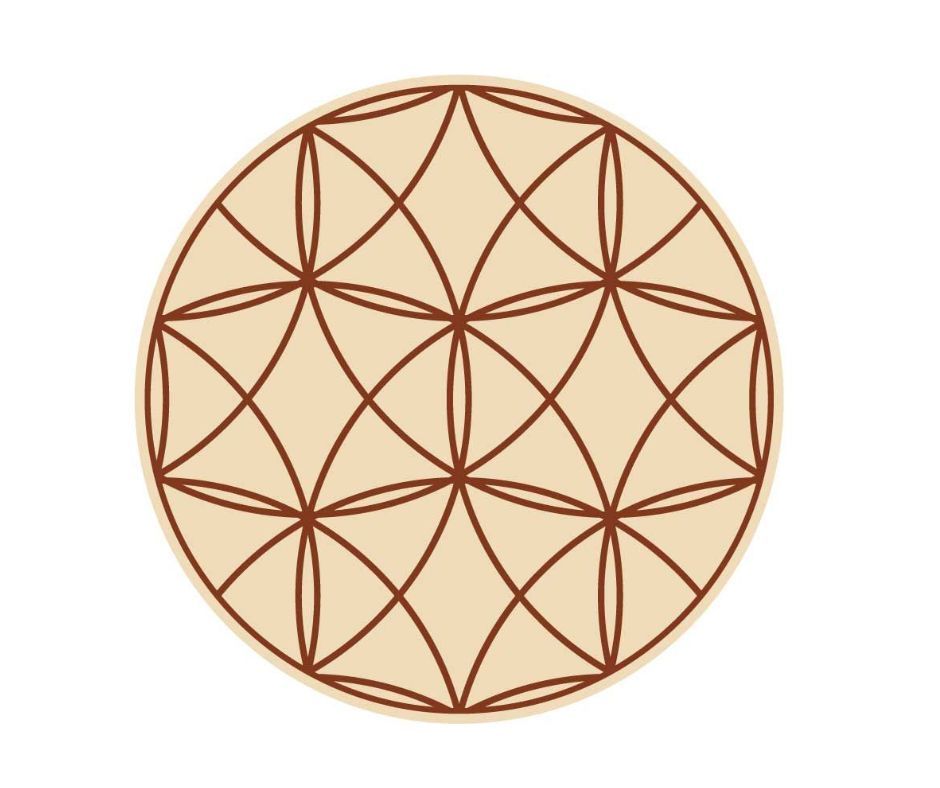
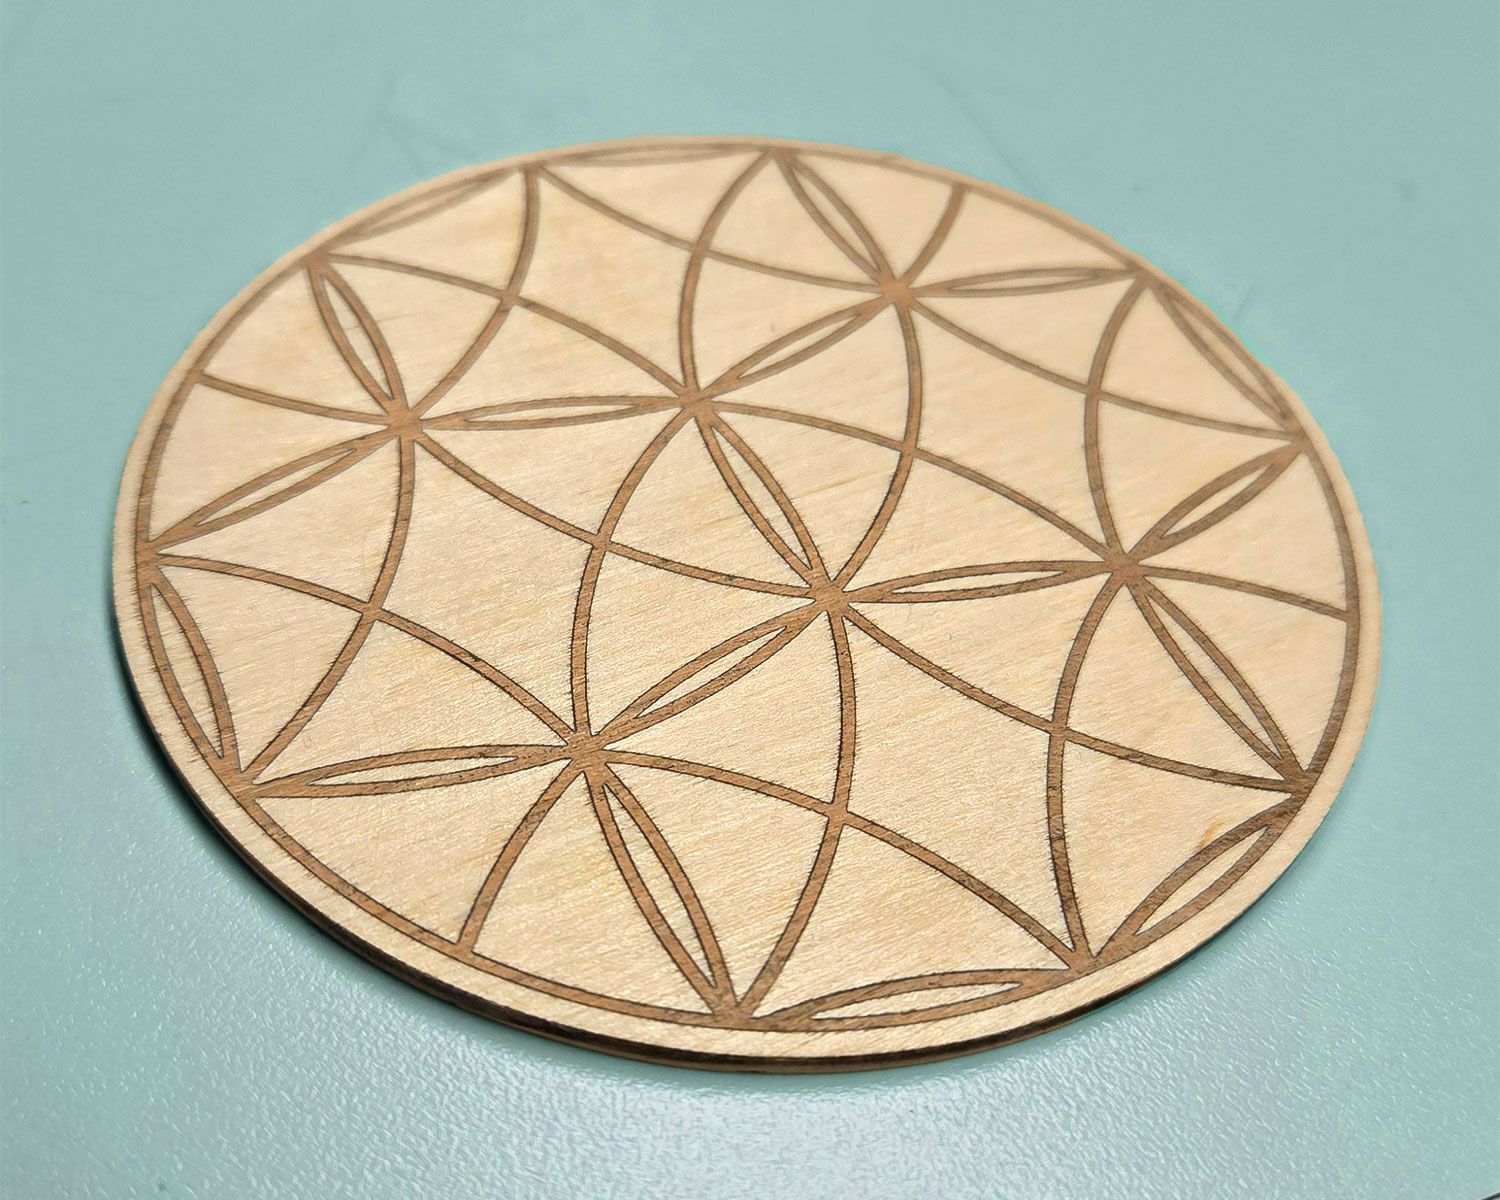
Before diving into your project, pick a design that speaks to you. We’re going with beginner-friendly geometric shapes for our coaster project—simple yet elegant. Once you’ve got your design, it’s time for the crucial step of testing. Every great show needs a dress rehearsal, and your material and engraving testing is just that.


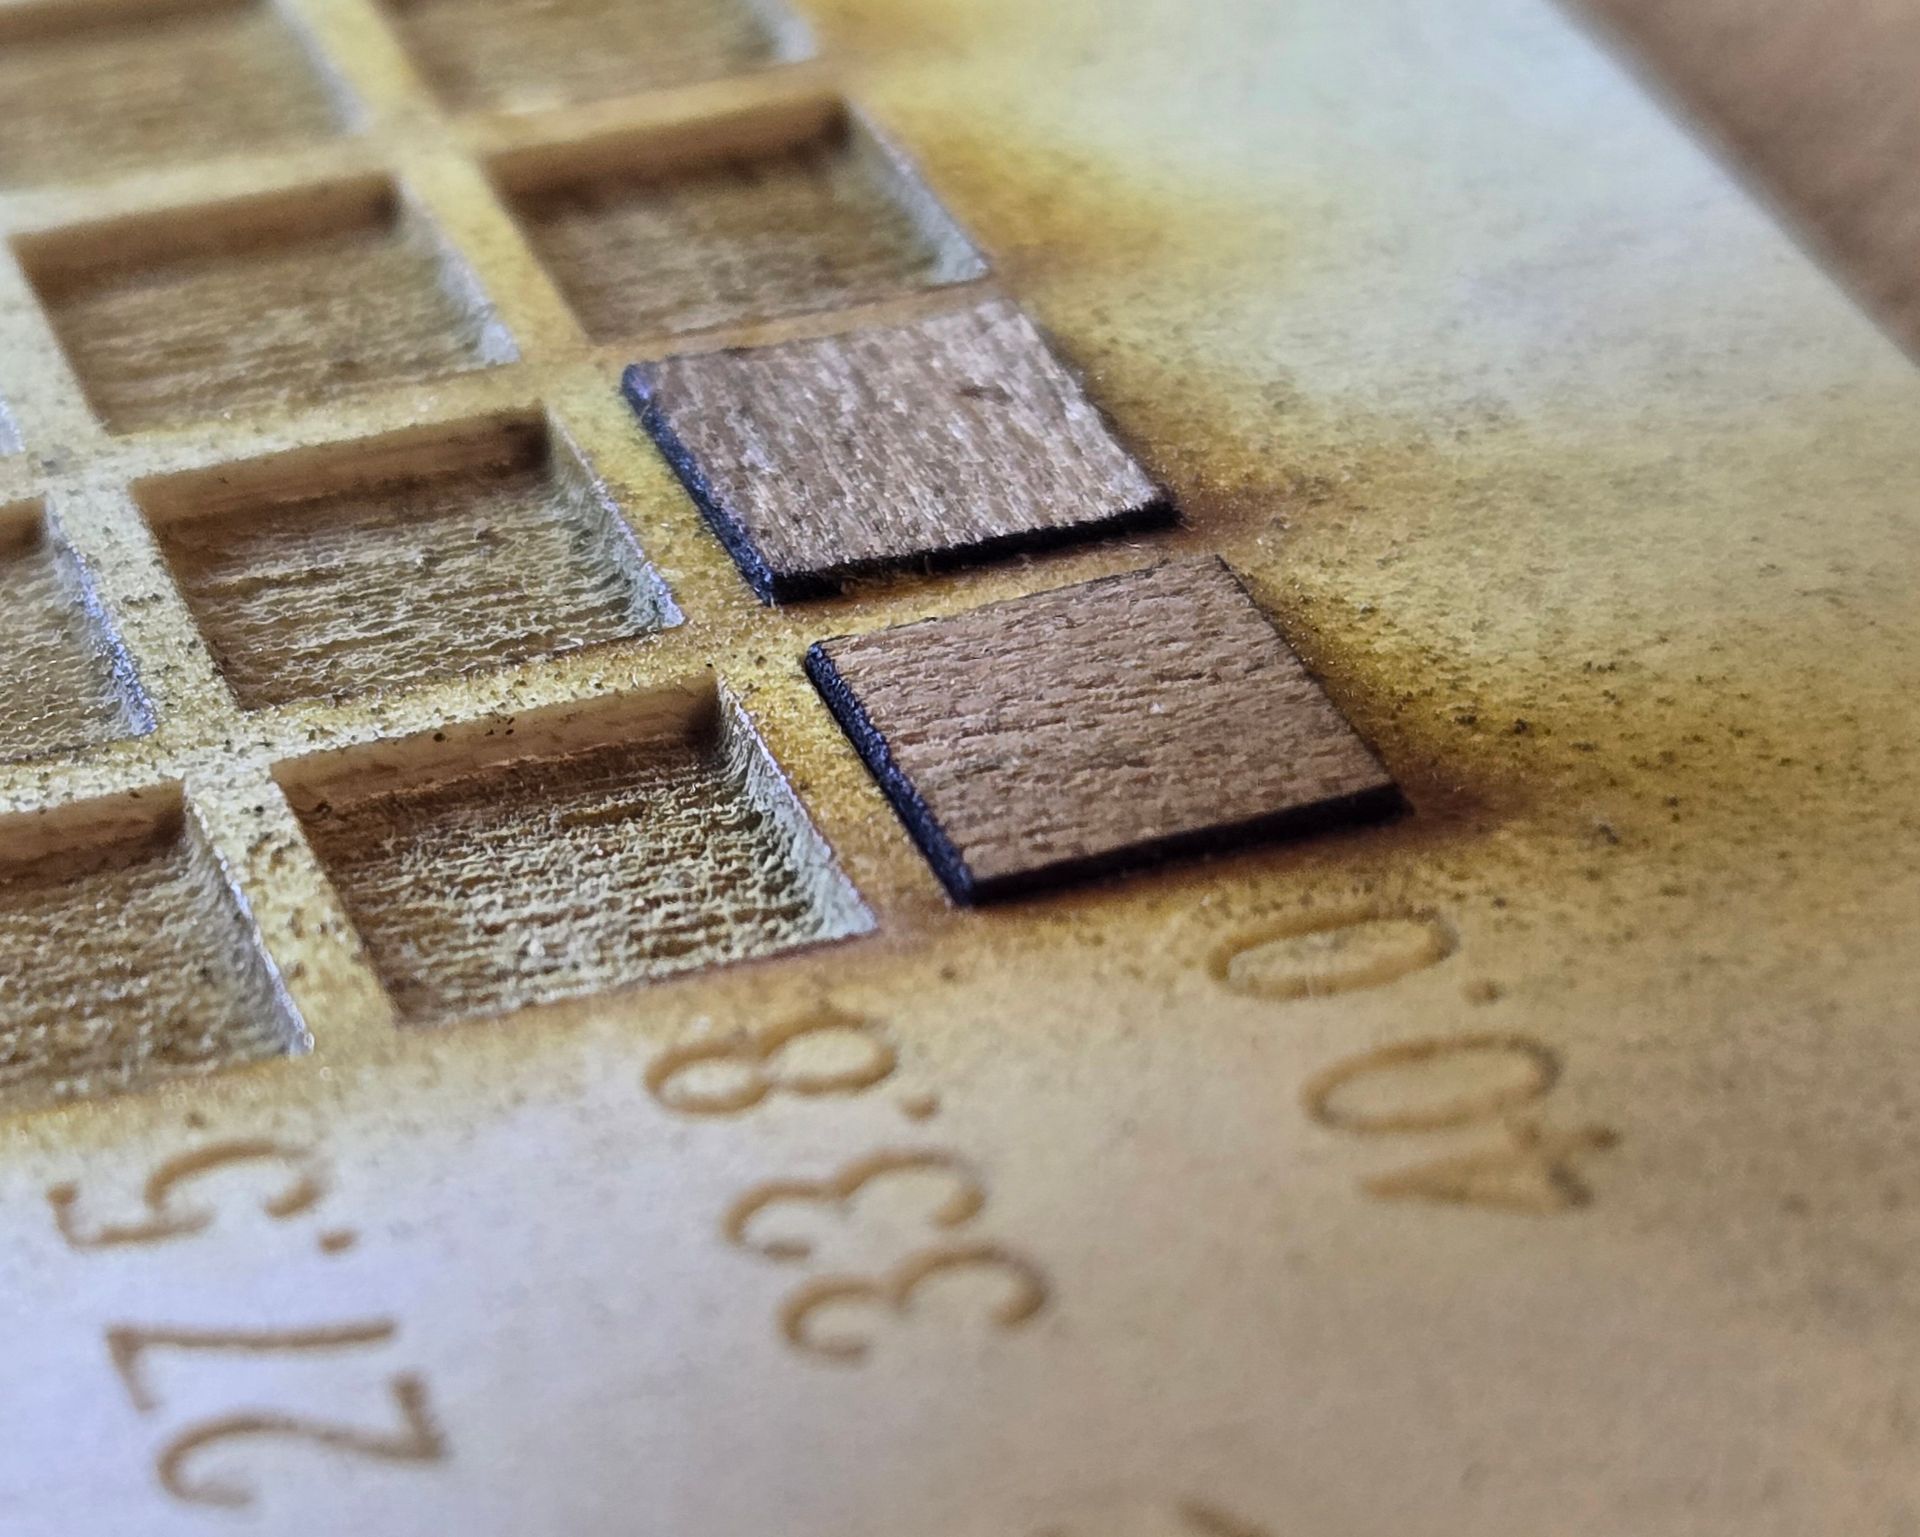
When testing your engraving settings, aim to have the cherry wood veneer protrude slightly above the surface of the Baltic birch base. This slight protrusion ensures that after sanding, the surface will be perfectly flush and smooth. Make sure to perform this test on a sample of your materials to find the exact depth and power settings that achieve this effect.


We’ll delve deeper into measuring and adjusting for kerf in our dedicated guide, "The Rabbit Laser USA Way: Measuring Kerf Size Made Simple". This guide will provide you with all the tips and tricks you need to get precise cuts every time.

Preparing the Wood

Choosing the right wood is crucial for your project. For this example, we're using 3mm Baltic birch plywood as the base and cherry wood veneer for the inlay to maximize visual contrast. To prepare your wood properly, start by ensuring that both your base and inlay materials are clean and free from any debris. This cleanliness is vital for achieving a precise and clean engraving and cut.


Before beginning your engraving and cutting, consider masking your materials. Applying a high-quality masking tape over the areas to be engraved or cut can significantly help in reducing residue from the laser process. This masking not only makes cleanup easier but also protects the surface of your wood from any potential scorch marks or excessive smoke staining, especially when working with lighter woods like Baltic birch.


Make sure to smooth down the masking tape firmly to prevent any bubbles or wrinkles that could interfere with the laser's path. The cleaner your application, the more consistent your engraving and cutting results will be.

The Laser Cutting and Engraving Process


Safety first! Remember, our machines are class 1 lasers, so no personal protective equipment is needed for most users. However, if you’re working with an open bed laser, make sure to wear appropriate eyewear to avoid any stray beams.


When working with your base material, in this case, Baltic birch, it’s important to engrave before you cut. This ensures the surface remains level throughout the engraving process. Cutting the material first can cause the pieces to drop slightly, creating an uneven surface that may affect the quality of the engraving.


Every material is unique, and so are the settings required for optimal cutting and engraving. That's why conducting a materials settings test is crucial. This test helps you determine the perfect power, speed, and focus settings for your specific materials, ensuring precise and clean cuts. Always test these settings on a sample piece of your material before proceeding with the final project.


Assembling the Inlay


Now it's time to piece everything together. Apply a thin layer of wood glue to the cherry wood pieces and fit them snugly into the Baltic birch base. For a perfect fit, gently tap the cherry pieces into place using a rubber mallet. This ensures that each piece seats well without damaging the wood.


To ensure even pressure and a solid bond while the glue dries, place some weights on top of the inlay pieces, or use hand clamps to keep everything tightly secured.

Once the glue has fully dried, begin leveling the surface. Sand down any protruding cherry wood until it's flush with the Baltic birch plywood. Start with 80-grit sandpaper, but be cautious—80-grit can remove material quickly. Check your progress frequently to avoid over-sanding.


Progress to 120-grit sandpaper to refine the surface, smoothing out any roughness left by the 80-grit and preparing the wood for the final finish. Complete the sanding process with 150-grit sandpaper to ensure a professional, silky finish.


Next, apply a liberal amount of Golden Pecan stain to the wood. Let the stain soak in for 5 to 10 minutes to achieve deep, rich coloration, then wipe away any excess. This step enhances the natural beauty of the cherry and Baltic birch woods.


Finally, seal your masterpiece with clear spray polyurethane. Apply the polyurethane in light, even coats to prevent excessive buildup or dripping. Follow the directions specific to your brand of polyurethane for drying times and additional coats, ensuring a smooth and durable finish.

Conclusion


You’ve just created a piece that’s bound to turn heads. Don’t hesitate to share your masterpiece with us and the community. And remember, this is just the beginning. What will you create next? 🐰


Got a question? Contact us! Ready for more? Share this post with friends or check out our laser machines that make all this possible.

Three red and white Rabbit Laser USA CO₂ laser machines (SD-90-1390, SD-60-9060, SD-40-6040) on a bl
By Rod Boehm May 29, 2025
Compare CO₂ laser prices by wattage, learn what’s included on install day, and explore payment options—all with Rabbit Laser USA’s lifetime support.
blueprint style design of an exhaust blower with blog title overlaid
By Rod Boehm May 22, 2025
Discover Rabbit Laser USA's range of laser exhaust systems, including 600, 440, 300, and 100 CFM blowers. Find the perfect exhaust solution for your laser machine.
By Rod Boehm May 14, 2025
Discover why Rabbit Laser USA exclusively uses LightBurn software for its laser machines. Learn how its intuitive interface, seamless integration, and powerful design tools enhance engraving and cutting precision.
image of honeycomb work bed with sizes of 1300x900, 900x600, 600x400
By Rod Boehm May 5, 2025
Compare Rabbit Laser USA’s 600×400, 900×600, and 1300×900 mm CO₂ laser workbed sizes. Learn which fits your materials, workspace, and production goals.
By Rod Boehm April 28, 2025
Use our cost ranges, power math, and depreciation guide to price laser-engraved tumblers for healthy profit. Includes free worksheet download.
3D printed attachments and laser-cut components developed by Rabbit Laser USA
By Rod Boehm April 14, 2025
Learn how Rabbit Laser USA combines 3D printing and laser cutting to improve precision, boost efficiency, and innovate custom fabrication solutions.
By Rod Boehm March 21, 2025
Learn how to master job origins in LightBurn with this essential guide. Discover when to use Absolute Coordinates, User Origin, and Current Position to improve precision, efficiency, and material usage in your laser cutting and engraving projects. Plus, get quick tips to streamline your workflow and avoid common mistakes.
photo of RuiDa control pad and controller
By Rod Boehm March 5, 2025
Discover why RuiDa controllers are the industry standard for laser engraving and laser cutting machines. Learn how they outperform proprietary controllers, offer seamless LightBurn compatibility, and provide unmatched precision. At Rabbit Laser USA, we’ve been upgrading customers' machines with RuiDa to give them full control over their laser cutter and engraver. Upgrade your laser machine today!
laser cut cardinal with blog text
By Rod Boehm February 28, 2025
Create a vibrant, layered cardinal with this beginner-friendly laser cutting guide. Learn color separation, painting tips, and assembly tricks for eye-catching décor.
Rabbit Laser USA's DL-90-1390 co2 laser machine in a classroom setting
By Rod Boehm February 14, 2025
Empower your classroom with Rabbit Laser USA’s reliable laser systems—minimize downtime, save with educator discounts, and spark student creativity!
Blog thumbnail choosing the right lens
By Rod Boehm February 5, 2025
Discover the importance of selecting the right focal length for your CO2 laser machine with Rabbit Laser USA. Learn about different lenses, their optimal uses, and maintenance tips to enhance your laser engraving and cutting projects. Ensure precision and safety with our guide to lens choices and care.
By Rod Boehm January 29, 2025
Learn why maintaining your laser’s exhaust system is crucial for safety, health, and top performance. Get monthly maintenance tips, discover which materials are toxic, and see how Rabbit Laser USA’s 550W Vacuum Blower Fan can keep your workspace safe and efficient.
More Posts